You want to know how to transfer letters onto a wood sign? The easiest way uses just a pencil, a printed design, and a piece of wood. You print your letters, shade the back of the paper, and trace. This diy wood sign tutorial makes it simple. Anyone can create a custom wooden sign with these diy instructions. You don’t need fancy tools—just follow this diy wood sign tutorial and try different ways to make diy wood signs. With a few supplies, you can create a custom wooden sign that looks professional. This diy wood sign tutorial gives you the confidence to start your next wood project.
Key Takeaways
- Use a pencil to shade the back of your printed design, then trace it onto wood to transfer letters easily and create a neat outline.
- Secure your paper with tape to keep letters straight while tracing, and choose paints like acrylic or paint markers for bright, lasting results.
- Try different transfer methods like chalk, transfer paper, or stencils to find the best style for your custom wood sign and enjoy the creative process.
How to Transfer Letters onto a Wood Sign

Step 1: Print Your Design On Paper and Shade the design from the Back of Paper with a Pencil
Start by choosing your favorite font and typing your message in a word processor or design program. Print your design on a regular sheet of paper. Make sure the letters are the right size for your diy wood sign. If you want bold, block letters, pick a thick font. For a hand painted look, try a script font.
Flip the paper over. Use a pencil to shade the entire back of the paper where the letters are. Cover every part of the design with pencil. This step makes it much easier to transfer the printed text onto your piece of wood.
Tip: If you want a cleaner transfer, use transfer paper or chalk transfer paper instead of a pencil. Colored chalk also works if you want to see the outline better.
Step 2: Put the Paper on the Wood and Trace the Design
Place the paper on top of your wood sign, with the printed side facing up and the shaded side touching the wood. Tape the corners of the paper to keep it from moving. This helps you get a neat transfer and keeps your letters straight.
Use a pen or pencil to trace the outline of each letter. Press down firmly as you trace. The pressure will transfer the graphite from the back of the paper onto the wood. Go over every part of the design, including any small details or flourishes. If you want to transfer a pattern from paper to wood, use the same method for shapes or images.
Note: If you want to transfer words to wood with a different method, try using wax paper or freezer paper. Print your design in reverse, place the wax paper on the wood, and rub with a card to transfer the ink.
Step 3: Remove the Paper and Show the Letters Transfered
Carefully remove the tape and lift the paper off the wood. You should see a light outline of your letters on the wood sign. If some parts look faint, you can go over them with a pencil to make them easier to see. Now you have a guide to help you paint or decorate your diy sign.
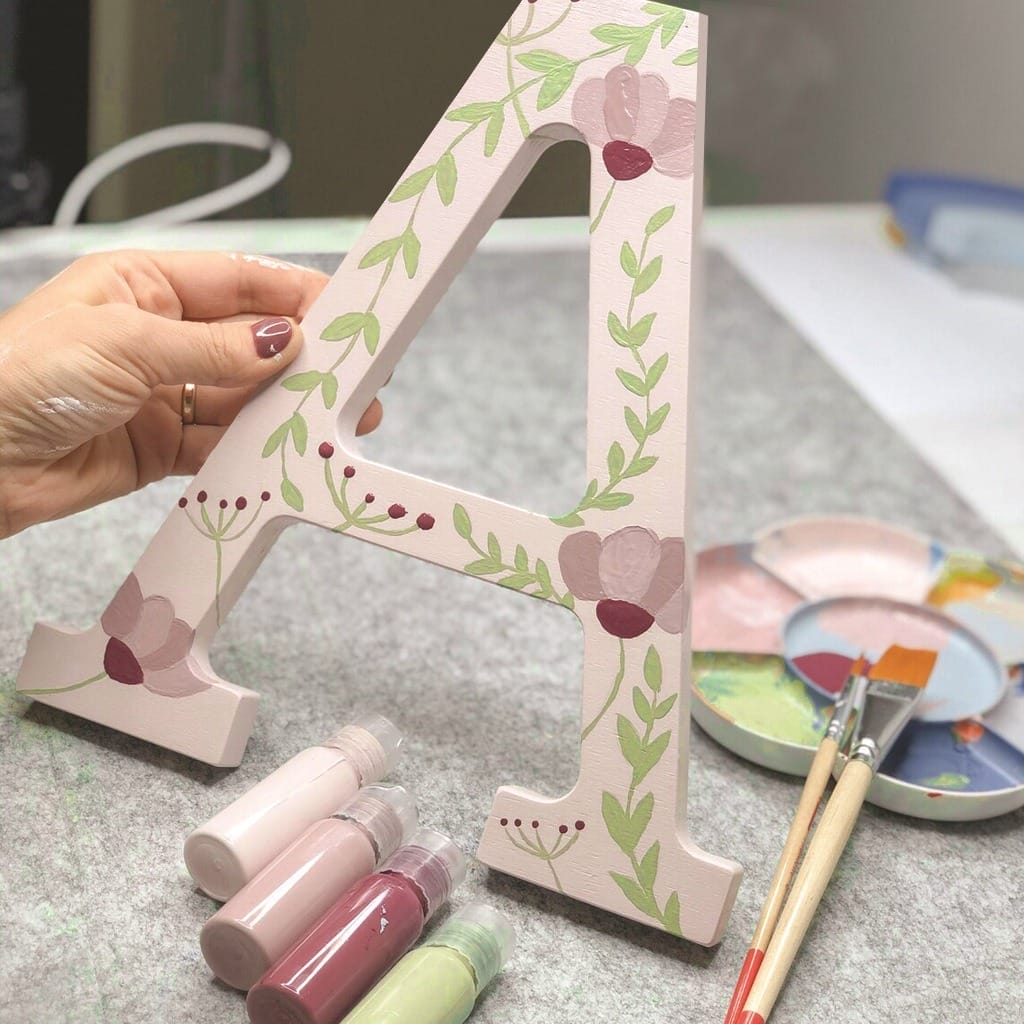
Step 4: Mark your Letters with a Paint Marker
Take a paint marker, acrylic paint, or craft paint and fill in the outline. Paint pens work great for crisp lines. If you want a hand painted look, use a small brush and go slow. For a vibrant finish, use white paint or a color that pops against your wood. Make sure to let the paint dry before you touch or move your sign. Additionally, consider the surface texture of your wood, as this can affect the final appearance of the paint. When learning how to choose paint for letters, opt for a finish that suits your style, whether it’s matte for a subtle look or glossy for a more modern finish. Remember to test your chosen paint on a small area first to ensure you achieve the desired effect before committing to the entire outline.
If you make a mistake, wipe it off with a damp towel before the paint dries. You can also sand off any excess paint once it’s dry. It is easy to create text on wood and decorate your living room or any space.
Pro Tip: For a glossy finish, seal your sign with a clear coat after the paint dries. This keeps your letters looking fresh and protects your diy wood sign.
Creative Tips for Your DIY Wood Sign
- Always trim off the excess paper before you start tracing.
- Use a towel to wipe dust off your work surface.
- Try different fonts and colors to match your interior design.
- If you want to transfer a pattern from paper to wood, use the same steps as for letters.
- For a neat look, use paint pens or a fine brush.
- If you want to decorate with a rustic style, leave some pencil marks showing for a hand painted effect.
- Use leftover scrap wood to practice before you make a custom sign.
Remember: It’s much easier to transfer printed letters to wood when you use the right supplies and follow the instructions step by step. With this tutorial, you can transfer letters onto wood and make a diy wood sign that looks amazing. Once you’ve mastered the technique, consider exploring wholesale wooden letter options to expand your DIY projects. These letters can add a unique touch to your signage, whether you’re creating personalized gifts or decorative pieces for your home. With a variety of styles and sizes available, the possibilities are endless! You can also use the same technique to create custom wood name signs, catering to specific themes or aesthetics. These signs can serve as perfect centerpieces for various occasions, including weddings and birthday parties. By adding personal touches, you can elevate the DIY projects to a whole new level of creativity and uniqueness.
Alternative Methods to Transfer Letters Onto Wood
You have many ways to transfer letters onto wood. Here are some popular options:
- Chalk Transfer: Rub colored chalk on the back of your paper, then trace the design. This method to transfer works well on dark wood.
- Transfer Paper: Place transfer paper between your design and the wood. Trace the letters, and the transfer paper leaves a neat outline.
- Stencil: Use a pre-made stencil or make your own. Tape it to the wood and fill in the letters with paint.
- Vinyl Letters: Cut out letters with a craft cutter or buy pre-made vinyl. Stick them onto the wood sign for a crisp look.
Choosing a Method: If you want a quick, inexpensive diy project, use the pencil or chalk transfer. For a more professional finish, try transfer paper or vinyl. If you want to create a custom sign with a unique font, print your own design and use the pencil method.
Tips for a Custom Wooden Sign

Preparing the Wood
You want your custom wooden sign to look great and last a long time. Start by sanding your piece of wood. This step makes the surface smooth and helps paint stick better. Wipe away dust with a towel. If you see any rough spots, sand them again. For a rustic look, leave some texture. Always make sure your work surface is clean before you begin your wood project. Once your wood is properly prepared, you can move on to planning your design and selecting your colors. Researching online can provide helpful tips on how to create wooden signs that truly stand out. Remember, a well-thought-out design is key to enhancing the overall look of your custom piece.
Tip: Trim off the excess wood if you want a neat edge. Use leftover scrap wood to practice your technique before you start your main diy wood sign.
Choosing Paints and Markers
Pick paints and markers that work well on wood. Acrylic paint and paint pens are easy to use and dry fast. If you want bold letters, use paint markers or craft paint. For a hand painted style, try a small brush. Test your colors on a scrap piece first. This helps you see how the paint looks on your custom wooden sign. Use white paint for a vibrant look, or match your interior design with different shades. When creating outdoor signs, it’s also essential to consider the best woods for outdoor signs, such as cedar, redwood, or marine-grade plywood, which can withstand various weather conditions. Sealing your finished design with a waterproof sealant can further enhance its durability and longevity. This will ensure that your custom creation remains vibrant and intact for years to come.
Sealing and Finishing
Seal your custom wooden sign to protect it from dust and scratches. Use a clear acrylic sealer or spray for a glossy finish. Let the paint dry before sealing. If you make a mistake, sand off the excess paint and try again. Sealing your wood project keeps your letters looking fresh and bright for years.
Remember: It’s much easier to fix small errors right away. Take your time and enjoy the process of making a custom wooden sign.
You learned easy ways to transfer letters onto wood using a pencil, chalk, transfer paper, or stencil. Try your favorite method to transfer and make a custom diy wood sign. Once your sign is complete, consider adding wooden letters for a personalized touch. If you’re unsure how to hang wooden letters, you can use adhesive strips or small nails for a seamless look. Experiment with different placements to achieve the perfect display that complements your home decor.
FAQ
How do you keep your letters straight when you transfer them onto wood?
Tip: Use tape to hold your sheet of paper in place. This keeps your outline neat and helps you trace each letter without shifting.
Can you use any kind of paint for a diy wood sign?
You get the best results with acrylic paint or paint pens. These stick well to your piece of wood and make your diy sign look vibrant.
What if you make a mistake while painting your letters onto the wood sign?
- Wipe off excess paint with a towel before it dries.
- For dry mistakes, lightly sand the area and paint again.
- It’s much easier to fix right away!