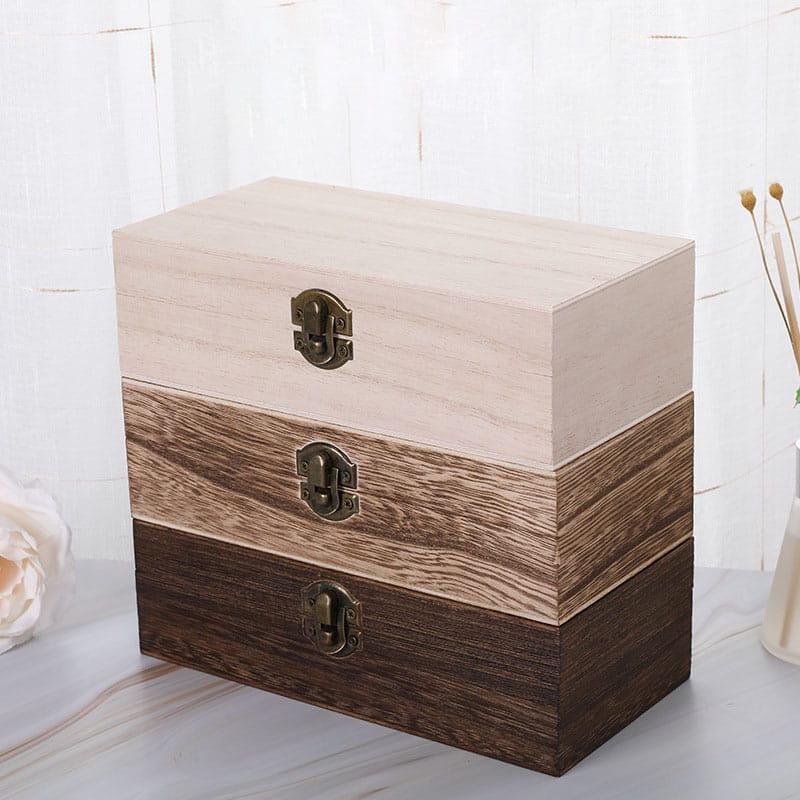
Have you ever wondered why some wooden jewelry boxes feel like heirlooms the moment you open them, while others loosen, twist, or chip after only a few months? Is the secret some hidden master skill, or does it come down to a few early decisions that many makers skip? When you look up how to make wooden jewelry boxes, it is easy to assume that fancy tools matter more than planning, but the opposite is usually true.
Demand keeps growing for handmade wooden jewelry boxes as gifts, branded packaging, and long-term storage. Retail stores, e-commerce brands, and corporate gift buyers all see how a small wooden box can raise the perceived value of what sits inside it. For you, that means learning how to make a small jewelry box out of wood is not just a fun shop project; it can become a repeatable product in your business.
This guide walks through the full process of how to make wooden jewelry boxes from scratch. You will see how to:
- choose the best wood and joinery
- cut accurate miters and dados
- assemble the box and slice a perfectly matched lid
- sand, finish, and line the interior
Along the way, you also see where it makes sense to handcraft boxes yourself and where a partner such as Qlychee Crafts can supply factory-direct wooden jewelry boxes, already made from certified sustainable timber and ready for branding or resale.
Key Takeaways
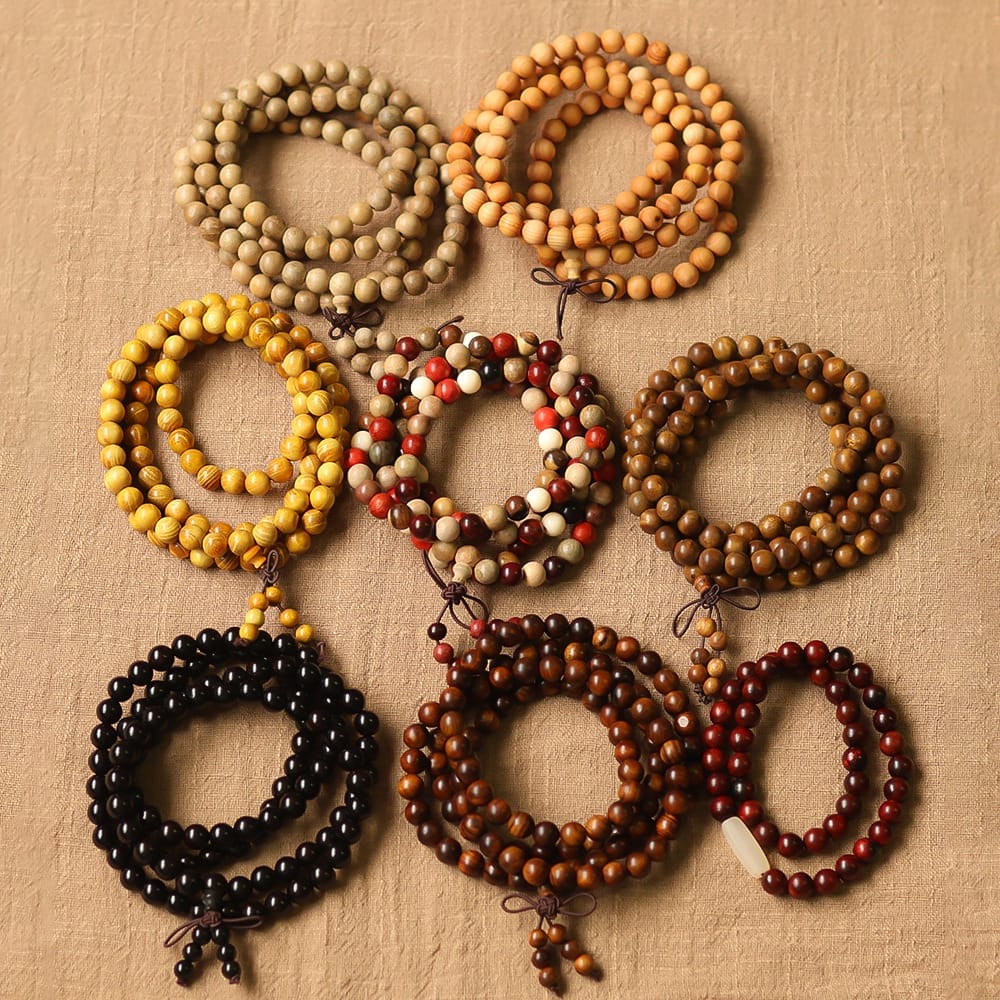
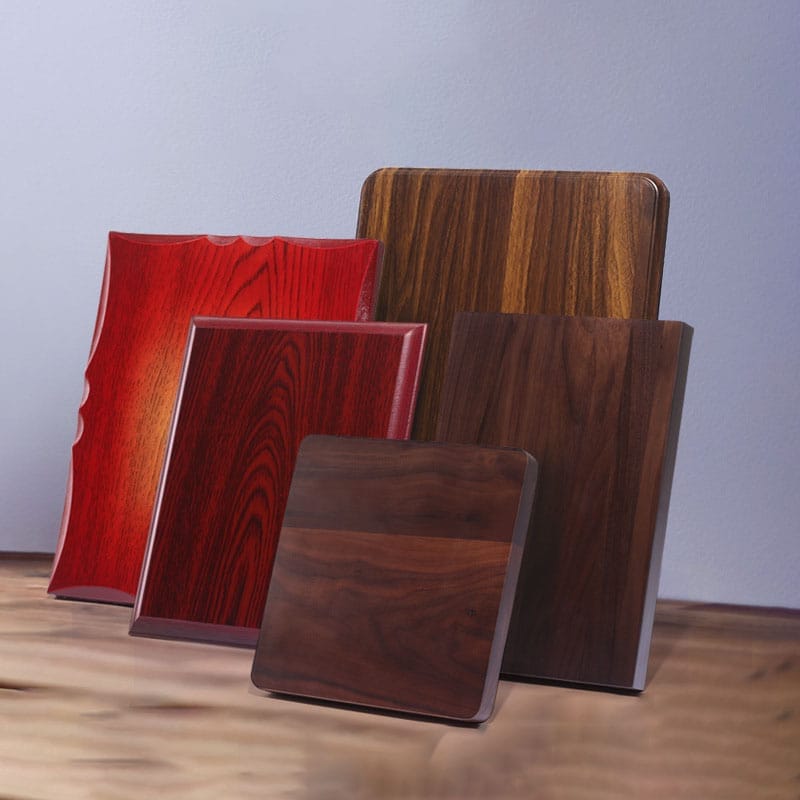
- Good planning makes the biggest difference to quality. Choose hardwoods such as walnut, cherry, or maple and match them with a joinery style that fits your brand. Simple miter joints work well for clean, modern boxes, while dovetail or box joints highlight visible craftsmanship for higher-ticket lines.
- Hinge choice comes first because it sets your wall thickness, and accurate cutting comes next because even a tiny error in a miter can leave a gap. When you dry fit every box before you reach for wood glue, you catch mistakes while they are still cheap to fix.
- Interior layout, tray height, and lining material should be part of your first sketch, not a last-second fix. Once you understand how to make a jewelry (or jewellery) box out of wood at single-piece scale, you can turn to Qlychee Crafts for wholesale runs with custom inserts, finishes, and branding so you grow without adding factory overhead.
How to Choose the Best Wood and Design for Your Jewelry Box

The first step in how to make wooden jewelry boxes that feel solid in the hand is smart material and design choice. Before you turn on a saw, decide the size, style, and price point you want, then match wood species, joinery, and hardware to that plan. This step keeps your DIY wooden jewelry box from drifting into something that costs more to make than it will ever sell for.
For most brands, the best wood for a jewelry box is a hardwood with a fine grain. Species such as:
- Walnut – dark, rich color and smooth texture
- Cherry – warm tone that deepens with age
- Maple – light, clean look that suits modern designs
all machine cleanly, resist dents better than softwoods, and take clear coats very well. If you plan to paint the outside or you sell into a cost-sensitive segment, you can use plywood or MDF for the body and still offer a premium feel by adding real wood veneer on the lid and a clean velvet lining inside.
Whenever you can, cut all four sides from one long board. Mark your board, then make sequential cuts so the grain flows around the corners in order. When a customer turns a handmade wooden jewelry box and sees that continuous grain, it signals careful work and makes even a simple mitered design feel high-end.
For wood box joinery techniques, you have a few main choices. This table gives a fast overview that fits most wooden jewelry box plans.
| Joinery Type | Skill Level | Visual Style | Best For |
|---|---|---|---|
| Miter Joint | Beginner to Intermediate | Seamless grain wrap | Clean modern boxes, gift items |
| Dovetail | Advanced | Exposed classic joinery | Heirloom pieces, showcase products |
| Box Joints | Intermediate | Bold square pattern | Rustic or industrial style boxes |
Hinges should come next in your design, not last. A typical stop hinge needs side walls around 7/16 inch thick to hold screws well. Quadrant and side-rail hinges need at least 3/8 to 1/2 inch so you can drill the curved cavity without breaking through the side. When you decide this early, you can mill the box parts to just over 1/2 inch and know your hardware will sit snug and safe.
If you plan to sell at volume, your design choices also affect cost and lead time. At Qlychee Crafts, for example, many buyers choose standard sizes in walnut, cherry, or maple with repeatable hardware layouts. That approach lets you test one or two core designs of a DIY wooden jewelry box in your own shop, then hand off to Qlychee Crafts for scalable production in FSC or PEFC certified timber once demand is clear.
How to Cut Mitered Sides and Groove the Bottom Panel Accurately
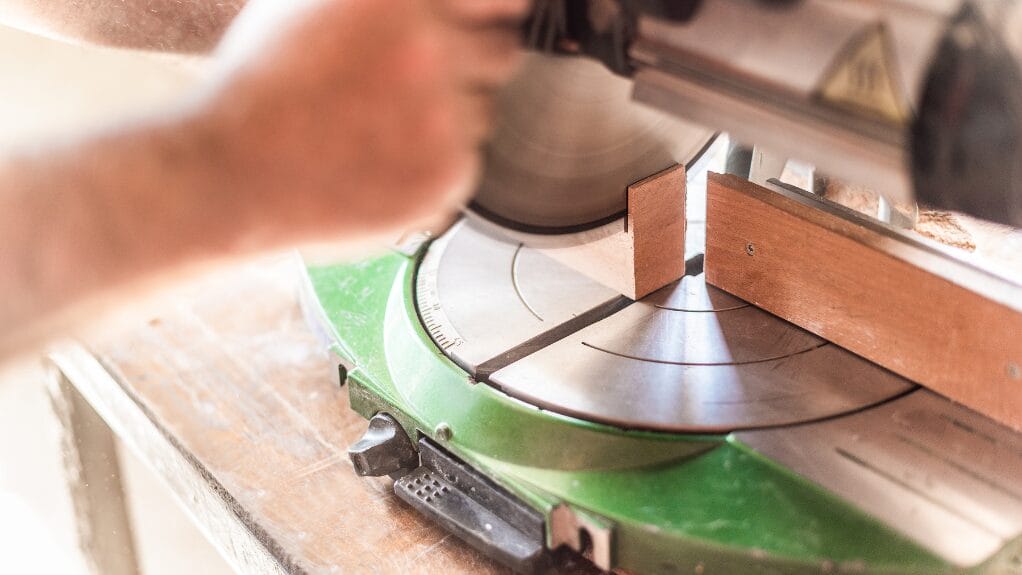
Once your design is set, you are ready to turn that plan into wood parts. Accurate cutting is the heart of any small wooden box making tutorial, especially when you rely on mitered corners. A clean 45-degree cut and a straight dado groove do more for quality than any fancy handle or clasp.
Mill your lumber first so every side has the same thickness, usually a touch over 1/2 inch to match most wooden jewelry box hinges. Lightly joint and plane, or have your supplier do this step, until faces are flat and edges square. Mark your board with corner numbers from one to four so you can keep your grain order when you cut the sides apart.
Tip: Mill extra stock at the same time so you have matching material on hand if a part chips or splinters.
To cut mitered sides, you can use a miter saw, a table saw with a miter sled, or a bandsaw — for small parts like drawer fronts and internal dividers, a bandsaw can be especially handy:
- Place a sacrificial backer board behind the workpiece so the blade does not tear fibers as it exits the cut.
- Set the blade to a precise 45 degrees and trim one end.
- Measure from the inside point of that miter to lay out your first length.
Opposite sides must match perfectly if you want tight mitered corners. After you cut the first long side, lay it on top of the next blank and mark the second piece directly from it instead of relying only on a tape. When both are cut, stand them on a flat surface side by side and check that the top edges meet in a straight line with no step. Repeat this step for the two shorter sides so your simple wooden box remains square.
For the bottom panel, how to build a jewelry box out of wood usually calls for a groove, also called a dado, near the base of each wall. Set your table saw fence so the blade cuts about 1/4 inch up from the bottom edge, then raise the blade so it cuts roughly 1/4 inch deep. Test this setting on scrap from the same board before you touch your real parts.
Because a standard blade is thinner than a 1/4 inch panel, you run each side through twice and move the fence a tiny amount between passes. Test the fit with your bottom material, whether that is MDF that will sit under velvet lining or a matching wood panel for a natural interior. The panel should slide into the groove without force, and it should not push the corners open when you dry fit the box, since even a 1/32 inch error can show as a bright-line gap at a joint.
How to Assemble Your Wooden Jewelry Box and Cut the Lid
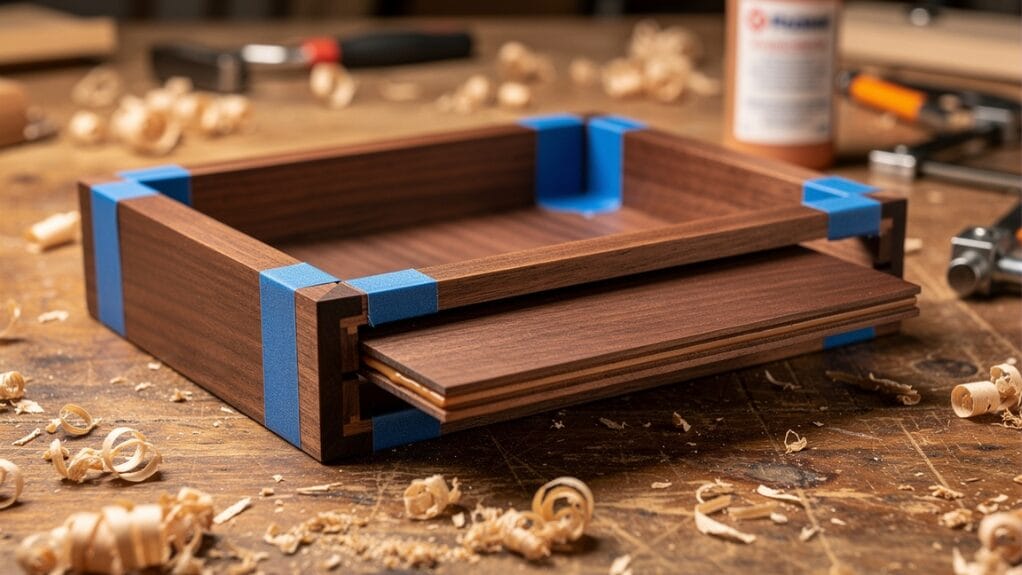
With all four sides and the bottom panel ready, you can bring the box together. This is the point where careful dry fitting pays off, because glue and clamps lock both problems and strengths into place. When you want a wooden jewelry box with lid that opens smoothly and lines up clean along the cut, patience here matters.
Start with a full dry fit using painter’s tape:
- Place the sides in order and tape the outside corners so they fold into a rectangle.
- Slide the bottom panel into its dados.
- Stand the box up, close all mitered corners, and check every joint for gaps.
- Measure the diagonals from corner to corner inside the box and adjust until both measurements match, which means your simple DIY jewelry box is square.
If the box is large or you want extra strength, you can add biscuits or splines across the miter joints. Cut shallow slots with a biscuit joiner or a spline jig, but keep them low near the bottom so the later lid cut does not reveal them. Dry fit with these parts in place as well, since they change how the corners close.
For glue-up, brush an even layer of wood glue on each mitered face and a light bead in the dado, then assemble in the same order you practiced. Use tape and light clamp pressure across the corners, checking again that diagonals match. Wipe away squeeze-out with a damp cloth so you do not fight hard glue ridges during sanding.
Tip: Use just enough clamp pressure to close the joints; too much can bow the sides and twist the box out of square.
Many makers follow a cut-open method to make a perfectly matched lid. You first glue a top panel across the box body so the box is fully closed. After the glue cures:
- Set your table saw fence for the lid height (for example, 5/8 inch).
- Raise the blade so it cuts just shy of the inside bottom edge of the lid.
- Run the box through the saw on all four sides, letting the kerf separate the lid from the base.
This method protects the continuous grain and locks in a good fit, as long as you remember that the blade removes about 1/8 inch from the total height.
While you are at this stage, think through your interior features. If you plan a sliding tray, mark where support rails will sit so tray and lid do not collide. Decide where ring slots, necklace hooks, or small compartments will go, and match those ideas with your brand’s jewelry mix so every slot earns its space.
How to Sand, Finish, and Line Your Wooden Jewelry Box Like a Pro

Now your box looks real, but it does not yet feel ready for a customer’s nightstand or a retail shelf. The last steps, which include sanding, finishing, and lining, turn a raw box into a finished jewelry box that invites touch. Good jewelry box finishing techniques also protect the wood from moisture and daily wear.
Start with a full inspection and a pencil — as shown in this Jewelry Box Progress Report, careful checking between stages is what separates polished final pieces from rushed ones. Lightly circle any glue spots, dents, or saw marks. Begin sanding with 120-grit sandpaper along the grain to remove those marks, then move to 150-grit and finish with 220-grit for a smooth surface that feels ready for a clear coat. Wear a dust mask or respirator whenever you sand fine hardwoods.
For the outer finish, pick a product that matches both your style and your customer’s expectations. Common choices include:
- Danish oil or other oil blends – bring out the natural grain with a soft sheen, great for warm, organic styles
- Varnish or polyurethane – add a tougher shell and more shine, which helps boxes survive travel or retail display
- Low-VOC finishes – keep fumes low, which matters when the box will hold jewelry near skin and when your brand values clean material choices
Always install hardware after the finish cures. Mark and drill pilot holes for the wooden jewelry box hinges so screws do not split the side walls. If you use quadrant or side-rail hinges, cut shallow mortises so the leaves sit flush, then add any clasps or magnetic catches that match your brand line.
For the interior, many makers choose velvet or felt for the lining. Cut the fabric a little larger than the base and compartment floors, spread a thin, even coat of contact adhesive, then press the fabric firmly from one edge across to the other to avoid trapping air. Tuck or trim excess neatly along the sides so the final result looks clean, not homemade in the wrong sense. If you sell at volume, Qlychee Crafts can deliver pre-finished and pre-lined wooden jewelry boxes with velvet, felt, or PU interiors, all using eco-friendly finishes so you skip the mess and move straight to branding and shipping.
Conclusion
Learning how to make a simple DIY jewelry box from scratch comes down to four stages: you plan and select materials, you cut miters and dados with care; you assemble and cut the lid as one sealed box, and then you sand, finish, and line the interior. At each step, choices such as hardwood selection, hinge type, and miter accuracy decide whether the final box feels like a keepsake or just another container.
If you enjoy shop work, this guide gives you a clear path to build a simple wooden box, a wood ring box, or a keepsake box line that fits your brand. When you are ready to scale beyond what your own tools can handle, Qlychee Crafts can supply customizable wooden jewelry boxes made from certified sustainable timber, finished to your needs, and shipped worldwide.
If you are ready to skip trial and error and source professional-level wooden jewelry boxes directly, explore the Qlychee Crafts wholesale range and see how a better box can lift your entire product line.
FAQs
Q1: What Is the Best Wood for Making a Jewelry Box?
Hardwoods such as walnut, cherry, and maple are top choices because they resist dents and show grain clearly under a clear coat. Cedar often works well for the interior or as a lining panel, since its scent can help keep pests away. For painted boxes or low-cost gift lines, MDF or plywood can work fine because the fabric or paint hides the core material.
Q2: Do You Need a Table Saw to Make a Wooden Jewelry Box?
A table saw helps with accurate dados and the lid separation cut, but you can still make a DIY jewelry box without one. Many makers use a miter saw for the 45-degree corners and a router or handheld circular saw with a guide for grooves. The key is careful setup and slow, steady passes so cuts stay straight.
Q3: How Do You Keep Miter Joints Gap Free?
Use the first finished side as a physical template for its opposite so both pieces match exactly in length. Always cut slightly long, then sneak up on the final size with light trims instead of trying to nail it in one cut. Dry fit the box with tape and check diagonals so you can adjust before you add glue.
Q4: Can You Order Custom Wooden Jewelry Boxes Wholesale from Qlychee Crafts?
Yes, Qlychee Crafts offers factory-direct wooden jewelry box manufacturing for brands that want custom shapes, inserts, and finishes. You can choose FSC-certified woods, hinge and clasp styles, lining materials, and laser-engraved or printed logos. Flexible minimum order quantities and pre-production samples make it easier to test new designs before you commit to a full run.