In the world of handmade crafts, the beauty of repurposing old materials cannot be overstated. Crafting items from barnwood not only preserves the history of the wood but also adds a rustic charm to any space. In this blog post, we explore a recent project that involved transforming a piece of barnwood into elegant candle holders, highlighting the process, tools, and tips that can inspire others to undertake similar projects.
Key Takeaways
- Embrace Imperfections: The character of reclaimed wood often lies in its imperfections. These may include nail holes, cracks, weathered textures, and color variations. Embracing these features instead of trying to conceal them entirely adds authenticity and enriches the final product’s story.
- Plan Before You Cut: Taking the time to measure and plan your project carefully can save you from costly mistakes. Proper planning ensures that every piece fits perfectly and the final outcome looks polished and intentional.
- Quality Finishing Matters: The finishing touches such as sanding, staining, or applying protective coatings can make a significant difference in both the appearance and durability of your project. Don’t rush this step; it enhances the tactile feel and visual appeal.
- Cost-Effective Crafting: Handmade items can be marketed effectively with the right pricing strategy. Using reclaimed materials like barnwood helps reduce costs, making it possible to create a profitable venture from your crafting hobby.
- Create Ambiance: Items like candle holders do more than just hold candles—they enhance the atmosphere of a space. The warm glow combined with natural materials creates a cozy environment, making these products desirable in the home décor market.
The Allure of Barnwood

Barnwood, often sourced from old barns and outbuildings, carries a rich history. Each piece tells a story, showcasing unique characteristics such as saw cuts, weathered textures, tight grain patterns, and sometimes even remnants of paint or old nails. The barnwood used in this project was retrieved from Duran, Michigan, adding a geographical and historical layer to the material’s identity.
Why Barnwood?
- Sustainability: By reusing barnwood, you reduce demand for new lumber and prevent old wood from being discarded in landfills.
- Unique Aesthetics: No two pieces of barnwood are the same; this uniqueness is a selling point for handmade products.
- Sturdiness: Barnwood is often dense and aged, making it durable for crafting lasting pieces.
The aged appearance and sturdy nature provide an excellent foundation for creating decorative items like candle holders that combine functionality with beauty.
How to Find and Identify Barnwood
Finding quality barnwood is essential for a successful project. Here are some tips to help you locate and select the best pieces:
- Search Local Sources: Check old barns, farmhouses, salvage yards, or demolition sites in your area that specialize in reclaimed wood.
- Look for Weathered Appearance: Choose wood with visible grain patterns, nail holes, and natural imperfections that add rustic character.
- Check Wood Condition: Avoid pieces that are excessively rotten, brittle, or infested with insects.
- Test Hardness: Press your fingernail into the wood surface; good barnwood will resist indentation.
- Identify Wood Type: Knowing if the wood is oak, pine, chestnut, or another type helps predict durability and finishing options.
- Verify Legality and Safety: Ensure you have permission to remove the wood and that it is safe to handle.
Following these guidelines will help you select authentic, high-quality barnwood for your candle holder project.
Choosing the Right Materials
For this project, the creator selected three simple candle holders from a local craft store to integrate with the barnwood base. When working with reclaimed materials, it’s essential to choose items that complement the rustic aesthetic rather than overpower it. The simplicity of these candle holders allowed the wood’s natural beauty to shine through.
Additional Materials Used:
| Material | Purpose | Notes |
|---|---|---|
| Dremel Tool | Grinding down embedded nails | Preserves rustic look |
| Radial Arm Saw | Cutting barnwood to length | Ensures clean, straight cuts |
| Sandpapers (80 & 120 grit) | Smoothing surfaces and edges | Multiple grits for gradual finish |
| Shellac | Finishing coat for warmth and protection | Enhances color and durability |
Planning the Project
Measurements and Preparation
Before any cutting or assembling began, meticulous planning was essential. The creator decided on a length of approximately 14 inches for the barnwood base. This length provided ample space to place three candle holders evenly spaced while maintaining a balanced look without overwhelming the wood’s natural features.
Addressing Imperfections
One notable feature of this particular piece of barnwood was the presence of various nails and screws embedded in its surface. Instead of removing these completely—which could damage the wood or leave holes—the creator used a Dremel tool to grind them down flush with the surface. This technique preserved the rustic integrity while making the wood safe to handle.
Leaving some imperfections like nail holes or cracks intact can add character and uniqueness to each piece, making it truly one-of-a-kind.
The Process of Crafting Barnwood Candle Holders
Cutting the Barnwood

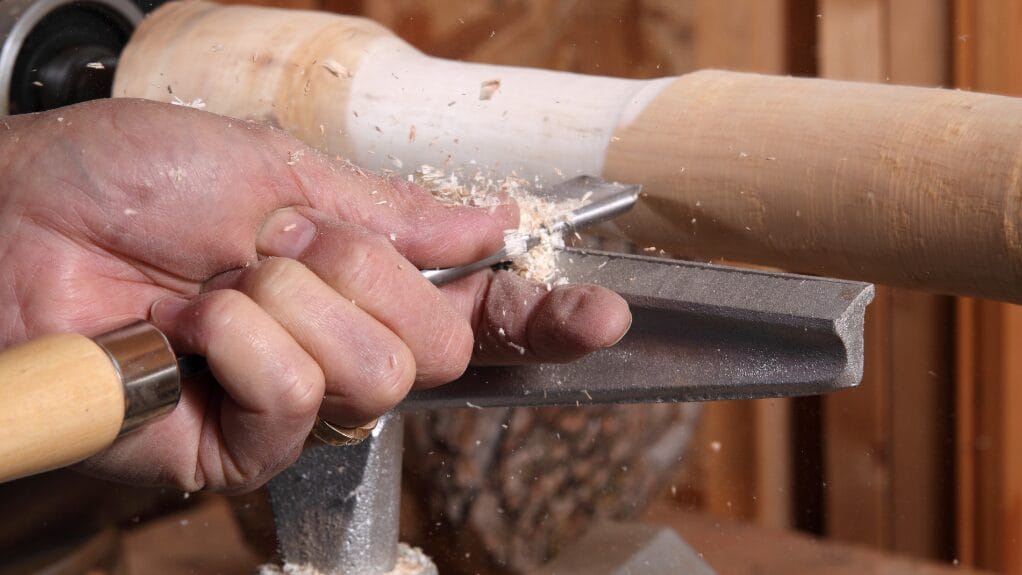
After measuring precisely, the first step involved cutting the barnwood to the desired length using a radial arm saw. This tool provided a sharp, clean cut while preserving the intricate grain patterns that contribute significantly to the candle holder’s charm.
Sanding for Smoothness

Sanding was carried out in two stages:
- Starting with 80-grit sandpaper, which was rough enough to remove accumulated dirt, splinters, and rough edges without stripping away character.
- Following up with 120-grit sandpaper for a finer finish that left the surface smooth but still retained natural textures.
This careful sanding process is crucial, especially for items intended for display or frequent handling, as it ensures both safety and aesthetic quality.
Drilling Holes for Candle Holders
The next step involved drilling holes into the wood base to fit the candle holders securely. The creator carefully measured and marked spots for even spacing. Using a drill with a depth gauge ensured that each hole was deep enough to hold the candle holders without protruding excessively or compromising stability.
Final Touches: Sanding and Finishing
After drilling, edges were rounded off using rough sandpaper to avoid any sharp corners that could cause injury or detract from the smoothness of the piece. Then, multiple coats of shellac were applied to give the wood a warm, golden hue while protecting it from moisture and wear.
Between each coat, light sanding was performed to ensure an even finish that would stand up to daily use.
Additional Tips for Working with Barnwood

Cleaning Barnwood Before Use
Barnwood can accumulate dirt, mold, or insect residue over time. Before starting your project:
- Use a stiff brush to remove loose dirt.
- Wash lightly with water mixed with mild soap.
- Allow wood to dry completely before cutting or sanding.
Handling Delicate Areas
Some parts of barnwood may be fragile due to rot or cracks. Reinforce these areas with wood glue or small wooden dowels if necessary before proceeding.
Tools Overview
| Tool | Function | Recommended Use Frequency |
|---|---|---|
| Radial Arm Saw | Precise cutting | Essential for accurate cuts |
| Dremel Rotary Tool | Grinding metal and fine detailing | Useful for embedded nails |
| Drill with Depth Gauge | Drilling precise holes | Important for uniform placement |
| Various Sandpapers | Smoothing surfaces | Multiple grits for best finish |
The Final Product
With all steps complete, the finished barnwood candle holders stood as both functional objects and artistic statements. The combination of weathered wood texture with polished candle holders creates a balance between rustic charm and refined craftsmanship.
Lighting the Candles

The final reveal involved lighting candles nestled within their holders. The soft flickering light cast warm shadows across the textured barnwood surface, creating an inviting ambiance perfect for cozy evenings or as a thoughtful gift.
This project illustrates how simple materials combined with thoughtful design can transform everyday items into memorable pieces that enhance home décor.
Expanding Your Barnwood Crafting Skills
If you enjoyed this project, here are some ideas for expanding your use of barnwood:
- Barnwood Picture Frames: Use similar techniques to craft rustic frames that showcase family photos or artwork.
- Barnwood Shelves: Create sturdy shelves with natural character, perfect for kitchens or living rooms.
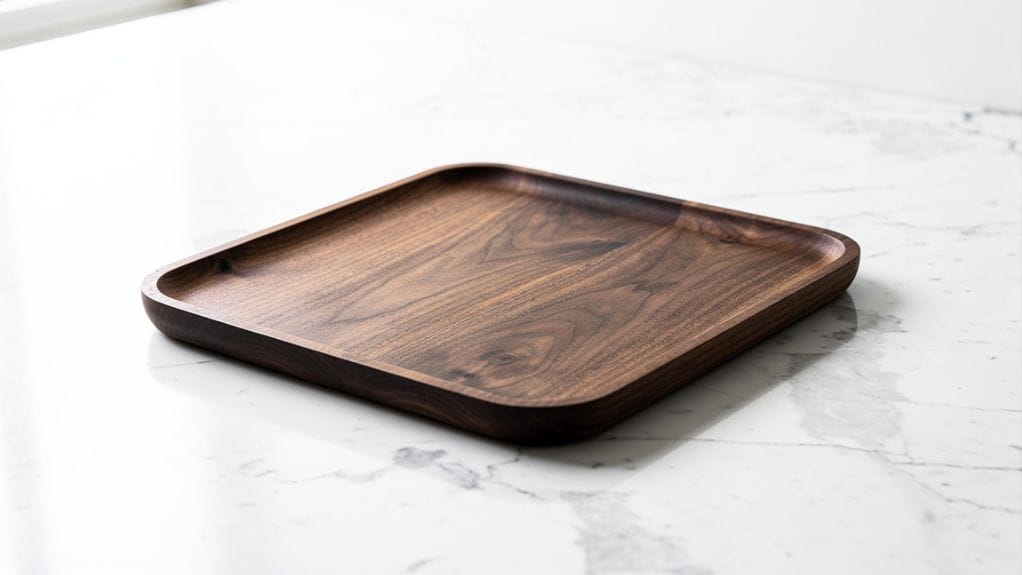
- Barnwood Coasters & Trays: Smaller projects that make great gifts or sale items at craft fairs.
Each project allows you to practice different skills such as cutting, sanding, assembly, and finishing while continuing to embrace sustainability through reclaimed materials.
Final Words
The journey of transforming barnwood into candle holders exemplifies a blend of creativity, craftsmanship, and sustainability. By repurposing materials, creators contribute not only to environmental conservation but also bring a piece of history into modern homes. Whether you are a seasoned craftsman or a beginner exploring woodworking, this project serves as an inspiring example of what can be achieved with ingenuity and care.
For those looking to start their own crafting journey, consider the charm and potential barnwood holds. Every piece has a story waiting to be told—happy crafting!
FAQ
1. What tools do I need to make barnwood candle holders?
You will need a saw (radial arm or circular), a drill with a depth gauge, sandpaper (80 and 120 grit), a Dremel tool for grinding nails, and finishing materials like shellac.
2. How do I safely remove nails from barnwood?
Instead of pulling out nails, grind them down flush with the surface using a rotary tool like a Dremel. This prevents damaging the wood and keeps its rustic look.
3. Can I use any type of barnwood for this project?
It’s best to use sturdy, dry barnwood without extensive rot. Wood with unique grain or weathering adds charm but avoid overly fragile pieces.
4. How many coats of finish should I apply?
Typically, 2-3 coats of shellac or your chosen finish, sanding lightly between coats, will provide a smooth, durable surface.
5. How do I price handmade barnwood candle holders?
Consider material costs, time spent, and market demand. Around $30 is a reasonable starting point for similar handcrafted items.