If you sell or stock wooden cutting boards, knowing how to oil wood cutting boards is one of the simplest ways to protect your inventory, keep customers happy, and reduce returns. A well-conditioned board looks richer on the shelf, performs better in a busy kitchen, and can last for years with the right care.
Whether you’re sourcing boards for resale, outfitting a restaurant, or preparing corporate gifts, consistent oiling turns a standard product into a long-term kitchen staple. Qlychee Crafts’ own oiling a wooden cutting board selection is designed to respond beautifully to this kind of care. When your staff understands the basics, they can also explain board care to shoppers or kitchen teams in just a few clear steps.
Key Takeaways
- Clean the cutting board thoroughly with warm, soapy water and let it dry completely before applying oil.
- Apply food-grade mineral oil generously in the direction of the wood grain using a lint-free cloth or a soft utensil designed for spreading.
- Let the oil soak into the wood overnight, then wipe away any excess oil with a clean cloth.
- Repeat the oiling process monthly or when the wood appears dry to maintain proper hydration.
- Store the board in a dry, well-ventilated area away from direct sunlight and check it regularly for signs of wear.
Why Oiling a Cutting Board Matters?
Wood is porous and constantly reacting to moisture and temperature. Every time a board is washed, some of its natural oils are stripped away. If you don’t replace that moisture with a food-safe oil, the board gradually:
- Dries out and becomes brittle
- Develops cracks and splits
- Warps or cups
- Traps food particles and bacteria in tiny fissures, a concern supported by research on the Hygienic Evaluation of Wooden cutting boards and their microbiological parameters.
When you understand how to oil your cutting boards correctly, you:
- Prevent cracking and warping by keeping fibers supple
- Improve hygiene by sealing pores and knife marks so they don’t trap food juices
- Improve appearance with deeper color and a more appealing grain pattern
- Extend product life, which builds trust with your buyers and reduces replacement costs
For you as a wholesale buyer, retailer, or hospitality manager, this isn’t just maintenance—it’s product stewardship. Proper care instructions add perceived value and help your boards perform well in real kitchens.
Many professional chefs treat board oiling like sharpening knives: a small habit that keeps tools working better for far longer.
Tools and Supplies You Need
Before you show a client or staff member how to oil wood cutting boards, make sure the right materials are on hand.
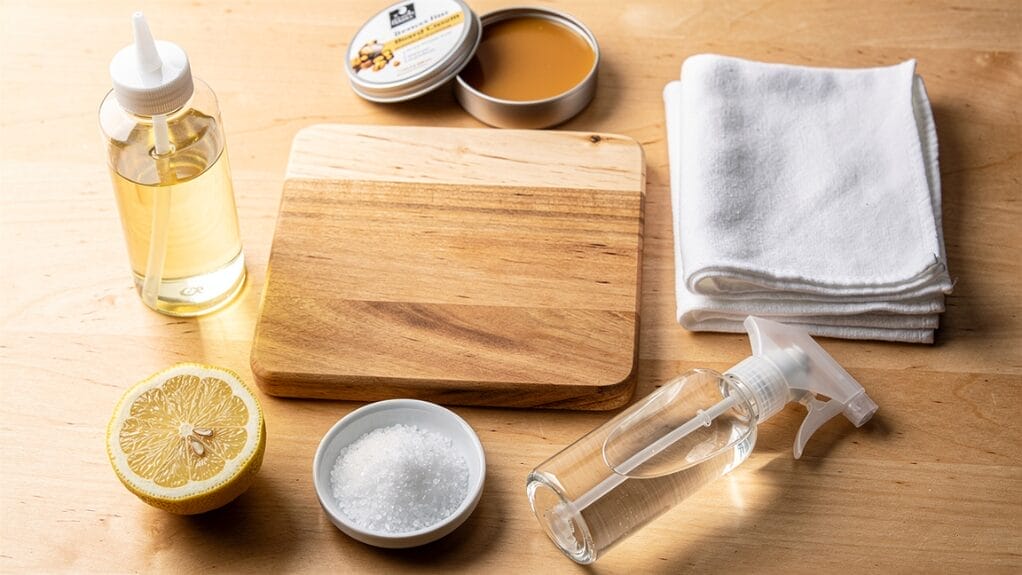
You’ll need:
- Food-grade mineral oil (or a cutting board oil based on mineral oil)
- Optional board cream: a blend of mineral oil and beeswax
- Clean, lint-free cloths or high-quality paper towels
- Mild dish soap and hot water
- Coarse salt and half a lemon for deep cleaning and deodorizing
- White vinegar or 3% hydrogen peroxide for safe disinfection when needed
Food-grade mineral oil is the workhorse here. It doesn’t go rancid, has no taste or smell, and penetrates the wood deeply. Board cream, which includes beeswax, adds an extra moisture barrier and a silky finish that customers notice immediately.
Avoid scented or flavored oils for conditioning; those are better reserved for presentation, not for long-term care. Store your oils in squeeze bottles so staff can apply a controlled amount with minimal waste.
Choosing Safe Oils for Wood Cutting Boards
Selecting the right oil is as important as the oiling technique itself. Not all kitchen oils are suitable for a cutting board.
Recommended Food-Safe Oils
1. Food-Grade Mineral Oil
This is the standard recommendation when explaining how to oil wood cutting boards:
- Food-safe, odorless, and tasteless
- Does not harden or become sticky
- Resists rancidity and has a long shelf life
- Easy to find through pharmacies or kitchen supply vendors
2. Mineral Oil + Beeswax (Board Cream / Spoon Butter)
Board creams combine penetrating mineral oil with a protective wax layer — and studies on Wood Cutting Board Finishes confirm that the choice of finish meaningfully affects bacterial growth on the surface.
- Excellent water resistance
- Smooth, low-gloss finish that looks polished in retail displays
- Ideal final coat after mineral oil has soaked in
3. Fractionated Coconut Oil (Refined, Food-Grade Only)
Unlike regular coconut oil, fractionated coconut oil remains liquid and is less likely to spoil:
- Food-safe when properly refined
- A reasonable alternative if mineral oil is not preferred
4. Pure Tung Oil (Food-Safe, 100% Pure)
Pure tung oil is a drying oil that hardens inside the wood:
- Creates a durable, moisture-resistant finish
- Highlights the grain with a natural matte look
- Must be clearly labeled as food-safe and 100% pure before use on food-contact surfaces
5. Raw Linseed Oil (Flaxseed Oil – Food Grade Only)
Linseed oil is a drying oil, meaning it hardens as it reacts with oxygen, creating a solid protective film within the wood fibers.
- Properties: 100% plant-based and more eco-friendly than mineral oil.
- Pros: Provides a more permanent finish than non-drying oils; excellent water resistance once cured.
- Note: Use only “Raw” or “Food Grade” linseed oil. Avoid “Boiled Linseed Oil” (BLO), as it contains metallic dryers that are toxic and not food-safe.
6. Walnut Oil
A favorite among high-end artisanal woodworkers, walnut oil is a natural drying oil with a pleasant aroma.
- Properties: High penetration levels with a non-greasy finish once dry.
- Pros: Gives wood a warm, satin glow and enhances the grain over time.
- Note: Must be clearly labeled for allergy awareness, as it may pose a risk to customers with nut sensitivities.
7. Carnauba Wax (Brazil Wax)
Often mixed with beeswax or mineral oil, Carnauba is known as the “Queen of Waxes.”
- Properties: Harvested from palm leaves; it has a higher melting point and is harder than beeswax.
- Pros: Provides a higher-gloss finish and superior wear resistance. It is perfect for premium gift items or display-heavy kitchenware.
- Application: Best used as a final buffing layer to create a professional, “showroom” shine.
Comprehensive Comparison of Food-Safe Wood Finishes
| Finish Type | Curing Status | Best For | Key Advantage |
|---|---|---|---|
| Mineral Oil | Non-Drying | Daily-use cutting boards | Low cost, easy to apply, odorless |
| Board Cream (Beeswax Blend) | Semi-Solid | Retail displays & gift sets | Superior water repellency and polished shine |
| Fractionated Coconut Oil | Non-Drying | Vegan-friendly kitchenware | Long shelf life, won’t go rancid like regular oil |
| Pure Tung Oil | Drying | Heavy-duty/Professional tools | Most durable, permanent waterproof seal |
| Raw Linseed Oil | Drying | Eco-conscious artisanal products | 100% plant-based, hardens for deep protection |
| Walnut Oil | Drying | Luxury/High-end wood crafts | Beautiful satin glow; non-greasy feel |
| Carnauba Wax | Hard Wax | Premium showroom finishes | Highest melting point and wear resistance |
- Drying vs. Non-Drying: *Non-Drying oils (mineral, coconut) stay liquid inside the wood. They are easy to maintain but wash away over time and require frequent re-application.
- Drying oils (Tung, Linseed, Walnut) undergo a chemical reaction with oxygen to harden. Once cured, they provide a much longer-lasting, water-resistant barrier.
- The “Cure” Time: Remind your customers that while mineral oil is ready immediately, drying oils like pure tung oil may take 7–10 days to fully cure before the product should be put into heavy service.
- Maintenance: For B2B buyers (like restaurants or retailers), it is helpful to note that Board Creams are the best “upsell” item to include with wooden products to help end-users maintain the wood’s luster.
Oils You Should Never Use
Avoid common cooking oils, even if they seem “natural”:
| Unsuitable Oil | Technical Issue | Long-Term Result | Why It Harms Your Brand |
|---|---|---|---|
| Olive Oil | High fat content; non-drying | Oxidizes and turns rancid | Creates a sour, unpleasant odor that transfers to food. |
| Canola / Vegetable Oil | Organic fats break down | Becomes sticky and tacky | The surface becomes a magnet for dust and bacteria. |
| Corn / Sunflower Oil | Rapid oxidation | Yellowing and foul smell | Makes the product look unhygienic and poorly maintained. |
| Standard Linseed Oil | Contains metallic dryers | Toxic chemical residue | Safety hazard; not certified for food-contact surfaces. |
| Mineral Oil (Non-Food Grade) | Impurities / Additives | Potential toxicity | Industrial-grade oils may contain harmful hydrocarbons. |
- The “Rancidity” Factor: Unlike food-grade mineral oil or drying oils (Tung/Walnut), common cooking oils contain organic fats that decompose. Once these fats soak deep into the wood fibers, the smell is almost impossible to remove, often requiring the board to be sanded down or discarded.
- Sticky Residue: Non-drying cooking oils never truly “cure.” Over time, they create a gummy film on the surface that makes the wood feel “dirty” to the touch, which can lead to negative customer reviews.
- Bacterial Risk: Because these oils do not harden and can spoil, they can actually encourage the growth of microbes within the wood pores if not cleaned perfectly.
How to Oil Wood Cutting Boards Step-by-Step

Once you have your supplies and oil selected, the process itself is simple and repeatable. This is the method you can confidently share with customers, kitchen teams, and sales staff.
Step 1: Clean the Board Thoroughly
Start with a spotless surface so the oil can penetrate instead of sealing in residue.
- Wash the board with hot, soapy water and a non-abrasive sponge or brush.
- Rinse well under hot running water.
- Never soak the board in a sink full of water, and never put it in a dishwasher; both will cause warping and can split the wood.
For deep cleaning or strong odors:
- Sprinkle coarse salt over the surface.
- Scrub with half a lemon, cut side down.
- Rinse and wipe dry with a clean cloth.
After cutting raw meat, poultry, or fish, you can safely disinfect by:
- Spraying the surface lightly with white vinegar or 3% hydrogen peroxide.
- Letting it sit for a few minutes.
- Rinsing and drying thoroughly.
Step 2: Allow the Wood Board to Dry Completely
Oil and water don’t mix, so applying oil to a damp board traps moisture inside.
- Stand the board upright on its edge or place it in a rack.
- Allow it to air-dry completely; this may take several hours or overnight.
- Make sure all sides feel dry to the touch before moving on.
This single step prevents many of the seasoning a wood cutting board issues that lead to returns and complaints.
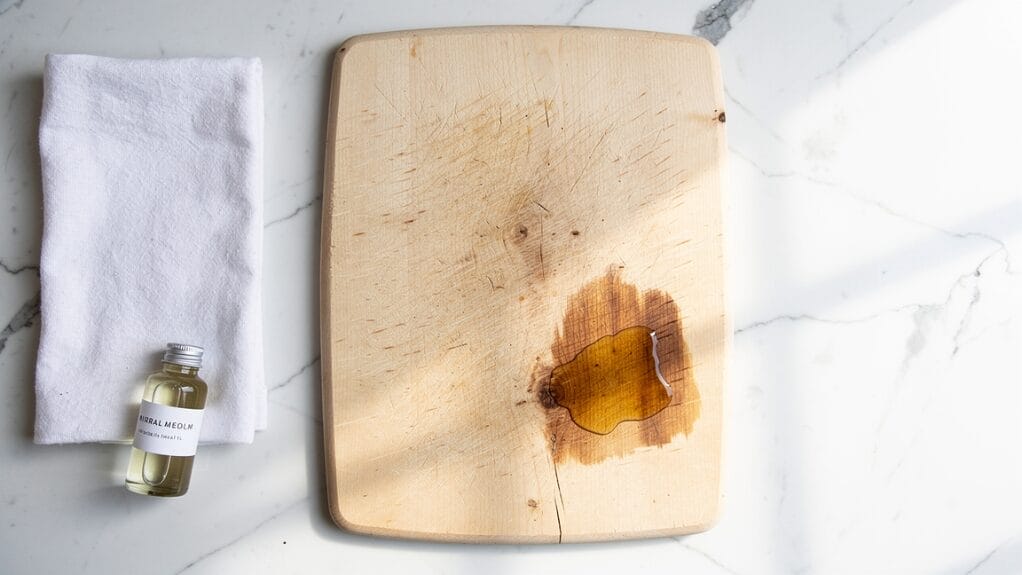
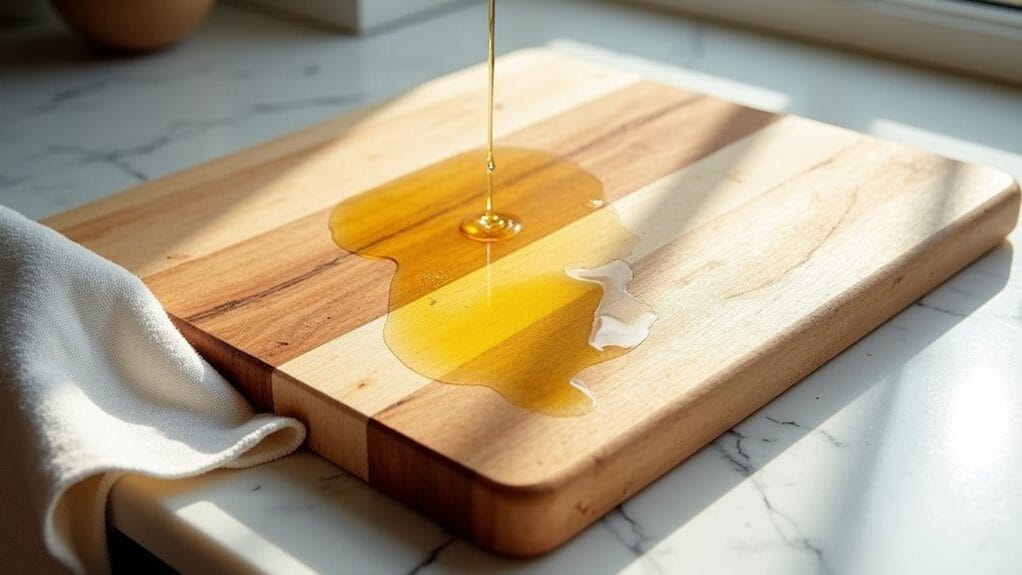
Step 3: Apply Food-Grade Oil Generously
This is where you put how to oil wood cutting boards into practice.
- Set the dry board on a protected surface.
- Drizzle food-grade mineral oil over the surface.
- Using a lint-free cloth or paper towel, spread the oil with the grain in even strokes.
- Coat all sides: top, bottom, edges, handle cutouts, and juice grooves.
A new or very dry board will drink up oil quickly. Add more as needed until the surface stays glistening for a minute or two instead of absorbing everything instantly.
If you use a board cream:
- Apply it after the mineral oil step, not instead of it.
- Rub a thin layer over the surface once the oil has soaked in.
Step 4: Let the Oil Soak in
Give the wood time to absorb and condition.
- Leave the oiled board to rest for at least a few hours, ideally overnight.
- Prop it upright so air can circulate and oil doesn’t pool in one area.
If you notice dull, dry-looking patches after an hour or two, apply a bit more oil to those “thirsty” areas.
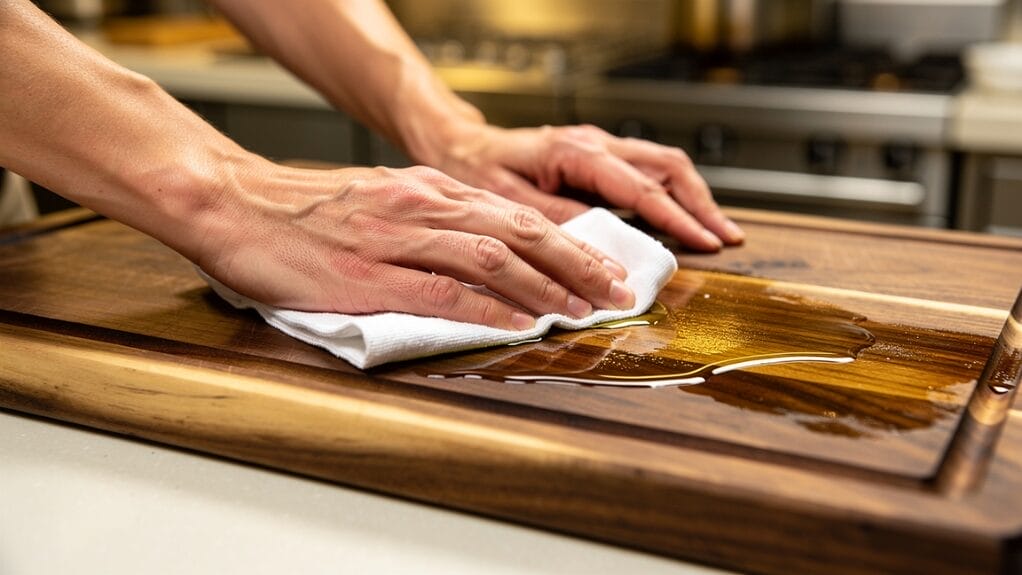
Step 5: Buff and Store Properly

After the soaking period:
- Use a clean, dry cloth to buff away all excess oil.
- The board should feel smooth and nourished, with no sticky or oily residue.
- Wipe in the direction of the grain for a refined finish.
For storage:
- Keep boards in a dry, well-ventilated area, away from direct heat or sunlight.
- Either store them flat on a dry surface or upright on edge; avoid stacking damp boards tightly together.
This final step is what gives your boards that professional, shelf-ready look that customers notice right away.
Maintenance Schedule and Daily Care Tips

To keep your boards looking and performing their best, pair periodic oiling with smart daily habits.
Suggested Maintenance Schedule
You can share or print a schedule like this for your customers or staff:
| Time Period | Maintenance Task | Notes |
|---|---|---|
| Daily | Wash & Dry | Hot soapy water; no soak |
| Weekly | Deep Clean | Salt + lemon if needed |
| Monthly | Oil Treatment | Apply with grain |
| Every 6 Months | Deep Condition | Oil + beeswax mix |
As a rule of thumb:
- Oil about once a month for regular home or light commercial use.
- Oil more often (every 1–2 weeks) for heavy restaurant or prep kitchen use.
- In very dry climates, check the board’s appearance regularly; if it looks pale, chalky, or water no longer beads on the surface, it needs oil.
A simple test many cooks use: if water stops beading on the board and sinks straight in, it is time for an oiling session.
Daily Do’s and Don’ts
Do:
- Wash right after use with hot, soapy water.
- Rinse and dry with a towel, then stand the board to air-dry completely.
- Use separate boards or sides for raw proteins and ready-to-eat foods when possible.
Don’t:
- Don’t soak wooden boards in water.
- Don’t put them in the dishwasher.
- Don’t store them while still damp.
- Don’t bleach your wooden cutting boards.
Following these simple rules, along with a clear explanation of how to oil wood cutting boards, goes a long way toward keeping your boards in service for years.
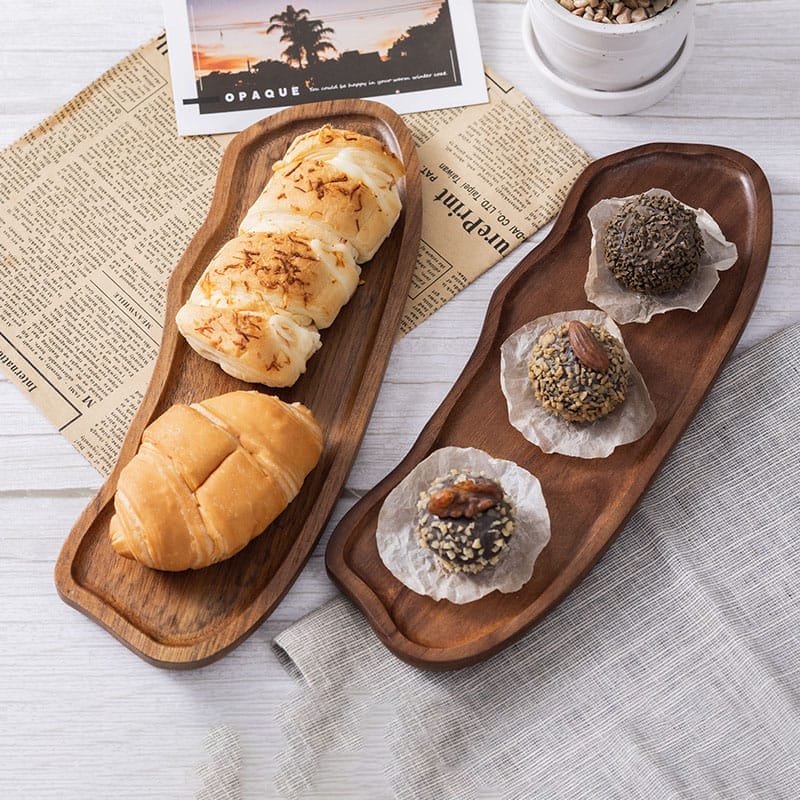
Extending Care to Other Wooden Kitchen Tools
The same oiling method applies not only to cutting boards but also to:
- Wooden spoons and spatulas
- Rolling pins
- Salad bowls and servers
- Trays and charcuterie boards
- Wood-handled knives and utensils
After you finish oiling and buffing a board, use your still-slightly-oily cloth to wipe down these wooden cooking utensils. This adds extra value for your customers and keeps entire tool sets looking consistent and well cared for—especially helpful for gift sets and curated collections.
Wood vs. Plastic Cutting Boards for Your Business

If you stock both wood and plastic boards, you already know they serve different needs. Understanding the trade-offs helps you position your wooden boards correctly.
Wood Cutting Boards
- Gentle on knife edges, which appeals to serious home cooks and chefs
- Naturally attractive; ideal for display, serving, and gifting
- Can be more hygienic over time when properly cleaned and oiled, as wood fibers tend to close around knife marks
- Require hand-washing and a regular oiling routine
Plastic Cutting Boards
- Can go in the dishwasher for high-heat sanitizing
- Lower initial cost
- Over time, develop deep, permanent grooves that can hold bacteria — a finding documented in studies on Cutting Boards of Plastic and wood contaminated experimentally with bacteria.
- Often look scratched and stained relatively quickly
By teaching customers how to oil wood cutting boards and including care cards or online guides, you address the main concern about maintenance while highlighting the long-term benefits of wood.
Kitchen trainers often remind new staff that no cutting board material stays safe on its own— regular cleaning and conditioning are what make the difference.
Partnering With Qlychee Crafts
When you provide your buyers with clear instructions on how to oil wood cutting boards, you help them protect their purchase and associate your brand with quality and longevity.
We provide a wide selection of wooden cutting boards, with options for wholesale and personalized customization. Reach out to us for further details.
Whether you need boards for retail shelves, restaurant supply, corporate gifts, or branded merchandise, Qlychee Crafts focuses on durable materials and finishes that respond beautifully to proper oiling.
Frequently Asked Questions
What Do You Oil A Wooden Cutting Board With?
You should oil a wooden cutting board with food-grade mineral oil or a commercial cutting board oil based on mineral oil. For extra protection, follow up with a board cream made from mineral oil and beeswax after the oil has soaked in. Avoid vegetable, olive, or canola oils, as they will eventually turn rancid.
What Oil Is Food-Safe on Wood?
The most widely recommended food-safe oil for wood is food-grade mineral oil. You can also use food-grade fractionated coconut oil or a certified food-safe pure tung oil. Always check the label to ensure the product is safe for contact with food. If it doesn’t specify food-safe use, don’t apply it to cutting boards or utensils.
Can You Over-Oil a Cutting Board?
Yes. If you apply more oil than the wood can absorb and don’t buff it off, the surface can feel sticky and attract dust and food particles. If this happens:
- Wipe the board thoroughly with a clean, dry cloth.
- If it still feels tacky, wash with hot, soapy water, dry completely, and buff again.
Going forward, apply generous oil, but always remove the excess after the soaking period.
Should You Let the Cutting Board Dry Before Oiling?
Absolutely. The board must be completely dry before you oil it. If moisture is trapped under the oil, it can lead to warping, cracking, or internal damage. After washing, stand the board upright and let it air-dry for several hours or overnight, then begin the oiling process.
How Often Should You Oil Wood Butcher Block?
For most home users, oiling once a month is a solid guideline. In commercial kitchens or high-use environments, you may need to oil boards every 1–2 weeks. The best indicator is appearance: when the board looks dull, dry, or “thirsty,” or when water stops beading on the surface, it is time to oil again.