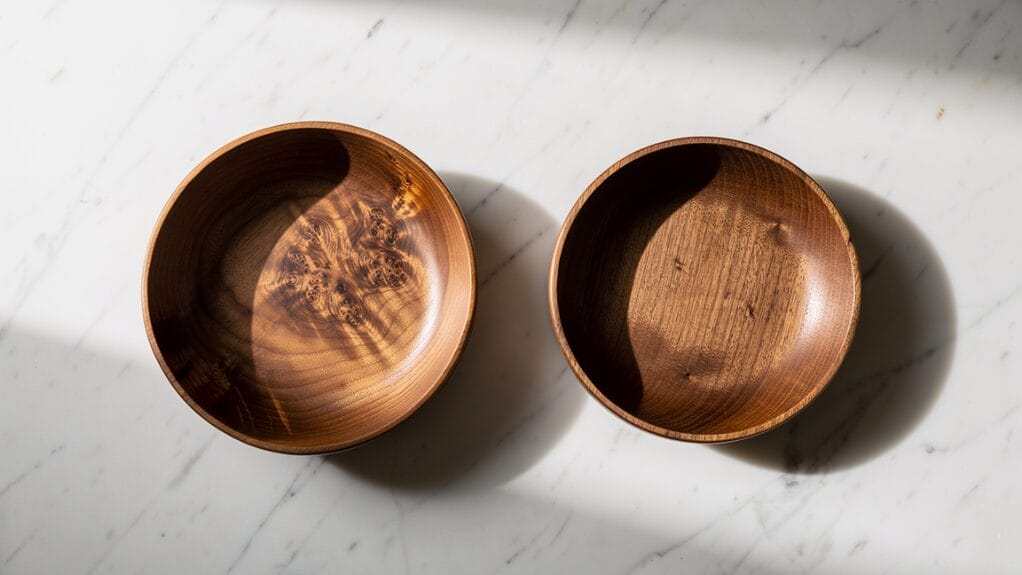
Are you curious how to make a wooden bowl in our factory? We’ll turn a wooden bowl using a lathe, starting with proper wood selection – maple, cherry, or walnut work well. First, we mount a turning blank securely and rough-turn the exterior with a bowl gouge to establish the basic profile. Then, we hollow out the interior, maintaining a uniform wall thickness between ¼ and ½ inch using calipers.
After sanding through progressively finer grits and burnishing, we apply food-safe finishes, such as mineral oil. Our detailed process reveals every essential step for mastering this craft.
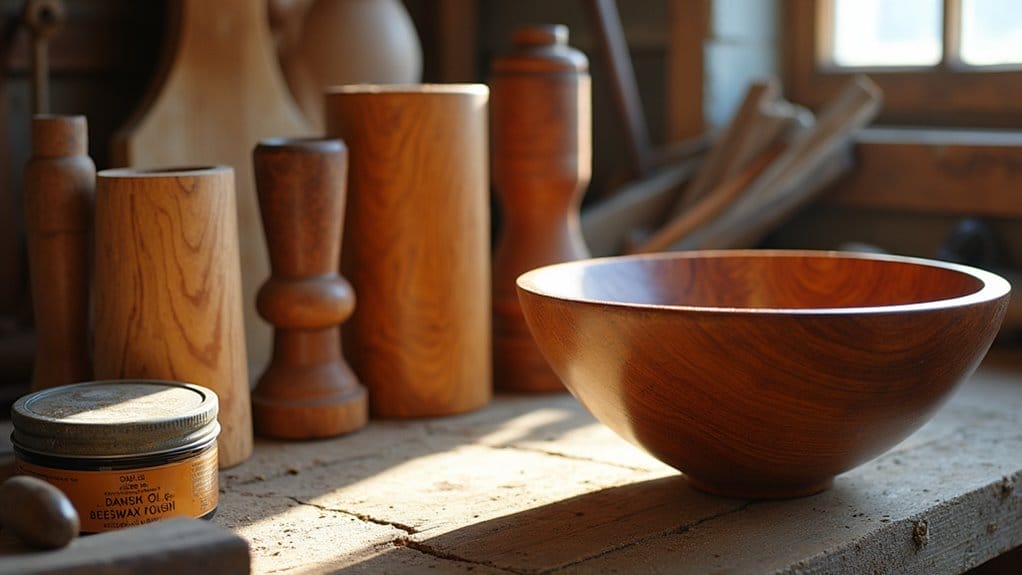
Key Takeaways
- Select a suitable wood, such as maple, cherry, or walnut. Make sure it’s free from defects and suitable for food contact.
- Mount the wood blank securely on the lathe and rough-turn the exterior using a bowl gouge to establish the basic bowl shape.
- Hollow interior gradually using proper gouges, maintaining wall thickness between 1/4 and 1/2 inch, checking with calipers.
- Sand progressively from 120-grit to 220-grit sandpaper, both inside and outside, until the surface is smooth.
- Apply a food-safe finish like mineral oil or Rubio Monocoat Oil Plus 2c, then buff with a soft cloth.
Materials Selection: Choosing the Right Wood & Finishes

We’ll start with softwoods like balsa or basswood for their forgiving carving properties. But experienced turners often prefer hardwoods like maple or cherry for their superior durability and grain patterns.
Common Woods for Bowls
The selection of wood species plays a crucial role in crafting exceptional wood bowls. Hardwoods such as maple, cherry, and walnut are leading the way in both functionality and aesthetics. We’ll discover how each wood type offers unique characteristics for functional wooden bowls.
| Wood Type | Properties | Best Use |
|---|---|---|
| Maple | Dense, durable | Daily use |
| Cherry | Darkens beautifully | Display, serving |
| Walnut | Rich grain, strong | Heirloom pieces |
| Birch | Light, uniform | Beginner projects |
| Basswood | Soft, easy carving | Practice, decoration |
| Acacia | Hard, water‑resistant, warm tones | Cutting boards, outdoor or humid environments |
Each species requires specific food-safe finishes like mineral oil or beeswax to guarantee safety while preserving the wood’s natural beauty.
Turning Blanks vs. Glued Lamination for Larger Diameters
When crafting larger wooden bowls, woodturners must choose between two primary methods for preparing blanks: solid turning blanks and glued lamination.
We often select dense hardwoods, such as maple or walnut, for solid bowl blanks cut from logs, which maintain natural grain patterns but require careful monitoring of moisture content to prevent cracking.
For larger diameters, we often opt for laminated pieces, which are built from thinner strips of turning wood. This technique offers superior stability and control over final dimensions.
Regardless of method, we’ll finish our bowls with food-safe finishes like mineral oil, ensuring both durability and safety for serving purposes.
Food-Safe Finishes and Sealers
Selecting food-safe finishes stands as an essential step in crafting wooden bowls that’ll come into contact with food items. We recommend mineral oil and food-grade oils as primary choices. They offer excellent protection while maintaining safety.
Shellac, derived from the secretions of the lac bug, provides another viable option when applied in thin layers.
While lacquer creates a durable finish, we advise against using it on food-contact surfaces due to the potential for chemical leaching. Instead, we suggest specialized products like Rubio Monocoat Oil Plus 2c, which delivers both protection and food safety when fully cured.
Consider maintenance requirements, as some finishes need regular reapplication to maintain their protective qualities.
Design and Prototyping: Shapes, Thickness & Ergonomics

Starting with a clear design vision helps transform raw wood into an elegant, functional bowl.
A clear initial vision is the foundation for crafting wooden bowls that unite beauty with practicality.
When planning bowl shape, we’ll consider both traditional round forms and asymmetrical designs that showcase personal creativity. The thickness of the bowl should maintain consistency between 1/4 and 1/2 inch. This ensures structural integrity while achieving an elegant profile.
For ergonomics, we’ll focus on comfortable handling with carefully planned contours.
Let’s leverage the natural patterns of the wood grain to enhance the visual appeal of our design.
Before committing to hardwood, we’ll prototype with softer materials, such as balsa. This allows us to refine dimensions and create a beautiful bowl that balances form and function.
Customization Services: How We Handle Custom Orders

We offer extensive customization options for our wooden bowls, including precise dimensional specifications, choice of wood species, and decorative elements.
Custom Options
When creating custom wooden bowls, our workshop offers extensive personalization options to match your specific requirements and aesthetic preferences.
We’ll help you select the ideal size and wood species, from maple to walnut, each bringing distinct grain patterns and durability characteristics.
Our craftsmen can incorporate carved or engraved patterns, two-tone laminates, and branded engravings to achieve the desired aesthetic you envision.
- Precision-carved designs and patterns enhance visual appeal while maintaining structural integrity.
- Two-tone laminates feature contrasting wood species for a striking visual effect.
- Professional engraving services add logos, messages, or artistic elements for personalized touches.
Food-Safety Labeling and Bespoke Lining for Specific Markets
Our commitment to food safety and customization extends through extensive labeling systems and specialized resin-safe inserts designed for diverse market applications.
We integrate food-safe labeling protocols to certify each bowl’s safety for direct food contact. Market demands drive our customization services, allowing us to create beautiful and functional personalized wooden bowl products.
- Each resin-safe insert is precision-engineered to match specific bowl dimensions while maintaining optimal food safety standards.
- Our certification process includes thorough testing of all food-safe finishes, from mineral oil to beeswax applications.
- Custom features incorporate non-slip bases and color-matched resin linings to meet distinct market segment requirements.
The integration of these elements guarantees our wooden bowls exceed both safety standards and aesthetic expectations.
How to Make a Wooden Bowl: Step-by-Step Workshop Flow

We begin our bowl production by carefully selecting and preparing wood blanks. Our process incorporates both traditional turning techniques and modern CNC-assisted finishing for larger production runs.
After thoroughly sanding and burnishing, we complete each bowl with food-safe oil treatments and final buffing.
Blank Preparation
Before starting the bowl-turning process, selecting and properly preparing the wood blank serves as the critical foundation for success.
We’ll need a defect-free hardwood or fresh log slab to begin. First, we’ll joint one face of the blank to establish a flat reference surface – this guarantees proper mounting alignment.
Next, we secure the blank to the lathe using either a faceplate or keyless chuck, carefully centering it to prevent vibration.
Once mounted, we’ll start rough turning to achieve a circular shape, continuously monitoring the blank’s uniformity while removing material to establish the basic bowl profile.
Turning Operations
Once the blank is securely mounted, the vital turning operations begin with rough turning using a bowl gouge to establish the bowl’s basic profile.
We’ll remove excess material to create a symmetrical form approximately half an inch thick.
Next, we’ll focus on hollowing the interior with our bowl gouge, carefully monitoring the depth as we excavate.
Wall-thickness control is essential. We’ll use calipers frequently to maintain consistent thickness between ¼ and ½ inch, ensuring structural integrity throughout the piece.
Our tool choices are vital for success.
While the bowl gouge excels at hollowing, we may employ different gouges for specific cuts, maintaining proper sharpening and stance throughout the process.
CNC & Robot-Assisted Finishing Options for High-Volume Runs
For high-volume production runs, incorporating CNC machining and robotic finishing systems transforms traditional bowl-making into a highly efficient automated process.
We’ll program our CNC machines to execute precise cutting paths for consistent wooden bowls while minimizing material waste.
The robot-assisted finishing stations utilize specialized arms equipped with sanding and polishing tools, ensuring uniform surface quality across batches.
This automation increases production speed by up to 300%, significantly streamlining our workflow.
To maintain ideal performance, we’ll implement regular maintenance schedules and quality control checks throughout the manufacturing process, guaranteeing each bowl meets our exacting standards.
Sanding, Burnishing, and Final Finishing
While the bowl’s basic shape has been established through turning, achieving a refined finish requires methodical sanding and careful application of protective coatings.
We’ll start with 120-grit sandpaper on the exterior, then progress to 220-grit for optimal smoothness. Hand sanding the interior follows the same progression.
Next, we’ll use a burnishing tool to create an appealing sheen across all surfaces.
For protection, we’ll apply a food-safe finish. This ensures complete coverage. An accelerator can speed up curing if needed.
The final bowl comes to life as we gently buff with a soft cloth, revealing the wood’s natural beauty.
Inspecting for Cracks, Tear-Out, and Balancing
Before commencing the bowl-turning process, we’ll conduct a thorough initial inspection of our wood blank to identify any existing cracks, checks, or grain irregularities that could affect the final product.
When shaping the bowl, we’ll monitor for tear-out by maintaining sharp tools and cutting against the grain direction. We’ll continually check the balance and wall thickness throughout turning to prevent wobbling and structural weaknesses.
After rough shaping, we’ll let the bowl dry before conducting another inspection.
This essential step reveals any new cracks or balance issues that may have developed during shrinkage, allowing us to make necessary adjustments before final finishing.
Tooling, Jigs, and Fixtures: What We Use to Scale Production

As production of wooden bowls scales beyond individual crafting, professional tooling and jigs become essential for maintaining quality and consistency.
We’ve optimized our workflow by implementing specialized jigs that guarantee uniform bowl depths and profiles. Our fixtures securely hold wood blocks in place on the lathe, while our bowl coring rig efficiently extracts multiple bowls from a single blank.
Custom jigs and precision fixtures streamline our bowl production while maintaining quality, allowing efficient extraction of multiple pieces from single blanks.
We maintain sharp gouges and wood carving tools for precise cuts. This reduces production time and improves finish quality.
Our dedicated sanding station, equipped with multiple grits, streamlines the finishing process. These tools and setups enable us to maintain craftsmanship standards while enhancing output efficiency.
Packaging and Shipping: Protecting Bowls in Bulk

Proper packaging of wooden bowls for wholesale distribution requires three critical protective elements: cushioning materials, moisture control, and strategic box organization.
We wrap each wooden bowl in bubble wrap or foam padding to prevent scratches and breakage. Inside sturdy cardboard boxes, we install dividers to separate individual pieces, eliminating bowl-to-bowl contact.
Humidity-control packets protect against moisture damage during transit, as wood remains susceptible to warping. We clearly mark packages as “fragile” and indicate proper orientation.
This thorough protective packing system guarantees our wholesale shipments arrive in pristine condition, maintaining product quality from workshop to warehouse.
Conclusion
We’ve explored the extensive process of wooden bowl production, from material selection through final packaging. By implementing precise turning techniques, maintaining proper wall thickness ratios, and utilizing specialized jigs, we consistently produce high-quality bowls at scale.
Whether you require individual pieces or manage wholesale production, these methodologies ensure optimal results while maintaining efficiency in your woodturning operation.
FAQs
What Is the Best Wood to Make a Bowl Out Of?
We’ll recommend starting with balsa or basswood for your initial bowls. Then, you can progress to hardwoods like maple, cherry, or walnut once you’ve mastered basic carving and shaping techniques.
How to Make a Wooden Bowl Without a Lathe?
Let’s secure our softwood block in a vise, carve the interior with a PFEIL #7 gouge, shape the exterior symmetrically, smooth with power sanding, and finish with Rubio Monocoat for protection.
What Tools Do You Need to Make a Wooden Bowl?
We’ll need a PFEIL #7 Gouge (14mm), a sturdy vise, power saw, orbital sander, and sanding materials (120-220 grit). A wood carving tool set and finishing sealant complete our essentials.
Can You Make a Bowl Out of Wood?
Yes, we can craft bowls from wood, particularly using soft species like balsa or basswood. We’ll need specific carving tools, including a gouge, and follow precise interior-to-exterior shaping techniques.