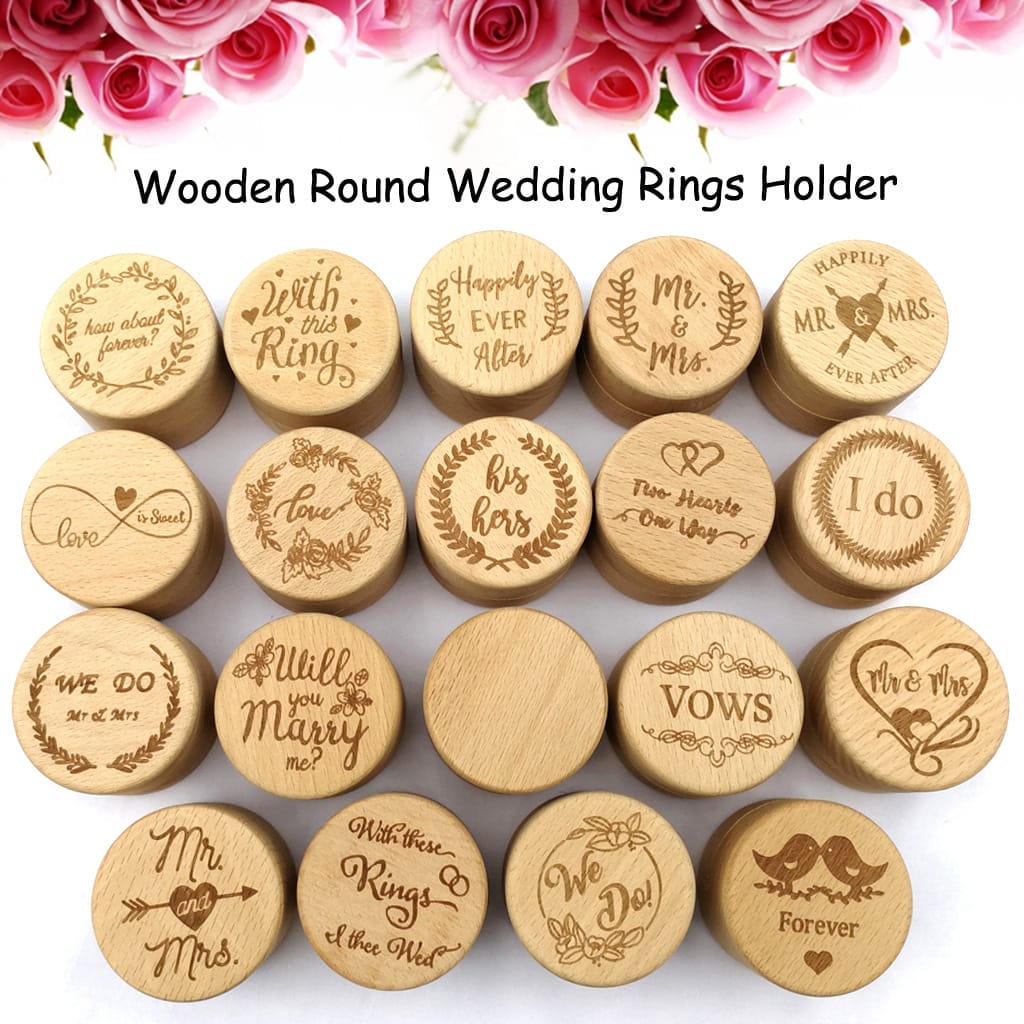
Walk into any gift shop or scroll through a popular marketplace and one thing shows up again and again: simple wooden bangles stacked beside metal and resin bracelet sets. They sell fast because they feel natural, light, and warm on the wrist. If you want to learn how to make wooden bangles for your own product line, you are stepping into a very steady category.
Wooden bangle bracelets work across age groups, fashion styles, and themes. They fit boho looks, minimal outfits, and even corporate gift sets when paired with subtle branding. For a store or wholesale program, that can mean:
- Repeat orders from customers who stack and collect.
- Easy upsells with multi‑piece sets and color variations.
- Themed collections tied to seasons, events, or locations.
The challenge is that professional wooden bangle production is not the same as sanding a ring for a weekend craft project. To supply retailers, run a workshop, or order private‑label stock, you need clear standards for tools, safe use of the lathe, wood selection, and finishing. Each step, from rough wood to finished oval or round ring, affects comfort, durability, and how the piece looks in photos and video.
This guide walks through everything you need, from machinery and high‑speed steel tools, to wood blank specs, step‑by‑step turning, safety, and finishing. You will also see where buying pre‑sanded wooden bracelets and blanks from Qlychee Crafts makes more business sense than cutting every strip and ring yourself. By the end, you will understand how to make wooden bangles at scale and how to choose the best mix of in‑house work and trusted suppliers.
“Quality is never an accident. It is always the result of intelligent effort.” — John Ruskin
Key Takeaways
- Solid equipment drives safe production. Wooden bangle production centers on a lathe with variable speed, a solid four‑jaw chuck, and sharp high‑speed steel tools. This setup lets you move safely from a rough blank to a smooth ring that needs only sanding and finish. With the right equipment, even small shops can handle steady batches.
- Wood choice shapes style and margin. Walnut and segmented rings suit premium lines, while oak and maple work for mid‑range and paint‑ready pieces. By matching a species to your audience, you control margins without hurting quality.
- A repeatable process beats one‑off success. The flow runs from blank preparation, then mounting, roughing, hollowing, reverse mounting, shaping, sanding, and finishing. When you document each step, you can train staff faster and keep results consistent across hundreds of bracelets.
- Safety and finishing set you apart. Eye and dust protection, sharp tools, and careful speed control keep staff safe and reduce equipment damage. Professional finishing with fine sanding and durable sealants makes the difference between a simple craft item and a bracelet that commands stronger retail pricing.
- Quality checks and customization create a brand. Strong inspection plus smart customization and branding turn basic rings into a real product line. If in‑house turning is not a fit, sourcing blanks or finished wooden bracelets from Qlychee Crafts gives you consistent, eco‑minded stock that is ready for paint, engraving, or direct sale.
Essential Tools and Equipment for Wooden Bangle Production
Professional wooden bangle production sits on a base of reliable machinery. Once you understand what each piece does, you can map out a workflow that fits your space and production volume.
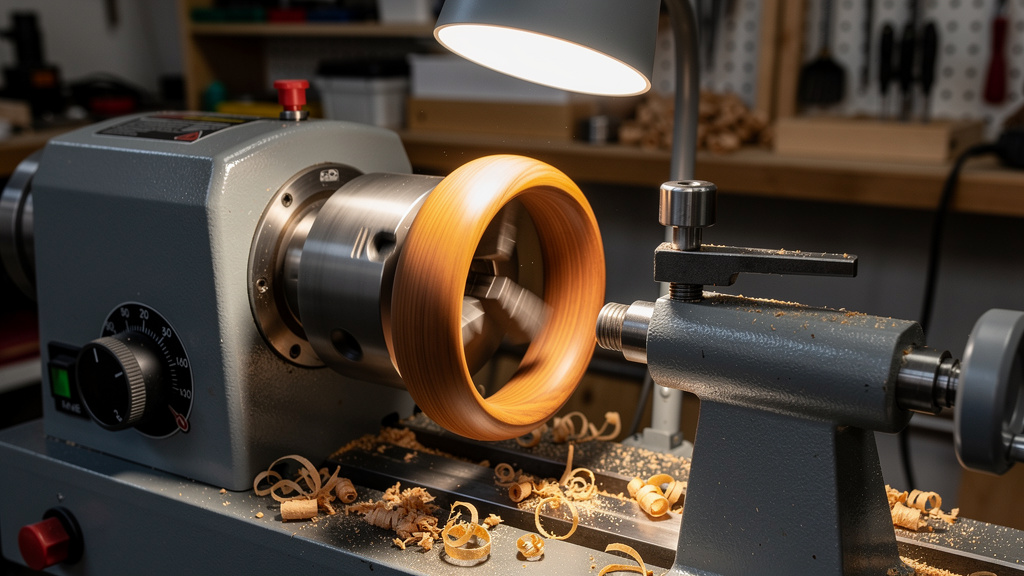
Wood Lathe Selection and Specifications
The wood lathe is the heart of how to make wooden bangles with a turned profile. For bangles, mini and midi lathes are often the best match, since you only need enough swing for a disc about four to six inches wide. These machines: are essential for creating beautiful pieces that can be marketed effectively. By focusing on wholesale wooden bangles for retailers, artisans can tap into a growing demand for unique, handcrafted accessories. Additionally, sourcing high-quality wood and employing skilled techniques can elevate the value of these products in a competitive marketplace.
- Take less floor space.
- Plug into standard power outlets.
- Handle steady batch work without intimidating new operators.
Variable speed control matters a lot. You want slower speeds (around 500–800 RPM) when a rough blank still has flat sides. Once the ring is round, you can move toward higher speeds for smoother cuts and sanding. This helps you keep the bracelet straight and safe as you trim and shape.
For most small and medium shops, a midi lathe offers a good balance of power, cost, and footprint. A full‑size lathe makes sense only if you also turn larger bowls or furniture parts. Before you buy, check that your planned bench or corner has room for:
- The machine and its stand.
- Tool‑rest clearance on both sides.
- Dust collection hoses and safe operator movement.
Chuck Systems and Mounting Hardware
A quality chuck system keeps the workpiece secure while you cut the inside and outside of the bracelet. For bangle production, a four‑jaw self‑centering chuck is standard because it grips evenly and adjusts quickly between pieces. This upgrade from simple spur centers pays off in both safety and speed.
A common workflow looks like this:
- Use the worm screw part of the chuck first by driving it into a pilot hole in the center of the blank. That lets you true the disc and start the groove for the inner ring.
- After that groove is cut, flip the piece and use expansion jaws inside the groove.
The jaws push outward against the wood so you can shape the outside without metal in the way.
Consistent, secure mounting means fewer catches, cleaner cuts, and less scrap. For a business, that means more saleable bangles per block of wood and less risk of tool damage or injury from a flying piece.
Supporting Equipment and Tools
Beyond the lathe and chuck, a few other machines support how to make wooden bangles at scale:
- Bandsaw: Cuts boards into square blanks, trims corners into rough ovals, and resaws thicker stock for multiple rings. This makes the first turning pass smoother and quieter.
- Sharpening setup: A bench grinder with jigs or a wet grinder keeps high‑speed steel edges keen. Sharp tools reduce tear‑out and sanding time.
- Drill press or handheld drill: Makes clean center holes for the worm screw.
- Measuring and layout tools: A compass, circle templates, or circle cutter help you mark inner and outer diameters so every bracelet in a set matches.
Adding basic dust collection and bright task lighting around this area makes the work safer and more comfortable for your team.
High-Speed Steel Turning Tools: The Core Toolkit

Your handheld tools are the direct link between your hands and the wood spinning on the lathe. High‑speed steel (HSS) holds an edge longer than simple carbon steel and stands up well to regular grinding. With a small set of HSS tools and some practice, you can cover all the cuts needed for wooden bangle bracelets.
A typical starter kit for bangles includes:
- One parting tool.
- One spindle roughing gouge.
- One bowl gouge.
- One or two scrapers (usually round‑nose and flat‑top).
Parting Tool: The Critical Instrument
The parting tool may be the smallest cutter in your rack, yet it does some of the most important work. Its thin, straight edge lets you:
- Slice a clean groove that will later become the inner opening of the bracelet.
- Define the final width of the bangle.
- Separate the finished ring from the waste block.
Because the blade is narrow, a dull edge tends to bind and burn inside the cut. Keeping this tool razor sharp gives you straight walls, less heat, and fewer marks to sand out. Many turners pick a narrow version so they waste less material and get more rings from one blank.
Gouges for Shaping and Roughing
Gouges move most of the wood when you make wooden bangles from square or octagonal blocks.
- A spindle roughing gouge is shaped to knock off corners quickly and turn the blank into a smooth cylinder. This saves time and reduces vibration before you move to finer shaping.
- A bowl gouge has a deeper flute and stronger cross‑section, which lets you cut smooth curves on the outside of the bracelet.
With the right stance and a light touch, you can flow from the middle of the ring out toward the edge in one clean pass. Good gouge technique leaves a surface that almost looks sanded even before you touch a grit strip.
Scrapers for Final Smoothing
Scrapers step in after the gouges do the heavy shaping. A round‑nose or flat‑top scraper lets you gently shave away tiny ridges and tool marks without changing the overall profile. Used with a light touch and the handle slightly raised, it skims the surface instead of digging in.
This step is especially helpful on hard species like walnut, where small lines show up easily under stain or wax. When scrapers are used correctly, your sanding starts with a finer grit, which saves time in production. They do not replace gouges, yet they refine the cut so the bracelet feels smooth even before the first coat of finish.
Wood Selection and Blank Preparation
Wood choice is one of the biggest levers you have when you plan how to make wooden bangles that match different price levels and themes. The species you pick affects color, visible grain, weight on the wrist, and how well the ring handles daily wear. You can cut your own blanks or source ready‑to‑finish pieces from suppliers such as Qlychee Crafts. When considering how to choose wooden bangles, think about the various styles and finishes that can enhance your design. Additionally, experimenting with different widths and thicknesses can create unique statements while maintaining comfort. By exploring various options, you can ensure your wooden bangles not only fit the aesthetic you desire but also suit the wearer’s lifestyle.
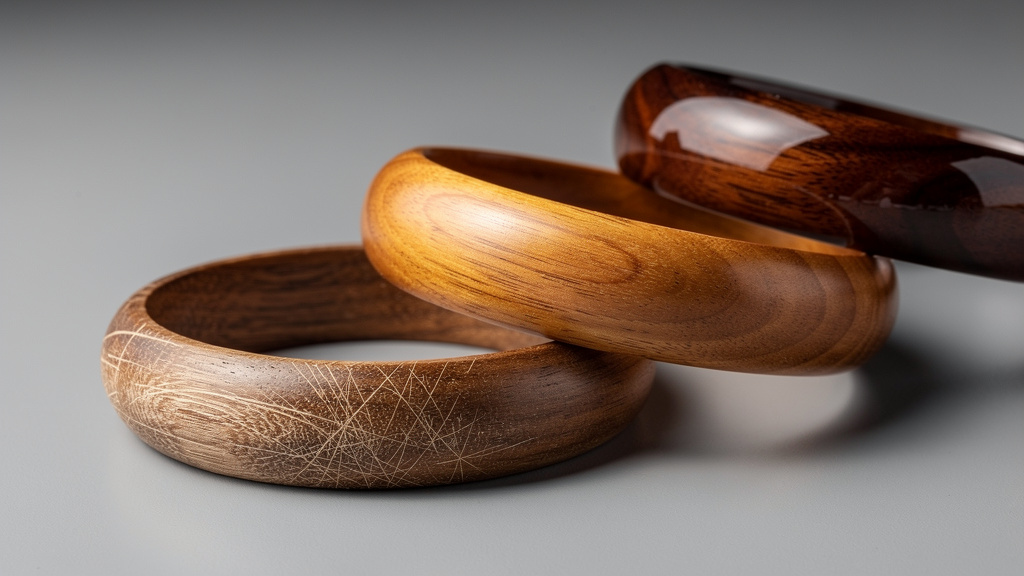
Recommended Wood Species and Their Characteristics
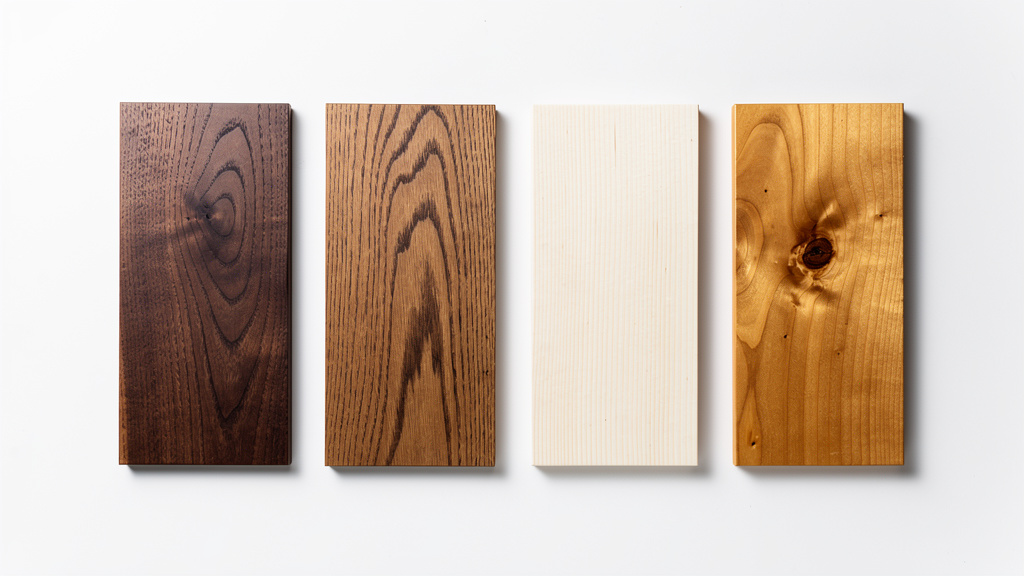
Here are some common species used for wooden bangles and what they bring to a product line:
- Oak – Strong with a bold grain pattern. It stands up to daily bumps and pairs nicely with casual outfits and rustic themes. Because oak is common and easy to source, pieces in this wood usually fit mid‑range retail prices without feeling cheap.
- Walnut – Deep brown tone that looks rich even with a simple wax coat. The fine, smooth grain means less sanding time and a very polished look once you buff the surface. This makes walnut a favorite for premium wooden bangle bracelets and sets meant to sit beside silver or metal pieces in higher‑priced displays.
- Cedar – Light in both weight and color, and it carries a natural scent that many people enjoy. It works well when you want airy, wide bangles that do not feel heavy on the arm. The trade‑off is that it is softer, so you need a good clear coat to reduce dents and marks from regular use.
- Mulberry – Offers a warm golden tone that deepens over time, which gives bracelets a mellow aged look after months of wear. It is quite durable, so it suits repeat buyers who like to stack rings on the same wrist every day.
For quick comparison:
| Wood Species | Appearance & Feel | Durability | Best Use Case |
|---|---|---|---|
| Oak | Bold grain, medium brown | High | Mid‑range casual and rustic styles |
| Walnut | Dark, refined, smooth | High | Premium collections and gift sets |
| Cedar | Pale, aromatic, very light | Medium–Low | Wide, airy bangles with clear coat |
| Mulberry | Golden, ages warmer | High | Everyday stacking bracelets |
If you prefer to skip some of this species research, Qlychee Crafts offers wooden bangle blanks in several finishes and shapes. Our sanded wooden bangles have smooth edges that lower splinter risk and cut down your prep work.
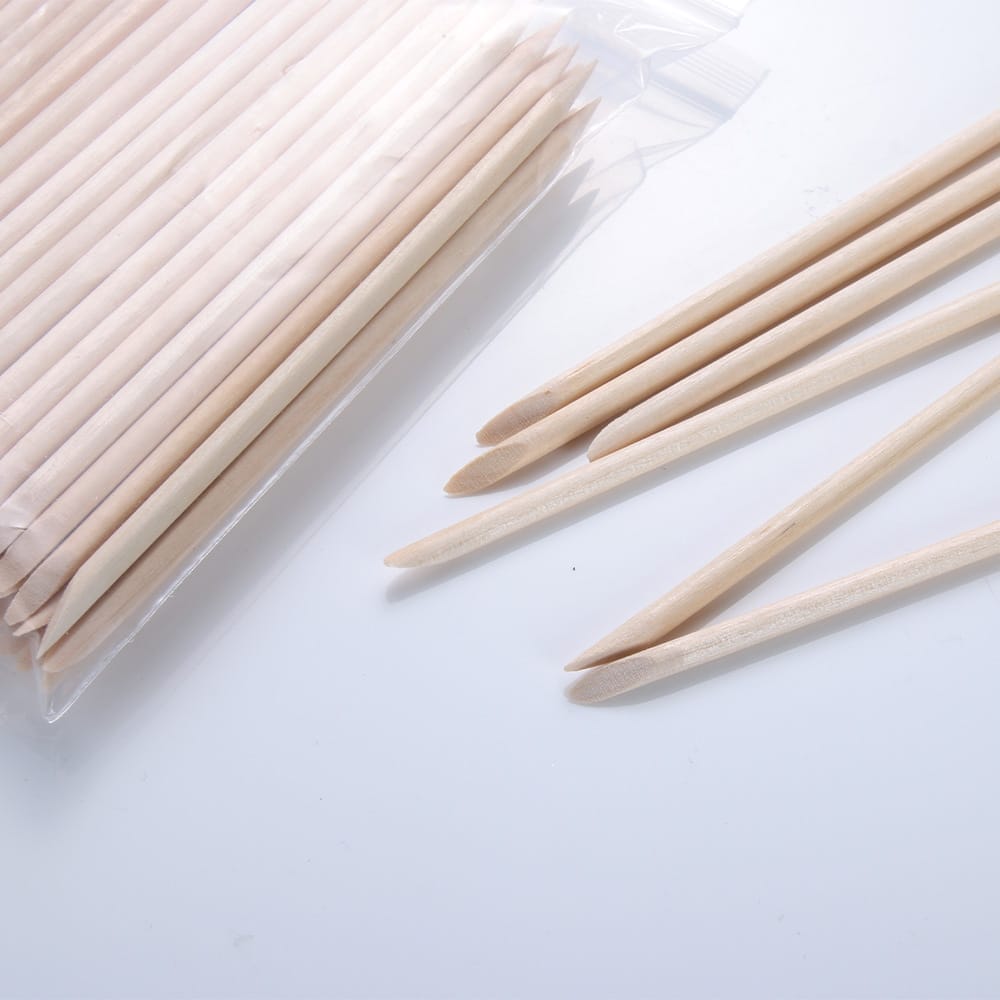
Blank Specifications and Preparation Requirements
For standard adult bangles, you usually start from a square or disc about 4–6 inches across. A thickness of at least 1 inch gives you enough material for:
- The inner groove.
- The chuck jaws.
- The final width of the bracelet.
If you want extra‑wide statement pieces, you can start with thicker stock and cut it into several rings.
The wood should be well dried, with moisture at or below roughly 8% for indoor items. That lower moisture level helps prevent cracks or warped shapes after the bracelet leaves your shop or warehouse. Offcuts and scrap boards from other projects can be turned into blanks, which keeps costs and waste down while still giving you good material.
Before a blank reaches the lathe, check it for:
- Loose knots.
- Big cracks.
- Insect damage or soft spots.
These flaws can turn into weak points or even dangerous breaks at spinning speed. When you buy blanks from Qlychee Crafts, that inspection is already done, so you can focus on design and finishing instead of sorting lumber.
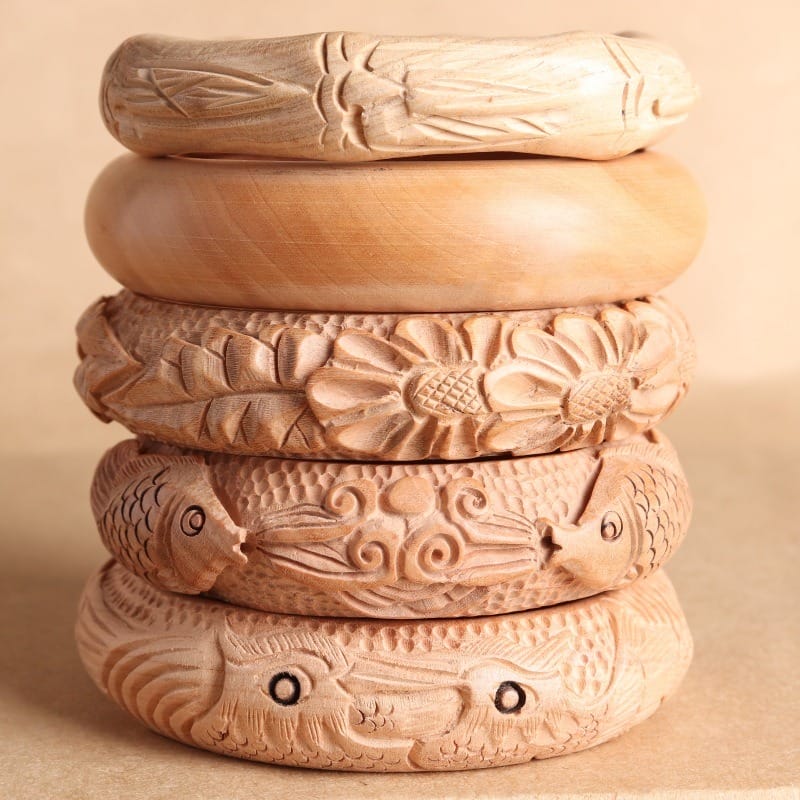
Creating Segmented Blanks for Premium Products
Segmented blanks let you make wooden bangles with bold patterns without painting or printing the surface. You glue strips of contrasting wood together, clamp them until the glue dries, and then cut the ring from that laminated block. Good pairs include:
- Maple with walnut.
- Darker species such as wenge with bright padauk.
- Ash with a darker core stripe.
The extra glue steps and layout time mean these bracelets take longer to produce, yet the striped or geometric effect supports higher price points. Many retailers use segmented wooden rings as limited runs or feature pieces in a collection. If your team is not ready for that level of blank building, you can still reach premium looks by decorating plain Qlychee Crafts blanks with paint, metal accent bands, or inlay.
Safety Protocols and Best Practices
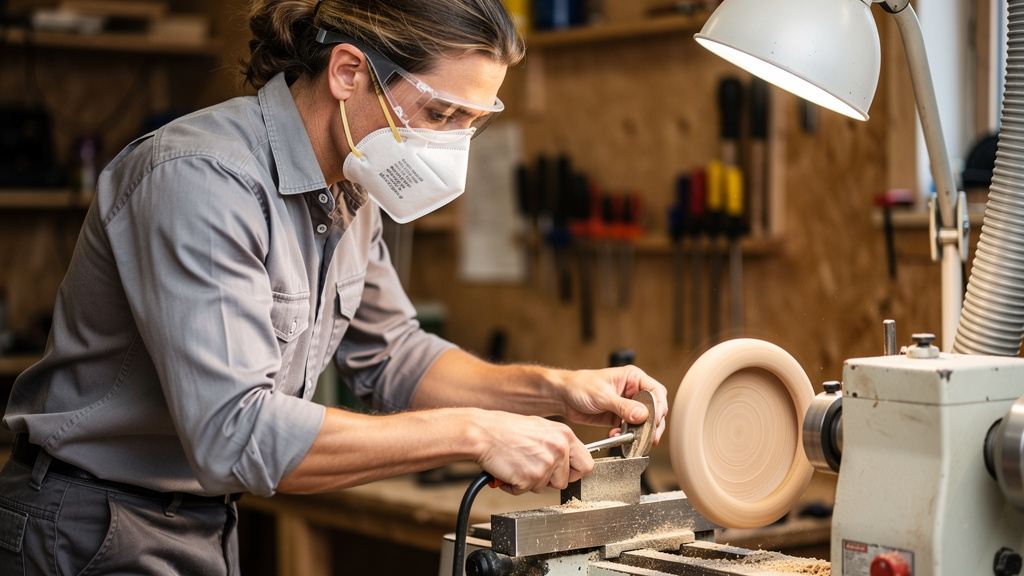
Safe production protects your team, your equipment, and your brand reputation. A lathe is a powerful machine, and spinning wooden rings near metal jaws always carries some risk. When you set clear rules and train staff well, you lower injury chances and also get smoother work because operators feel more confident.
“There are old woodturners and there are bold woodturners, but there are no old, bold woodturners.” — Traditional shop saying
Personal Protective Equipment (PPE)
Every person at the lathe should wear safety glasses or a full face shield. Small chips and sanding dust come off the bracelet at speed, and eye protection stops those from causing painful injuries. A dust mask or respirator protects lungs, which matters even more with fine sanding and with exotic hardwood species.
Hearing protection helps during long production runs, especially if you run dust collectors and multiple machines at once. Clothing also plays a part in safety:
- No loose sleeves, scarves, or dangling jewelry.
- Long hair tied back or under a cap.
- Closed‑toe shoes with good grip.
For a business, these are firm rules rather than gentle suggestions.
Machine Operation Safety Standards
Before turning on the lathe, always spin the workpiece by hand to check for clearance. This simple step shows whether the blank will hit the tool rest or any nearby hardware. Start at a lower speed when the blank is still slightly unbalanced and move higher only once it is round and running smoothly.
Key habits include:
- Keeping tools sharp so they cut with light pressure.
- Setting the tool rest about ¼ inch from the work and slightly below center.
- Never reaching over or around a spinning ring, even for quick sanding.
- Knowing where power switches and emergency stop buttons are and how to shut the machine down fast.
Short written checklists beside each lathe help new staff remember these points.
Workspace Organization and Maintenance
A clean floor around the lathe reduces slips and trips from loose shavings. Good dust collection and air filtration keep fine particles out of lungs and away from finished stock. Lighting should be bright and even so staff can see small tool marks and finish defects during checks.
Set up a schedule to:
- Sharpen tools regularly.
- Check and clean chucks.
- Tighten mounting hardware.
- Inspect cords and switches.
Store finishes, solvents, and rags away from heaters and sparks, and keep labels readable so staff know which product is water‑based or solvent‑based. This kind of basic shop care supports both safety and product quality.
How to Make Wooden Bangles: Step-by-Step Production Process
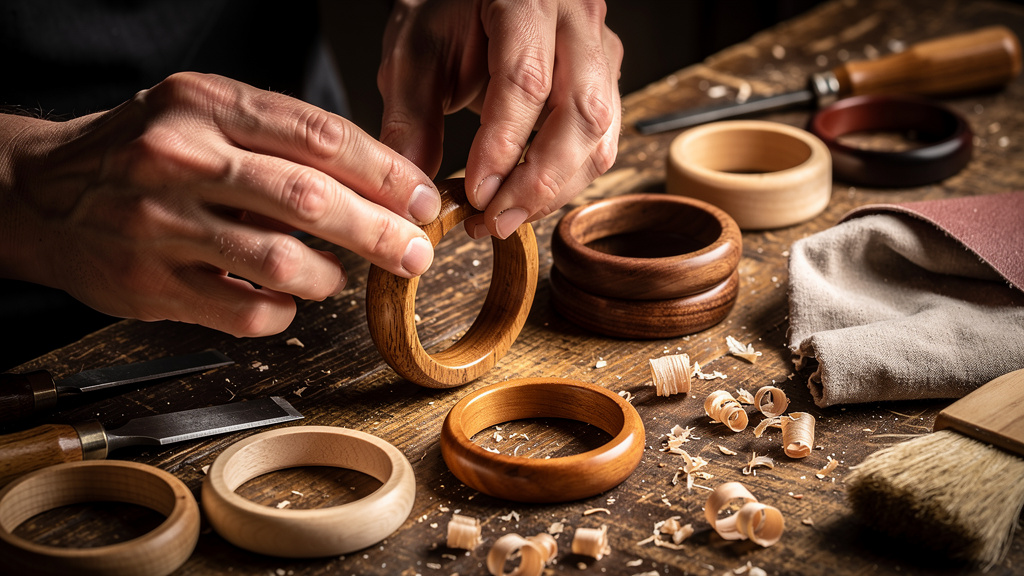
Once you have tools, wood, and safety practices in place, you can walk through the production flow. Knowing how to make wooden bangles step by step helps you write training documents, record internal videos, and plan where pre‑made blanks from Qlychee Crafts fit into the mix. The following stages form a repeatable method you can scale.
Preparing the Wood Blank for Turning
Begin by picking a dry, defect‑free board or block that matches your planned bracelet width and style.
- Cut a piece that measures roughly 4–6 inches wide and a bit thicker than your widest planned ring.
- Use a bandsaw to square the sides so the blank will sit flat against the chuck.
- Draw light pencil lines from corner to opposite corner; their crossing point is the true center.
- Drill a pilot hole at that mark with a bit that matches the worm screw on your chuck, going about ½–¾ inch deep.
- Tilt the bandsaw guide and cut off each corner so the square becomes an octagon. This rough oval spins more smoothly than a full square.
Mounting and Initial Turning
- Thread the worm screw into your chuck and twist the blank by hand onto the screw until it sits snug against the chuck face.
- Bring the tool rest close (about ¼ inch from the widest part of the blank) and spin the block by hand to confirm nothing hits.
- Set the speed in the lower range and turn the lathe on.
Use a spindle roughing gouge or bowl gouge to remove the high corners and bring the outside to a smooth circle. As the piece becomes more balanced, you can slowly increase the speed for cleaner cuts. After the outer edge is round, use the bowl gouge to flatten the face, moving from the center toward the rim in gentle, overlapping passes until the surface looks even.
Hollowing the Center and Reverse Mounting
With the face flat, stop the lathe and use a compass to draw a circle that matches the planned inner diameter of the bracelet. This line shows where the hand or wrist will pass through later, so check it against sizing charts or sample rings.
- Turn the lathe back on and use a sharp parting tool to cut straight along that pencil line into the wood.
- As the groove gets deeper, wiggle the top of the tool slightly side to side to widen the top of the slot. These small relief cuts stop the blade from binding and also give chips a path to escape.
- Cut to about two‑thirds or three‑quarters of the blank’s thickness, then stop the machine and remove the work from the worm screw.
Take off the worm screw and switch the chuck to expansion mode. Place the jaws into the groove you just made and expand them until the wood grips firmly from the inside. When the ring feels solid, turn the lathe on again and finish the inner cut with the parting tool from this side. The center plug drops away, leaving a hollow ring that stays held on the jaws.
Final Shaping and Parting Off
With the ring mounted on the jaws, you can now refine the outside shape.
- Use a bowl gouge or scraper to create a flat, rounded, or gently dished profile that fits your brand style.
- Make several light passes rather than one deep cut so the bracelet stays round and free from chatter marks.
- While the piece still spins on the lathe, sand the inside and outside with strips of sandpaper, starting around 150 grit and moving to finer grits.
Stop the machine and mark the final width of the bracelet on the outer edge with a pencil, taking care not to go so deep that your parting tool will reach the metal jaws. Turn the lathe back on, slide the parting tool in at the mark, and cut slowly while your other hand supports the ring. As the last thin strip of wood gives way, ease the bracelet off, so it does not fly across the room.
Professional Finishing Techniques for Wooden Bracelets
Finishing turns a smooth wooden ring into a product that feels ready for a display case or shipping box. The way you sand and seal the surface sets the comfort level on the skin and also how the bracelet looks in close‑up photos or video. When you plan how to make wooden bangles for sale, budget time and materials for this stage, since it shapes perceived value.
“The last 10 percent of the job takes 90 percent of the time.” — Old finisher’s saying
Comprehensive Sanding Strategy
A thoughtful sanding plan saves time and gives you repeatable results across batches. While the bangle is still on the lathe:
- Reduce the speed so the ring turns slowly and safely.
- Use narrow strips of sandpaper wrapped around a foam block or a small dowel to reach the inside surface without risking your fingers.
- Work through a grit sequence such as 150, 220, then 320, checking the wood between grits.
Finer grits like 400 or even 600 are helpful for very smooth, glass‑like finishes on premium walnut bangles. Wipe away dust between each grit so you can see any remaining lines before the next pass. After parting off the bracelet, place sandpaper on a flat surface and rub the flat sides of the ring in small circles to keep them even.
To improve comfort, use fine‑grit paper to soften the sharp meeting lines where the flat sides meet the inside and outside curves. You only need to take off a tiny amount to break that sharp edge. This simple step makes a bracelet feel much better when someone slides it over the hand and wears it all day.
Multi-Stage Buffing for High-Gloss Finish
Buffing goes beyond sanding to give wooden bracelets a polished, jewelry‑grade shine. Many shops use a three‑wheel buffing system mounted on the lathe or a separate motor. Each wheel uses a different compound, and the ring touches each one in turn.
- The first wheel carries a slightly abrasive compound such as Tripoli. This smooths away any last fine sanding lines and leaves a soft satin glow.
- The second wheel uses a finer compound like white diamond, which raises the sheen toward a bright semi‑gloss.
- The final wheel holds a hard wax such as carnauba, applied as a thin bar against the spinning cloth.
As the bracelet presses against this last wheel, friction warms the wax so it seeps into the surface. When it cools, the finish feels very smooth, has a clear shine, and resists light moisture from hands or weather. This process works especially well when you want to show off the natural grain of walnut or oak without any paint on the outside of the bracelet.
Alternative Protective Finishes
Sometimes you need more durable protection than wax alone, especially for hospitality, corporate gift, or high‑traffic retail uses.
- Wipe‑on polyurethane: Applied with a lint‑free cloth in thin layers, with light sanding between coats. Two or three coats build a clear shell that seals the wood against sweat, spills, and frequent handling.
- Low‑VOC lacquer: A strong choice for eco‑focused lines. Qlychee Crafts uses this type of finish on many polished wooden bangles.
- Oil finishes and specialty waxes: Products like penetrating oil or Renaissance wax give a softer feel on the skin, though they may need more frequent maintenance.
- Craft sealers: Mod Podge and similar products work well to seal glitter, photos, or decoupage work when decorating craft‑grade blanks for art kits or school projects.
Choosing a finish that matches how and where the bracelet will be worn keeps customers happy and reduces complaints about peeling or cloudy coatings.
Quality Control and Product Consistency
Quality control is where how to make wooden bangles turns into a repeatable product line instead of a one‑time craft project. Wholesale buyers and retail partners expect tight sizing and clean surfaces from piece to piece. Good checks at the bench reduce returns, complaints, and wasted shipping.
Focus your checks on four areas:
- Dimensions: Decide on standard inner diameters and widths for each size you offer. Use calipers or sizing mandrels to confirm every bracelet in that group is close to the target. Predictable sizes mean fewer fitting issues for store staff and online customers.
- Surface quality: Under bright light, look for tool marks, torn grain, glue gaps in segmented rings, or rough spots that were missed during sanding. Feel the inside and outside edges with your fingers to confirm there are no sharp corners that could scratch skin.
- Finish coverage: Make sure every part of the ring, including the sides and inside of the bracelet, has full and even coverage. Avoid drips, thick ridges, or dry patches that dull the overall effect. If you use paint or glitter on the outside, confirm that any clear coat such as polyurethane or Mod Podge fully seals the surface.
- Structural soundness: Look for hairline cracks along grain lines, loose segments in laminated blanks, or areas that feel much thinner than the rest of the ring. Weak spots can fail in daily use, which creates poor reviews and returns.
For wholesale lines, clear photos on neutral backgrounds, accurate size notes, and labeled packaging help partners list and ship bangles with confidence.
When you source pre‑made bangles from Qlychee Crafts, much of this work is handled before the goods reach your warehouse. Our production‑friendly blanks and finished bracelets arrive with smooth edges, predictable finishes, and size labels that cut time from unpacking to shelf. That lets you focus on branding, display, and selling instead of checking every ring by hand.
Customization and Market Differentiation Strategies
Customization is where your wooden bangle line starts to stand out from other bracelet racks. Once you understand how to make wooden bangles in a basic form, you can add design layers that fit your store theme, holiday plan, or corporate client. This section covers both decorative ideas and smart product variations.
Decorative Techniques and Enhancements
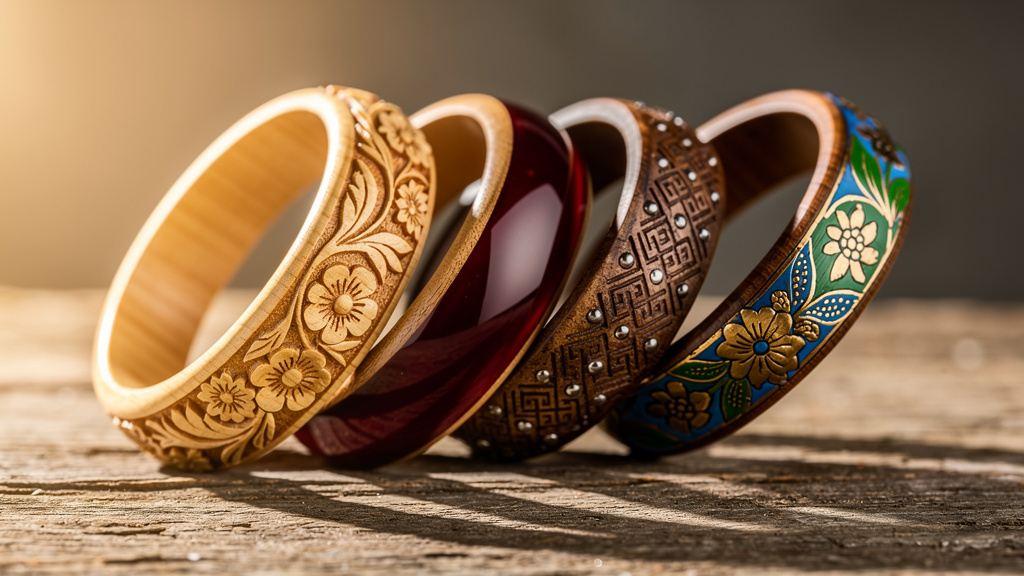
Color treatments change the mood of a wooden bracelet quickly:
- Acrylic paint works well when you want bold blocks of color, ombré effects, or thin stripes that wrap around the outside of the bracelet.
- Wood stain lets the grain stay visible while shifting tone from pale maple to deep walnut looks. Layering two shades can add depth.
- Laser engraving offers clean, repeatable logos, text, or patterns on the inside and outside surfaces. That makes it a strong option for corporate gifts, resort shops, or influencer merchandise where brand marks matter.
You can also add inlay by setting small metal strips, crushed stone, or contrasting wood into grooves around the ring.
For a softer, craft‑inspired look, try:
- Wrapping sections of the bangle with yarn, string, embroidery floss, or narrow fabric strips.
- Gluing the ends with a clear adhesive or small drops of super glue so the wrap stays tight through wear.
- Adding glitter accents, small charms, and beaded segments attached with thin wire to turn a plain blank into a themed piece for holidays or kids’ lines.
Qlychee Crafts blanks are smooth and ready for all of these decoration methods, from simple paint to detailed photo transfers sealed under Mod Podge.
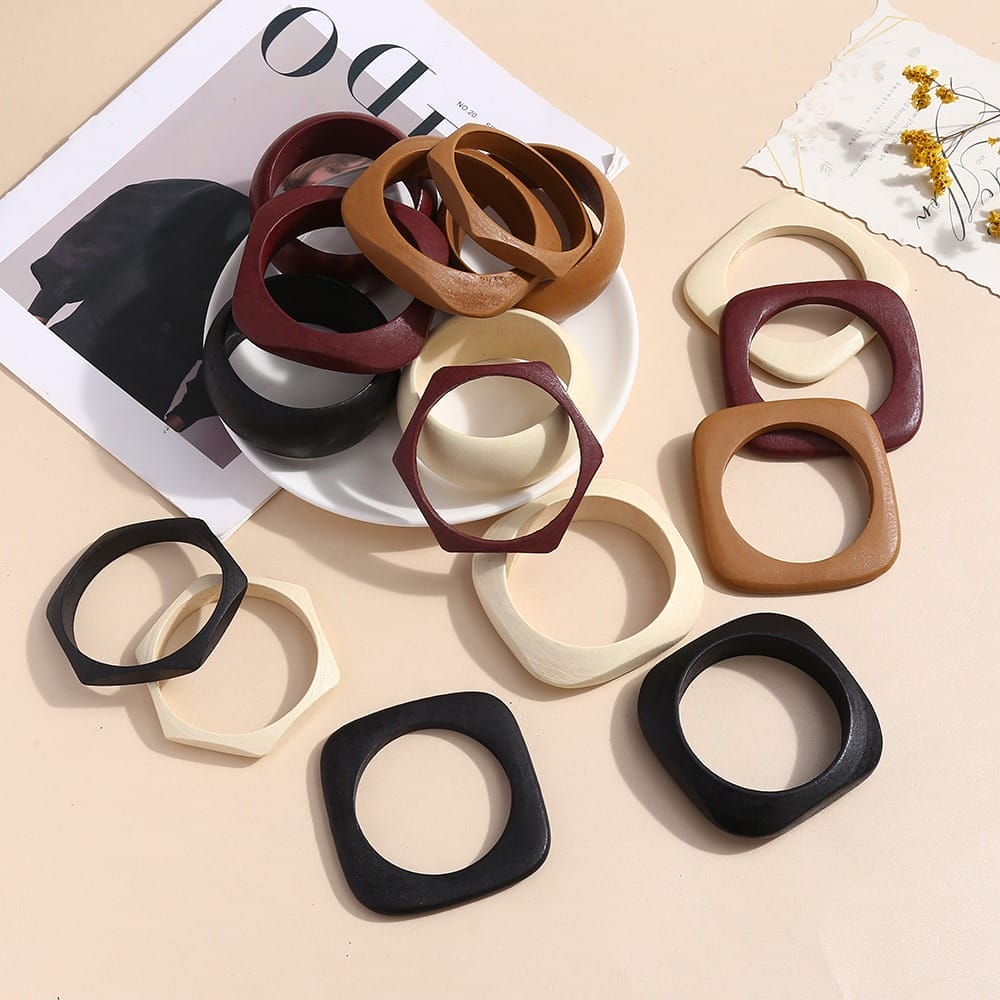
Strategic Product Variations
Thoughtful variations let you cover many shopper tastes without confusing your inventory.
- Width: Slim bangles (about ½–¾ inch) feel light and delicate, perfect for stacking several in different colors. Wider rings (1–1½ inches) read as statement pieces and work well alone or in pairs.
- Profile: Flat‑sided bracelets look modern and pair well with metal cuffs, while rounded profiles feel classic and softer on the wrist. Sculpted shapes with gentle waves or faceted flat sides cut on a sander catch light in interesting ways.
- Sets and collections: Stackable sets in coordinated colors or wood species encourage customers to buy more than one piece at a time. Seasonal collections—pastels for spring, nautical navy and white for summer, walnut rings with silver accents for winter—add freshness across the year.
Qlychee Crafts supports this approach with OEM color runs, custom branding, and flexible packaging. Low minimum order quantities help you test new themes or influencer drops without locking up too much capital in unsold inventory.
Final Words
Putting how to make wooden bangles into practice means bringing together several threads at once. You need the right mix of machines, sharpened turning tools, safe habits, and well‑chosen wood. On top of that, clear sanding, finishing, and inspection steps keep every bracelet looking and feeling ready for your customer’s wrist.
From a business view, you face a choice between full in‑house production, buying blanks, or ordering finished and branded wooden bracelets. Knowing how each stage works, from trimming the first square to applying the last wax coat, helps you judge real costs and risks. Even if you never touch a lathe yourself, this understanding lets you ask better questions and pick stronger suppliers.
If you do bring production under your roof, invest in training so every operator understands tool control, machine settings, and safety rules. Well‑written guides, short internal video clips, and a simple checklist near each lathe go a long way toward steady results. Start with small test batches, measure how long each step takes, and refine the process before you commit to larger runs.
For many retailers, corporate buyers, and online brands, partnering with an expert supplier is the faster path. Qlychee Crafts offers raw and polished bangles, sanded blanks with smooth edges, eco‑friendly finishes, and customization services that cover color, engraving, and packaging. That combination lets you bring a wooden bracelet line to market quickly while still telling a strong story about safety, sustainability, and design.
FAQs
What Is the Best Wood Species for Making Wooden Bangles?
The best wood depends on the kind of bracelet line you plan to offer:
- Walnut is a top choice for premium products because it has a rich dark color and takes a very smooth finish with only moderate sanding.
- Oak gives you strong, durable bangles with visible grain that fits mid‑range pricing and casual styles.
- Maple has a light, even tone that is perfect when you plan to paint or stain in different colors for themed sets.
- Cedar is light and aromatic and can work for wider bangles, though you should protect it with a good clear coat since it dents more easily.
How Long Does It Take to Make One Wooden Bangle on a Lathe?
Once you are comfortable with the tools, a single wooden bangle often takes around 15–20 minutes of lathe work. That time covers mounting, rough shaping, hollowing, and basic sanding while the bracelet is still on the machine. You then need extra time for hand sanding, buffing, and any clear coat or paint that must dry.
In the learning phase, expect closer to 30–45 minutes per piece as you find the best cuts and speeds. Batch work, where you repeat the same step on several rings in a row, usually brings the average time per bracelet down.
What Safety Equipment Is Required for Wooden Bangle Production?
At minimum, every person working on how to make wooden bangles should wear:
- Safety glasses or a full face shield.
- A dust mask or respirator.
- Hearing protection during long sessions.
Clothing should be fitted enough that no sleeves, jewelry, or loose items can catch on the spinning ring, and long hair needs to be tied back or covered. Sharp tools and good lighting are also part of safety, since they reduce the force needed for cuts and make it easier to see defects. Clear emergency stop procedures and visible power switches round out a safe setup.
Can Wooden Bangles Be Customized With Logos or Designs?
Wooden bangles are very friendly to customization and branding. Options include:
- Laser engraving to place logos, patterns, or text on the inside or outside of the bracelet with precise control.
- Paint, stain, glitter, and decoupage to add color themes, photos, or artwork, especially when you seal them with a clear coat such as polyurethane or Mod Podge.
- Inlay work with thin metal strips, colored resin, or contrasting wood for premium looks.
Qlychee Crafts offers customization services that include engraving, painting, charm attachment, and branded packaging, which makes private‑label projects much easier to manage at scale.
What Is the Minimum Order Quantity for Wholesale Wooden Bangles?
Minimum order quantities (MOQs) vary by factory and by how much customization you request.
- Standard natural or pre‑finished blanks are often available in smaller packs so you can test new designs or online listings without taking on heavy stock.
- Custom colors, engraved logos, or special packaging usually require a higher count to cover setup time and material changes.
Qlychee Crafts offers low MOQ options compared with many factories, which helps you trial seasonal themes or influencer collaborations. For some online sellers, they can also support drop‑shipping so you can list wooden bracelets without holding inventory at all.
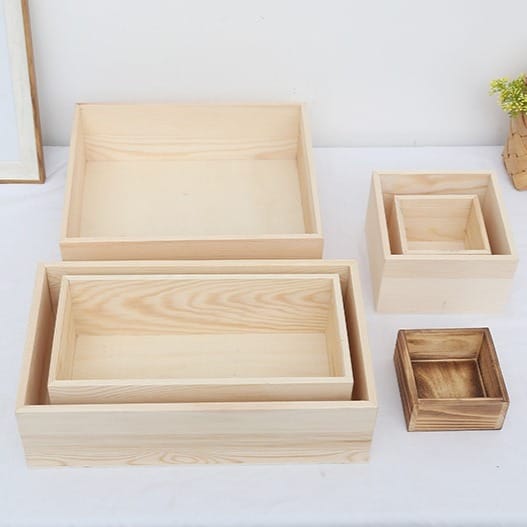
How Should Finished Wooden Bangles Be Stored and Shipped?
Finished bangles store best in a cool, dry place away from direct sunlight and high humidity. Rapid changes in temperature or moisture can move the wood and stress finishes, so steady conditions keep rings round and smooth.
For shipping:
- Wrap each bracelet in tissue or bubble wrap so they do not rub against each other and scratch.
- Use boxes that fit closely around the stack of bangles to save on shipping costs and prevent rough movement during transit.
- Add desiccant packs for long shipments or humid climates when needed.