Have you stared at a bentwood chair or a perfect wooden ring and wondered how anyone coaxes such stiff material into a clean circle? The truth is that learning how to bend wood into a circle is more about understanding wood and using the right method than about having a massive shop. Many people believe bending wood means cracked boards, burned fingers, and wasted lumber, so they avoid curves altogether and keep every project straight. That is a shame, because curved work is what separates basic projects from professional furniture and interior pieces.
In this guide, you see how wood actually moves when it bends, which species behave best, and which ways to bend wood fit different projects. You walk through four professional techniques, from steam bending to cold bent lamination, along with tools, safety, and step‑by‑step workflows.
Key Takeaways
- You have four main paths when you want to know how to bend wood into a circle. Steam bending works best for strong, structural curves in solid boards. Heat bending with a pipe fits tight curves in thin strips and smaller pieces. Kerf bending gives you smooth curves in panels and plywood where the inside face is hidden. Cold bent lamination creates very stable curves from many thin strips glued together.
- Wood choice matters more than most people think when they bend wood. Straight‑grain oak, ash, maple, cherry, walnut, birch, beech, and hickory all bend better than random construction boards. Thin stock, usually no more than one eighth of an inch for strip work, bends with far less force and breaks less often. Matching the species and thickness to the method you choose makes the process much smoother.
- Timing and clamping make or break results when you form a curve. Steam bending follows a clear rule of about one hour of steaming for each inch of thickness, with only a minute or two to clamp the hot board onto the form. Heat bending on a pipe demands steady movement and immediate clamping while the strip is still hot and flexible. The more prepared you are before the bend, the better your circles hold their shape.
- Professional suppliers such as QlycheeCrafts remove the bending step entirely when you need perfect circles at scale. With laser‑cut wooden circles that hold about 0.2 mm accuracy across many diameters and thicknesses, you gain consistent parts for furniture, lighting, décor, and more. That level of repeatable accuracy is very hard to match with any manual bending method.
- Safety is not optional when you use hot water, steam, and open flame to soften wood. Heat‑resistant gloves, eye protection, good ventilation, and never using galvanized pipe around flame all protect your health. Organizing clamps, forms, and soaking containers before you start helps you work calmly and avoid rushed moves that lead to burns, broken parts, or fires.
Understanding Wood Structure And The Science Of Bending
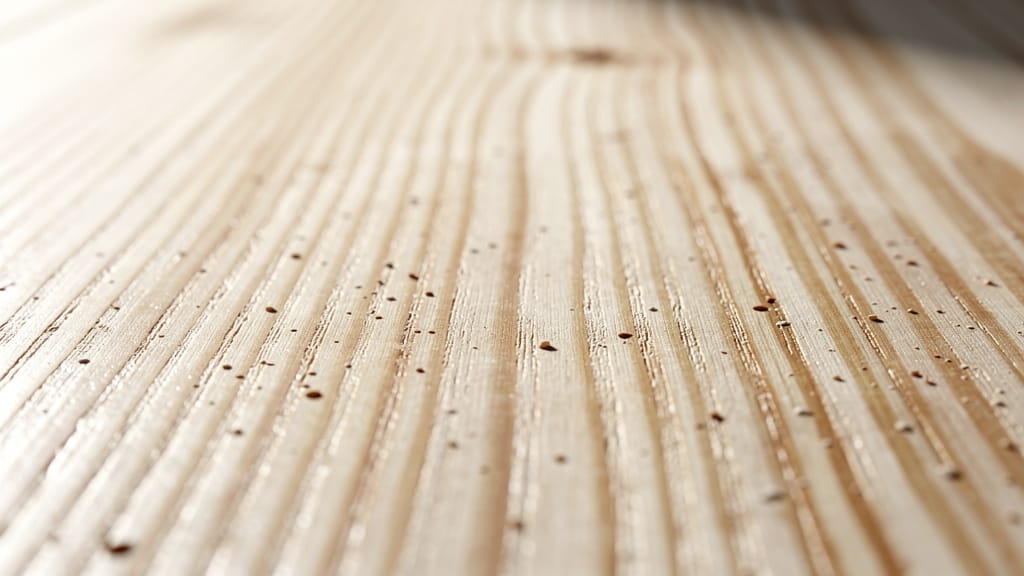
If you understand how wood is built on a microscopic level, every bending method suddenly makes more sense. Wood is made of long, tube‑like circles in wood that run along the grain. Those cells are mostly cellulose fibers, and they are glued together by a hard natural binder called lignin. That glue gives wood its stiffness and strength when the board is straight.
When you add heat and moisture, the lignin softens and behaves more like warm plastic than hard glass. Steam bending and hot‑pipe bending both rely on this softening:
- In a steamer, hot vapor soaks the board all the way through.
- In hot‑pipe work, water you soaked into thin strips turns into steam inside the wood as you press it against the hot metal.
In both cases, softened lignin lets the fibers slide past one another so the board can curve without snapping.
Once you remove heat and let the stock dry on a form, the lignin hardens again. Now the fibers are locked in their new curved position. That is why a properly bent piece of wood keeps its arc even years later. There is one catch, though. Wood wants to move slightly back toward straight as it dries, which people call springback. Forms for steam bending and lamination are often made slightly tighter than the target circle so the final piece relaxes into the correct radius instead of opening too far.
Selecting The Right Wood Species For Circle Bending Projects

Picking wood for a circle bending project is not just about color and price. Some species move beautifully when you bend wood, while others fight you at every step. Long, straight fibers and the right moisture level matter as much as strength.
Some frequently used bending species include:
- White oak and red oak – Favorites for steam bending. Their porous structure lets steam penetrate deep into the board. Boat builders, chair makers, and tool handle makers rely on oak for strong, curved parts that stay solid.
- Ash – Very high strength‑to‑weight ratio and bends into tight arcs while still handling heavy loads, so it often shows up in tool handles and structural curves.
- Maple – Especially hard maple, bends well into more gentle arcs and finishes to a clean, light surface that fits modern furniture.
- Cherry and walnut – Bring rich color and fine grain to curved chair backs, circular shelves, and high‑end interior details.
- Hickory – Extremely tough and can take aggressive bends, but feels harder on tools and may need a bit more steaming time.
- Beech and birch – Respond nicely to steam and are also common in bent plywood, chair parts, and curved frames.
Critical Wood Characteristics For Successful Bending
Species is only one part of the story. You also need the right board inside that species group.
Key characteristics to watch:
- Straight grain – Fibers should run from one end of the piece to the other with no swirls, wild cathedral patterns, or grain that dives out the edge. Holding the board on edge and looking along it in good light makes grain direction easier to see.
- Cut pattern – Quarter‑sawn lumber usually shows tighter, more regular grain lines across the face and tends to stay flatter and more predictable during bending. Plain‑sawn boards can still work, but they often have more grain run‑out, which acts like a pre‑cut notch in the side of your curve.
- Moisture content – Green lumber with more than about 30 % moisture bends very easily. Air‑dried stock in the mid‑teens also works well. Kiln‑dried boards around 6–8 % are noticeably stiffer.
Kiln drying heats the wood enough that the lignin becomes more brittle, so even if you soak the piece again it does not soften quite as nicely. That does not mean you cannot bend kiln‑dried wood, but the failure rate is higher, especially with tight radii.
For most bending methods that use side grain, thickness limits are strict. Thin strips around 1⁄16″ to 1⁄8″ bend far more safely than thick stock. For steam bending of solid boards, anything much over about 1½″ thick becomes difficult without industrial gear. Whenever a project has a tight deadline or uses rare, expensive lumber, it may be wise to pay for bending‑grade stock from a specialty yard.
When To Choose Pre-Cut Wooden Circles Instead Of Bending
Bending your own circles feels satisfying, but it is not always the best choice.
Common reasons to skip bending and go pre‑cut:
- Time – By the time you have wood manufacturing process, built forms, soaked or steamed the wood, bent it, and waited days for it to dry, several evenings in the shop may have passed. Pre‑cut wooden circles from QlycheeCrafts arrive ready to use, which keeps commercial work on schedule and hobby builds from dragging on for weeks.
- Precision – A hand‑bent circle usually has small variations in radius and roundness, even when the technique is solid. QlycheeCrafts uses laser cutting with about 0.2 mm accuracy, so circles from one inch up to around thirty inches in diameter come out consistent enough for joinery, lighting, or machine parts. Matching that level of repeatability with hand tools, even with a router circle jig, takes more time than many projects can spare.
- Production scale – If you are building one chair and enjoy experimenting, bending may feel right. If you build fifty chairs or supply dozens of pendant lights every month, ordering a stack of identical discs or rings is far more efficient than repeating the bending process. When you factor in steamers, forms, clamps, material waste, and the learning curve, the cost per usable bent piece is often higher than simply buying circles from a dedicated manufacturer that already works at volume.
Essential Tools And Safety Equipment For Wood Bending

Before you attempt any method of bending wood into a circle, it pays to think about your kit. The right tools help you bend accurately and reduce broken parts. Just as important, the right safety equipment protects you from heat, steam, and sharp blades. You can set up each method with budget‑friendly gear, and you can upgrade over time if you bend often. Additionally, mastering woodworking techniques for beginners can significantly enhance your ability to create more complex projects. By familiarizing yourself with essential skills, you can build a solid foundation that will support your future endeavors. Whether you’re making a simple chair or an intricate cabinet, these basic techniques will prove invaluable.
Heat Bending Tools And Setup
A hot‑pipe bending station is simple to build from common hardware pieces. The heart of the system is a length of black iron pipe, usually one or two inches in diameter and around six to eight inches long. That pipe mounts to a tee fitting and a flange so you can clamp the stand securely to your bench. A short section of pipe under the tee helps create a sturdy base that will not twist under pressure.
A very important point is that you must stay away from galvanized fittings, since the zinc coating gives off harmful fumes when heated with a torch. Black iron pipe is safe for this purpose once you clean off the oils with medium sandpaper. An end cap with small drilled holes on the far end of the pipe lets hot gases escape and keeps the flame supplied with air. A standard propane torch usually supplies enough heat, though some people use a hotter gas or an electric element instead.
To hold the torch steady you can clamp its body to a wooden block or use a hand screw clamp on the handle so the flame points into the open end of the tee. An infrared thermometer helps you spot‑check the pipe surface so it stays around 200–220 °F. That range softens thin strips without scorching them. For soaking, a capped piece of plastic pipe works very well for long strips, while a plastic tub or even a sink handles shorter ones.
Steam Bending Equipment Requirements
Steam bending takes a bit more planning and materials, but it opens the door to large, structural curves that carry real loads. You need some way to generate steady steam. Many woodworkers:
- Buy a small commercial steamer meant for wall paper removal and connect its hose to a homemade box
- Use a large kettle on a propane burner with a tight lid and a hose fitting in the top
- Set an electric hot plate under a metal pot for small jobs
The steam box itself is usually built from ¾″ exterior plywood or a large, thick‑walled plastic pipe. It needs to be large enough that your workpiece has a couple inches of air space on all sides so steam can reach every surface. A hole near one end receives the steam hose, and several small holes at the other end let condensation drip out and prevent pressure from building. Inside the box, simple wooden dowels or slats support the boards off the bottom.
You also need a solid bending form that matches the circle or arc you want. Many people glue several layers of plywood or fiberboard together and then cut and sand the desired curve into that stack. For thicker pieces a metal compression strap that runs along the outside of the bend helps prevent the outer fibers from tearing as you bring the stock around the form. Finally, you will want a generous collection of clamps, since you need to lock the board tight to the form before it cools.
Safety Protocols That Prevent Injuries
Safety may sound dull, but hot water and steam can hurt you faster than almost any other shop task. Heat‑resistant gloves rated for high temperatures should be on your hands whenever you handle a hot board, a pipe, or anything from the steam box. Steam burns happen in an instant and feel worse than many dry burns, so never reach into a box or near a pipe without protection and eye wear.
Good air flow is just as important. Propane and other fuels release gases that you do not want trapped in a small, closed shop. Work with a door or window open and a fan moving air away from you. Keep a fire extinguisher close by whenever you have a torch running or a burner under a kettle. Never walk away from an open flame or an active steamer, even for a minute.
Method 1 – Steam Bending For Classic Structural Curves

Steam bending is the classic way to form strong curves in solid wood, especially when you work with thick stock for chairs, boat ribs, and structural hoops. When you want a full cut a circle in wood with strong, continuous grain, this method often gives the best strength. It takes the most setup time, but once your box and forms are built you can repeat the process for many pieces.
With steam bending, you heat the entire board with vapor until the lignin softens through its whole thickness. You then have a very short window to pull the board out, press it around a form, and lock it down with clamps and sometimes a metal strap. Once dry, the piece holds a curve that can be part of a circle or even form a complete ring when you join the ends.
Building Your Steam Box And Bending Form
A good steam box seals heat and vapor while giving you full access to the workpiece. For most small shop projects, a box about 8–10″ square inside and 4–6′ long handles chair parts and many medium projects. You can scale up or down from there as long as the board has at least two inches of space around it so steam can move freely.
- Cut the sides, top, and bottom from ¾″ exterior plywood so the glue lines do not separate from moisture.
- Use simple rabbet joints or butt joints reinforced with screws and seal the seams with heat‑resistant caulk.
- Fix one end of the box and give the other a hinged door or removable panel with gasket material or weatherstrip around the edge for a tight but quick‑opening seal.
Drill a hole near the lower end for the steam hose and several smaller holes at the opposite end so water can drain and air can escape. Inside the box, add a series of dowels or cleats across the width to support boards off the floor. Many builders wrap the outside of the box with fiberglass insulation or foil foam board to hold temperature with less energy. Mounting the entire box on a simple stand at hip level makes loading and unloading easier and safer.
The bending form can come from stacked layers of plywood or fiberboard screwed together and cut to shape on a bandsaw. Draw your desired circle or arc on a template first, then trace it to the blank form stack. After cutting, refine the curve with sanding tools until it looks and feels smooth by hand. Mount the form firmly to a base so you can clamp against it without flex. Adding extra blocks or drilled holes around the curve gives more clamping options during the fast part of the bend.
The Critical Steaming Timeline And Process
Steam bending rewards patience with heat‑up time and strict timing once the wood is inside. As a rule of thumb, wood needs about one hour in the box for every inch of thickness:
- ½″ piece → roughly 30 minutes
- 1″ piece → roughly 60 minutes
Very dense species like hickory or oak sometimes benefit from slightly longer times.
Before loading any wood, let the steamer run with an empty box for 15–20 minutes so the interior reaches around 212 °F. You should see a steady stream of vapor slipping from the drain holes at the far end. Lay the boards on the internal supports with a little gap between them if you bend several at once, so steam can reach all faces. For very thick parts you can turn them halfway through to even out heating.
Avoid oversteaming. Leaving stock in too long can weaken fibers and give a mushy texture instead of a crisp bend. Short steaming leaves the inner core stiff, which leads to cracks during the bend.
Executing The Bend – Speed And Technique
Once the steaming time is up, the process turns from slow waiting to a quick, practiced motion. Before you even start the steamer:
- Clamp the bending form to a solid bench.
- Lay out all your clamps in the order you plan to use them.
- Attach the metal compression strap to its end blocks so it is ready to drop in place.
- Ask a friend to help if the piece is large.
When the clock hits the target time, put on your heavy gloves and eye protection. Open the box carefully so hot steam vents away from you. Slide the board out along with the compression strap, then bring them both to the form in one smooth motion. Place the board against the form with the strap on the outside face where tension will be highest.
- Clamp one end firmly, usually with two or three clamps so it cannot slip.
- Begin to pull the free end of the board around the form, adding clamps every few inches.
- Use steady, even pressure rather than quick pulls. The strap must stay tight so the outside fibers stay in compression instead of stretching.
This step should take no more than about a minute or a bit more, since the wood begins to stiffen as soon as it leaves the box.
Common problems to avoid:
- Hesitating halfway so the section cools, which causes cracking when you move again
- Using too few clamps, which lets flat spots appear between them
- Ignoring early signs of tearing on the outside of the curve
If you hear fibers tear or see checks open up on the outside of the curve, stop and examine the piece. Some shallow surface tearing can sometimes be sanded away, but deep cracks usually mean the board has failed.
Drying Springback And Creating Complete Circles
Once the piece is fully clamped, the work shifts back to patience. The wood must dry completely to hold its new shape.
- Thin parts often need at least 2–3 days on the form.
- Thicker stock can benefit from a week or more, depending on your shop humidity.
A small fan nearby can help move moist air away from the surface.
When you remove the clamps, expect a little opening of the arc. Many people plan for around 5–10 % springback by making the form slightly tighter than the final circle they want. A moisture meter can help you check that the board has dropped back down near 8–12 % content before you unclamp it, which means it is stable enough to keep shape.
To make a full ring, you can:
- Cut the ends with a long diagonal scarf joint three or four times longer than the thickness of the piece
- Glue the joint with epoxy
- Clamp it in a simple circular jig to keep alignment while the epoxy cures
Method 2 – Heat Bending With A Bending Iron For Tight Radius Curves
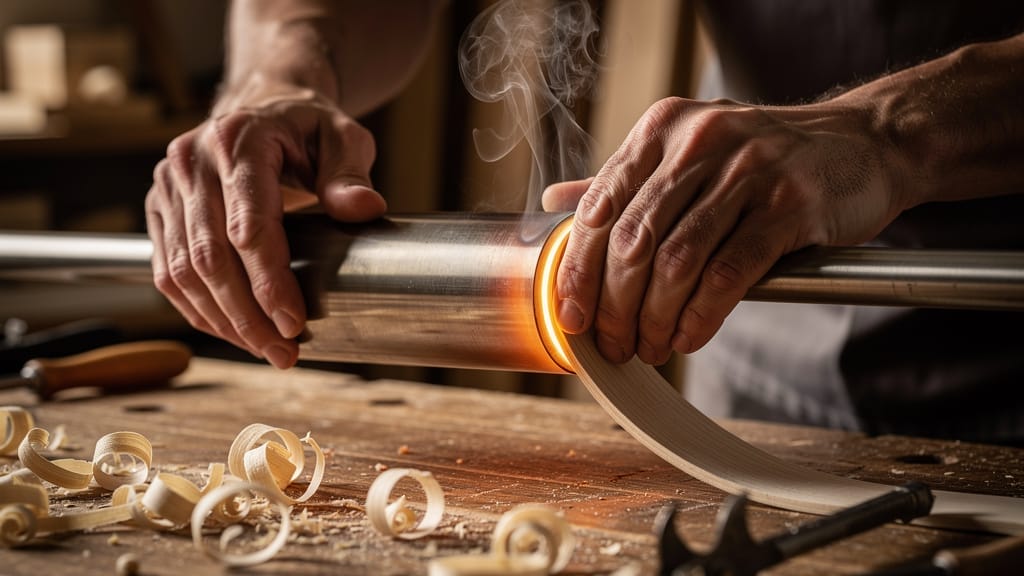
Heat bending with a pipe or bending iron feels very different from steam work. Instead of heating the entire piece at once, you heat and shape small sections of thin strip stock on a hot metal surface. This method shines when you need tight curves for instrument sides, small furniture parts, wooden rings, or decorative strips. It also gives you strong visual feedback, since you see and feel the wood move as you work.
Because the strips are so thin, you do not need a full steam box or long drying times. You soak the strips in hot water, then move them back and forth on the hot pipe until they relax into the curve you want. Once the shape looks right, you clamp the strip to a template and let it cool. Springback is usually small, especially when the strip later becomes part of a laminated stack.
Constructing Your DIY Bending Iron Jig
Building a simple bending station costs less than many other shop tools and works very well for most hobby and small professional work.
- Start with a black iron pipe around one inch in diameter and about six inches long, which acts as your bending surface. Clean it well with sandpaper to remove the dark coating and oils from the mill so they do not smoke or stain the wood.
- Screw this pipe into a tee fitting so it sticks out horizontally. The bottom of the tee connects to a short nipple and a flat flange, which serves as the base you clamp or screw to your bench.
- On the far end of the horizontal pipe, screw on an end cap with two or three small holes. These let hot gases flow out so the flame inside does not starve for air.
Mount the flange to a heavy board or directly to your bench with strong clamps or lag screws. Then set up a propane torch so the flame points into the open leg of the tee. A hand screw clamp holding the torch body to a stand or block keeps it steady. Turn on the flame and wait a few minutes for the pipe surface to climb into the correct temperature range, which you can confirm with an infrared thermometer held a few inches away.
Wood Preparation And The Critical Pre-Soaking Phase
Thin, even strips are the foundation of safe heat bending. You usually resaw them on a bandsaw and then plane or sand them down to about ⅛″ or less. For very tight curves or practice work, you might go as thin as 1⁄16″. Keeping the thickness uniform along the length matters more than hitting an exact number, since thick spots tend to resist and crack.
Before bending, you soak these strips in hot water so they pick up internal moisture. This water later turns to steam inside the wood as you press the strip to the hot pipe, which softens the lignin from the inside. Adding a couple drops of dish soap helps the water move into the fibers faster, though it is not strictly necessary. A soak of at least an hour works for thin pieces, and an overnight soak gives very even results.
For long strips that do not fit in a sink or tub, you can stand a piece of plastic pipe upright, cap the bottom, and fill it with hot water. Once the soaking time is up, lift each strip out and wipe the surface dry with a cloth so you are not dripping water onto the torch or floor. Make a habit of checking grain direction before soaking, since strips with grain that runs off the edge rarely survive a tight bend.
The Heat Bending Technique – Step By Step
Good results with a bending iron come from smooth, patient motion more than from strength. Start by making a template of the curve or circle you need from thin plywood or fiberboard. This pattern sits beside the pipe and later holds the strip as it cools, so draw it carefully to match the radius you want. Clamp it down before you turn on the torch so your station stays organized.
Once the pipe reaches around 200–220 °F, put on your gloves and bring over one soaked strip:
- Press a short section of it firmly against the pipe at the point where you want the bend to start.
- Rock the strip back and forth over a couple inches of pipe, keeping steady pressure. You hear a small sizzle as water inside the wood heats and turns to vapor.
- As that section begins to relax, gently increase the pressure to coax it into a curve. Then slide the strip a little farther along and repeat the rocking motion so more of the length follows the same arc.
Continue this pattern, always moving slowly and watching for any sign of cracking. If a section seems to dry out and stiffen before it reaches the right curve, you can dab it with a damp sponge and return it to the pipe.
Keep checking the strip against your template. When the shape matches closely along the whole length, move it straight onto the pattern while it is still hot. Clamp it in three or more places so the curve holds exactly where you want it. Let it cool and dry for several hours, or overnight when possible, before you remove the clamps. At that point the strip should keep its curve with very little springback.
Finishing And Addressing Scorch Marks
Small areas of darkening on the surface are very common with heat bending. As long as the wood is only lightly browned and not deeply charred, you can clean it up later. Wait until the strip is fully dry, then sand the browned areas with medium grit paper until the color blends with the rest of the surface. Follow with a finer grit for a smooth final texture.
Because heat‑bent strips are thin, avoid heavy grinding that changes their thickness. Many builders reserve the show face for the side that never touched the pipe so any small marks are hidden inside a lamination. For interior parts or pieces that receive an opaque painted finish, minor scorching rarely matters. After cleaning up the surface, you can trim the edges with a block plane or spokeshave and move on to glue‑ups or final assembly.
Method 3 – Kerf Bending For Controlled Curves In Panels

Kerf bending takes a different approach from steam and heat methods. Instead of softening wood, you cut wood in the inside face of a board or panel so it can flex. Those slots, called kerfs, act like tiny hinges that close as you pull the panel into a curve.
Because you are removing material, a kerfed piece is not as strong as a solid bent board and should not handle major loads without reinforcement. Still, when you need a smooth curve in a desk front, a reception counter, a wall niche, or a wrapped column, kerf bending is fast, clean, and does not need any steam or flame. Most of the work happens at the table saw, with careful layout and consistent cutting.
Understanding Kerf Bending Principles And Applications
At its core, kerf bending works by allowing the inside of a board to compress without crushing fibers. A normal board resists a bend because the inside face must shorten while the outside face stretches. By cutting many parallel slots on the inside, you create empty spaces that can close up as the board curves, which removes most of the compression stress.
This method shines with sheet goods:
- Curved cabinet fronts
- Arched openings
- Wrapped soffits and columns
These often rely on kerfed plywood or fiberboard that later gets covered with veneer or solid edging. The technique also suits thick solid boards where you only ever see the outside face and want a smooth arc without building a full steam setup. In that case the kerfed face stays hidden against a wood wall decor or inside a structure.
There are limits you must respect. A kerf‑bent part has many cuts running through its thickness, so it cannot handle the same loads as a solid member. It works best in non‑structural roles or where it is backed by a solid frame. The slots also look rough, which means you either cover them with another layer of wood, fill them with glue mixtures, or design the project so that face never shows. In exchange, you get very predictable curves with simple tools.
Calculating Kerf Spacing And Depth For Your Curve
Good kerf bending starts with a little math and a lot of testing. The main variables are:
- Thickness of your panel
- Radius you want
- Depth of the slots
- Distance between cuts
Together they decide how easily the board bends and how smooth the outside face appears. Tighter curves generally need deeper and more closely spaced slots than gentle arcs.
A common starting point is to leave about 1⁄16″–⅛″ of material on the outer face that stays uncut. You set your saw blade height so it stops just short of that thickness. On a ¾″ plywood panel, that might mean a cut depth around ⅝″. Too shallow and the panel barely flexes. Too deep and the outer skin can split when you form the curve.
For spacing, many builders begin with ½″ gaps between kerfs for medium curves. You can:
- Mark the layout on the panel, or
- Set up a stop block on your sled fence so you can index each cut quickly.
Tighter curves might need ¼″ spacing or even closer gaps so the outside face does not break into small flats. Before you commit to a finished panel, make several small test pieces from the same material with different depths and spacings, then bend each one by hand and compare how they behave.
Safe And Accurate Kerf Cutting Techniques
Since kerf bending depends on many repeated cuts, accuracy and safety at the table saw are vital. A crosscut sled gives you a stable platform and helps keep the panel square to the blade during every pass. It also keeps your hands farther from the teeth than a bare fence and miter gauge. Install a zero‑clearance insert so the thin webs of wood between kerfs do not catch or tear out as you push the piece.
Set your blade height carefully with a gauge block or test cuts on scrap so you reach the desired depth without cutting through the face veneer. Once the depth is correct, lock the height and do not adjust it during the job. For consistent spacing you can clamp a stop block to the sled fence at the right distance from the blade. After each cut, slide the panel until the last kerf touches the stop, then make the next pass.
Move at a steady, moderate feed rate so the blade does not burn the wood or wander. As you near the last few inches of a cut, use a push stick or block to keep your fingers clear of the blade path. Ear and eye protection stay important here, since you may run dozens of cuts for a single panel. With a little rhythm, you can produce a neat row of matching kerfs that give a clean bend later.
Reinforcing And Finishing Kerf-Bent Pieces
Once you have bent a kerfed panel around a form or frame, you must decide how to lock it into shape and bring back strength.
Options include:
- Glue and sawdust fill – Fill the open slots with a thick mixture of wood glue and fine sawdust while the panel sits in its curved position. When this hardens, it forms a solid back that helps the panel keep its arc and handles light loads well.
- Epoxy fill – For stronger work, you can trowel epoxy into the kerfs. Many epoxies stay slightly flexible and bond strongly to wood, which lets the back of the panel share stress more evenly. After the filler cures, you can sand any overflow flush.
- Backing layer – Glue a thin sheet of plywood or solid veneer over the kerfed face while it is bent. This hides every slot and adds another full layer of wood, greatly improving stiffness.
Once reinforced, you can trim, rout, and sand the panel edges to final size just like any other curved part.
Method 4 – Cold Bent Lamination For Maximum Strength And Stability

Cold bent lamination takes thin, flexible strips and glues them together over a form to create a thick, strong curved piece. Instead of using heat to soften lignin, you rely on the natural flexibility of thin stock and the holding power of modern adhesives. When the glue cures, the stack behaves like a single solid piece with continuous grain that follows the curve.
This method is common in high‑end furniture and architectural millwork when you need repeatable, very stable curves. You can build chair backs, table bases, handrails, circular frames, and more from boards that would never bend as a single thick piece. The process demands careful preparation of strips, accurate forms, and careful clamping, but you do not need steam, flame, or special heating gear.
Why Lamination Produces Superior Curved Components
Laminated curves offer several strength advantages over single bent boards:
- Because you slice one board into many thin strips, any small knot or grain deviation in one layer is backed up by cleaner grain in the layers around it.
- When you glue all those layers together, loads spread across the whole thickness rather than concentrating at one weak spot, which often makes the final piece stronger than a solid board of the same size.
- Once the glue cures, it locks the fibers in place along the curve. There is very little springback because each layer wants to stay in the position where it hardened.
- Laminated parts react less to seasonal humidity changes, since the many glue lines and thin layers resist warping and twisting.
For long arcs like handrails and large wood rings durable, that stability over years is very important. Very tight radii become possible simply by using thinner strips and more of them. You can even combine species in different layers to highlight lamination lines as a design feature. When you need several identical curved parts, a single good form lets you produce them again and again with very consistent results.
Creating Precision Two-Part Bending Forms
Strong lamination starts with a solid form that matches your intended curve. A two‑part form, with one convex half and one concave half, holds the stack of strips between them and spreads clamping pressure across the whole surface. This prevents high spots and gaps that can show up later as weak areas or visible lines.
To design the form:
- Decide the inner radius and final thickness of your laminated piece.
Example: For a ½″ thick hoop with a 10″ inner radius, the convex form follows a 10″ curve.
- The concave half must sit ½″ farther out, at a 10½″ radius, so the glued stack fits snugly between them.
- Draw the desired curve full size on heavy paper or thin plywood so you can trace it accurately to the form material.
Medium density fiberboard and high‑grade plywood are popular for forms because they stay flat, cut cleanly, and accept screws well. Glue or screw several layers together until the stack is thick enough to resist bending under heavy clamp pressure. Rough cut the curve on a bandsaw a little outside your line, then refine to the line with sanding tools. Take time to smooth any bumps, since every small lump will transfer into the laminated piece. Mount both halves of the form to sturdy bases and coat their surfaces with paste wax or clear tape so dried glue does not stick.
Milling Strips And Preparing For Glue-Up
The quality of your strips decides how easy the glue‑up feels and how clean the final curve appears. Choose boards with straight, even grain and few defects. Resaw them on a well‑tuned bandsaw using a tall fence and a sharp, wide blade to keep cuts straight. Aim for strip thickness between 1⁄16″ and ⅛″, depending on how tight the curve is. Tighter circles need thinner strips that bend more freely.
As you slice the board, number each strip in order from one face to the other. This keeps the grain and color sequence intact when you reassemble them, which gives the finished piece a continuous look instead of a random patchwork. After resawing, lightly sand or plane the surfaces to remove saw marks and bring all strips to a consistent thickness. Even small thickness differences can show up as gaps along the edges of the lamination.
Before introducing glue, perform a dry run. Stack the strips in order, place them on the convex half of the form, and bring the concave half down with clamps. Check that every strip reaches the ends of the form and that the stack bends without trouble. Use this practice run to plan your clamping order and confirm that you have enough clamps and cauls ready for the real glue‑up.
The Glue-Up Process – Timing And Technique
When glue enters the picture, timing becomes more important, but you still want calm, steady movements instead of rushing. Pick an adhesive with enough open time for the number of strips and the size of the form. Many woodworkers use aliphatic resin glues with extended working time, while others choose epoxy or urea‑based products for large, critical pieces. Read the label so you know how long you have before the glue skins over.
- Lay out the numbered strips in order on a clean surface beside the form.
- Using a small roller or brush, spread a thin, even coat of glue on one face of each strip except the last one in the stack. Aim for full coverage without big puddles that will just squeeze out.
- As you finish each strip, flip it glue side up in a neat pile so the numbers remain in order.
Once all surfaces are coated, lift the stack onto the convex form, keeping the ends lined up. Place the concave half on top and begin clamping at the center of the curve. Work your way toward both ends, adding clamps every few inches and tightening them just enough to see a small, consistent bead of glue appear along the edges. Use wooden cauls under the clamp jaws where needed to spread pressure and protect the form. Keep an eye out for any strips that try to slide out of position and nudge them back while the glue is still wet.
Curing Cleanup And Final Dimensioning
After all the clamps are in place, let the lamination sit undisturbed for at least the minimum cure time listed for your glue. Many makers prefer to leave parts in the form overnight or for a full day to give the bond time to gain strength. Releasing clamp pressure too soon can let the layers shift or create weak joints, so patience pays off here.
When you remove the clamps and lift the piece from the form, you usually find beads and ridges of squeezed‑out glue along the edges. Scrape these off with a sharp chisel or hand scraper before they become rock hard. Then you can joint or sand the edges straight, taking light passes so you do not cut deeply into the outer layers. A thickness planer or wide sander helps clean and smooth the faces if needed.
A well made lamination looks like a solid curved board at first glance, with only thin lines marking the layers. The curve should match your design very closely, with little or no springback. From here you can cut the piece to length, add joinery, and build it into furniture, fixtures, or architectural details just like any other shaped component.
Professional Alternatives – Precision-Cut Wooden Circles From QlycheeCrafts
Sometimes the smartest way to get a perfect circle is not to bend wood at all. For many commercial shops and even serious hobbyists, buying precision‑cut wooden circles saves hours of setup and eliminates the risk of broken parts. This is where QlycheeCrafts comes in as a focused supplier of circular wood components. In addition to offering precision-cut wooden circles, QlycheeCrafts also provides tools specifically designed for cutting circles in wood projects. This combination allows both amateurs and professionals to explore new creative avenues without the frustration of traditional methods. With their high-quality materials and reliable tools, every project can achieve a level of precision that truly stands out.
Instead of wrestling thick boards around forms, you can order discs, wholesale wooden circles already cut to your exact diameter and thickness. QlycheeCrafts uses modern cutting and sanding equipment, including laser systems with about 0.2 mm accuracy. That level of precision means each circle in a batch matches the next extremely closely, which pays off when you build sets of tables, chair bases, lamp bodies, or decorative wall pieces.
The company offers a wide range of sizes from custom wooden rings to discs up to around thirty inches across, with common thicknesses such as ⅛″, ¼″, and ½″. Materials include yellow poplar and beech that finish cleanly and take paint or stain well. Surfaces arrive smooth and ready for further machining, engraving, or finishing, which cuts down prep time in your own shop.
For brands, interior studios, and product makers, QlycheeCrafts also supports custom orders. You can specify exact diameters, center holes, engraving patterns, and even surface treatments to match your line. Because they operate as a B2B‑focused manufacturer with a dedicated design and engineering team, they can keep unit costs down while still holding tight tolerances. That lets you focus on design, assembly, and finishing instead of routing circles or fighting tricky bends.
FAQs
What Is The Easiest Way To Start Learning How To Bend Wood Into A Circle?
For most people, starting with thin strips on a hot pipe is the least stressful entry point. You can resaw inexpensive species like poplar into narrow strips, soak them in hot water, and practice bending around simple templates. Because the strips are so thin, they bend with little force and break less often than thick boards in a steamer. Once you get a feel for how the wood softens and moves, you can apply that experience to steam bending and lamination.
Which Bending Method Gives The Strongest Circular Parts?
When you need high strength and long‑term stability, cold bent lamination is hard to beat. Gluing many thin strips together over a form creates a part where grain follows the curve and glue lines spread stress across the whole thickness. A well designed laminated ring or arc will often handle loads better than a single steam‑bent board of the same size. Steam bending also produces strong parts, but it comes with more springback and a higher chance of failure during the bend.
Can You Steam Bend Kiln-Dried Wood Successfully?
You can sometimes steam bend kiln‑dried wood, but it is more difficult and the failure rate is higher than with green or air‑dried stock. Kiln drying stiffens the lignin and makes it less responsive to heat and moisture, so even after soaking, the inner core may stay stubborn. If you must use kiln‑dried boards, choose very straight grain, avoid tight radii, and expect to lose some pieces to cracking. Whenever possible, use greener stock or switch to lamination for tight or critical curves.
How Do You Stop Wood From Cracking While Bending?
Several habits reduce cracking during bending:
- Choose straight‑grained, defect‑free stock and keep strip thickness within recommended limits for the method you use.
- Make sure the wood has enough moisture, either from soaking or steaming, so the inner fibers soften.
- Use compression straps on the outside face during steam bending so fibers stay in compression instead of stretching.
- Bend with smooth, steady pressure rather than sharp jerks and clamp the piece to a form quickly so it does not cool mid‑bend.
When Should You Skip Bending And Order Circles From A Supplier?
If your project calls for many identical circles, very tight deadlines, or tolerances that leave no room for flat spots or springback, buying from a specialist like QlycheeCrafts makes sense. Pre‑cut circles also help when you lack space for a steamer, do not want open flame in your shop, or work with species that are hard to bend. In those cases you gain time, consistency, and peace of mind by starting with finished discs and focusing your effort on design and assembly.
Conclusion
Curved work can look mysterious at first, but once you understand how wood fibers and lignin behave under heat, moisture, and glue, the process turns into a set of clear steps. Steam bending, hot‑pipe bending, kerf cutting, and cold lamination each give you a different path for how to bend wood into a circle, and each one fits its own range of sizes, radii, and workloads. By matching your method to the species, thickness, and purpose of the piece, you avoid most cracked boards and disappointing shapes.