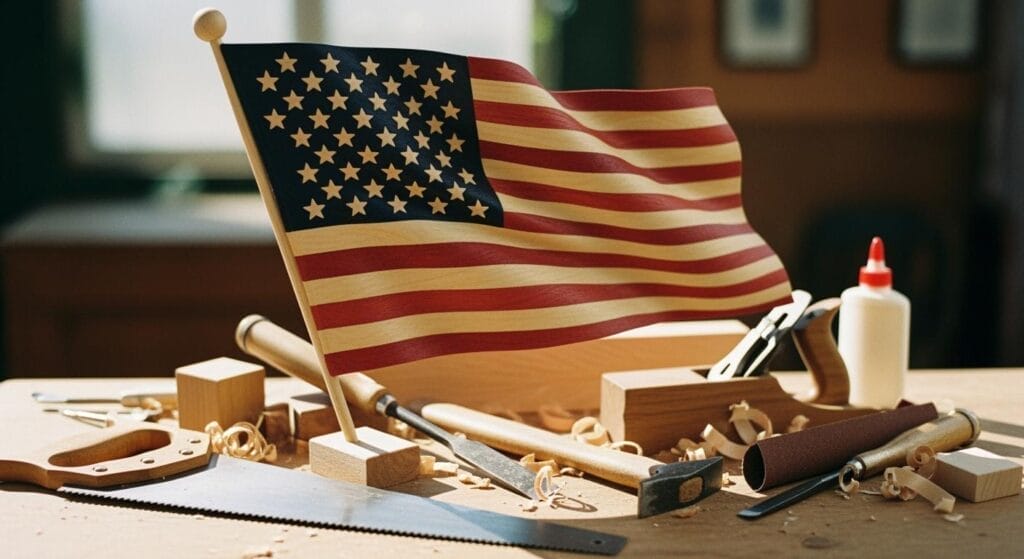
You can make a special, handcrafted patriotic display. This guide teaches you how to build a three-dimensional waving wood American flag. We divide the process into simple, easy steps. This helps you get a professional-looking result. You can show it off with pride.
Key Takeaways
- Gather the right tools and materials. This includes wood, saws, glue, and finishes. Proper selection ensures a good start.
- Cut and shape the wood carefully. Create a wave template. Use a jigsaw to cut the wave shapes into each stripe. This makes the flag look like it is waving.
- Assemble the flag with precision. Glue the wavy stripes together. Attach the union section firmly. Sand the entire flag until it is smooth.
- Finish and protect your flag. Apply red, white, and blue paints or stains. Add stars to the blue union. Apply a clear coat to protect the wood and paint.
Gather Tools and Materials for Your Waving Wood Flag

Select Wood for Stripes and Union
You need to choose the right wood for your project. Pine is a popular choice. It is easy to cut and shape. Cedar also works well. It offers a beautiful grain and natural resistance. Plywood is another option for a stable base. You can even repurpose 2×4 lumber. This is a smart, cost-effective way to make a waving wood flag. When selecting your wood, always pick straight boards. This helps ensure your flag looks professional. You will use separate pieces for the stripes and the union section. Consider the grain direction for a better final look.
Essential Tools for Cutting and Shaping
Gather your essential tools before you begin this diy woodworking project.
- A miter saw helps you make precise, straight cuts for your wood pieces.
- A jigsaw is crucial for creating the unique wave shapes.
- You might use a router to add decorative edges or smooth curves.
- A sander will prepare your wood for finishing. It makes the surface smooth.
- Clamps are necessary to hold your wood securely while the glue dries.
These tools are vital to build your stunning handmade American flag. They help you achieve that ultra-realistic wavy design.
Adhesives, Fasteners, and Finishing Supplies
You need materials to assemble and finish your flag.
- Wood glue creates strong bonds between your wood pieces.
- Brad nails add extra reinforcement, especially for the union.
- For finishing, you will use stains or paints. Choose vibrant colors for the red, white, and blue stripes.
- You will also need a clear coat for durability. This protects your finished flag from the elements. It ensures your diy woodworking project lasts for years.
This step prepares you for how to make a waving wooden flag. You will create a sculpture that looks like an actual flag.
Prepare and Cut Wood for Your Flag Stripes

Determine Flag Dimensions and Stripe Widths
First, decide the overall dimensions for your waving wood American flag. This choice affects the final look. A common flag ratio is 1.9 to 1 (length to height). For example, a 38-inch long flag will be 20 inches tall. You will have 13 stripes. Divide the total height by 13 to find each stripe width. This ensures your flag has correct proportions. Write down these measurements. They guide all your cuts.
Cut Wood Strips to Length
Next, cut your wood pieces to the determined length. A miter saw makes precise cuts. For a more pronounced wavy effect, cut each wood piece in half lengthwise. This gives you thinner pieces. Thinner pieces bend and shape more easily. This step is crucial for how to make a waving wooden flag that truly stands out. You will need enough pieces for all 13 stripes.
Prepare the Union Section
The union section holds the stars. You need to cut this piece to size. The union typically covers the top seven stripes. Its length usually extends about two-fifths of the flag’s total length. Measure and mark your chosen wood for the union section. Use your miter saw to cut this piece. Ensure its edges are straight and clean. This piece will fit snugly against your prepared stripes. This careful preparation helps you build a stunning handmade American flag.
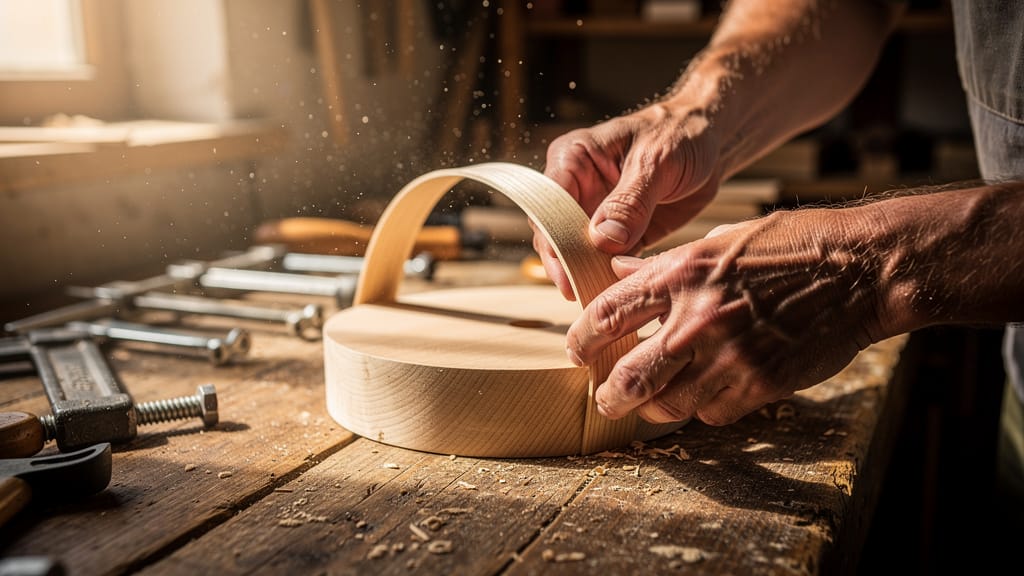
Create the Waving Effect for Your Wooden Flag

Design and Template the Wave Contours
Now, you will give your wood flag its unique wave. First, create a template for your wavy design. You can hand-draw a random wave line on a piece of cardboard or thin plywood. Make sure the curve is gentle and flowing. This template will guide your cuts. You want a natural wave that makes your flag look like it is billowing in the breeze. This step is key to how to make a waving wooden flag that truly stands out.
Cut Wave Shapes into Wood Strips
Next, you will transfer your wave design to each wood strip. Place your template on a strip and trace the wave line. Repeat this for all your stripes. Now, use a band saw or a jigsaw to carefully cut along these lines. A jigsaw works well for these curves. Take your time with each cut. You are shaping individual stripes to create the overall wavy effect. This method helps you make a waving wood American flag with an ultra-realistic wavy design.
Smooth and Refine Waved Edges
After cutting, your wood stripes will have rough edges. You need to smooth these edges. Use a sander or sandpaper to carefully sand all the cut curves. Start with a coarser grit sandpaper to remove any major imperfections. Then, switch to a finer grit to make the edges very smooth. This refining process is important. It makes your wavy wooden American flag look professional. Smooth edges also help the flag look like an actual flag billowing. This attention to detail will make your diy woodworking project truly impressive.
Assemble and Refine Your Waving Wooden Flag

Arrange and Glue Stripes in Waving Pattern
You have cut your wavy wood stripes. Now, you will bring your flag to life. Lay out all your stripe pieces on a flat surface. Arrange them in the correct order. Make sure the wave patterns align to create a continuous, flowing curve. This is where your ultra-realistic wavy design truly takes shape. Apply a generous amount of wood glue to the edges of each stripe. Press them firmly together. Use clamps to hold the wood pieces tightly while the glue dries. Proper clamping is very important. It ensures strong bonds and minimizes gaps. Wipe away any excess glue immediately. This prevents problems later when you finish your flag. Check for any small gaps between the stripes. You can fill these with wood filler if needed. This step is crucial for a seamless look.
Securely Attach the Union Section
Your stripes are now one solid piece. Next, you will attach the union section. This is the blue field where the stars will go. Position the union piece in the upper left corner of your assembled stripes. Make sure it aligns perfectly with the top seven stripes. Apply wood glue to the back of the union section. Press it firmly onto the stripes. For extra strength, use brad nails to secure the union in place. Drive the nails from the back of the flag or carefully through the front. If you nail from the front, make sure the nail heads are flush with the surface. This creates a stunning handmade American flag. It will have a strong and durable construction.
Sand the Entire Flag Smooth
Your waving wood American flag is now assembled. It is time to smooth it out. Start sanding the entire flag. Use a random orbital sander for best results. Begin with a coarser grit sandpaper, like 80-grit. This removes any remaining glue residue, uneven spots, or minor imperfections. Work your way up to finer grits, such as 120-grit, then 180-grit, and finally 220-grit. Each sanding step refines the surface. It prepares the wood for stain or paint. Pay special attention to the edges and the curves of the wave. You want a perfectly smooth surface. This will make your diy woodworking project look professional. A well-sanded surface ensures the finish adheres properly. It also makes the flag feel great to the touch. This step helps your sculpture that looks like an actual flag truly shine.
Finish and Protect Your Waving Wooden Flag

Apply Base Coats and Add Stars
You have assembled your wavy wooden American flag. Now, you will apply the finish. First, apply your base coats. Use red paint or stain for the red stripes. Then, apply white paint or stain for the white stripes. You can use painter’s tape to create clean lines between colors. This ensures a crisp look. Apply blue paint or stain to the union section. Let each coat dry completely before applying the next. Next, add the stars to the blue union. You can use a stencil for this step. Place the stencil on the union and paint the stars white. Alternatively, you can carve the stars into the wood for a more textured look. This creates a stunning handmade American flag.
Consider Wood Burning for Rustic Appeal
You can add a unique touch to your flag with wood burning. This gives your diy woodworking project a rustic appeal. Use a wood burning tool to create patterns or darken areas. You can burn the lines between the stripes. This enhances the wave effect. It makes your flag appear to have more depth. If you burn near glued areas, use painter’s tape. Cover the tape with HVAC tape. This prevents the glue from sticking to the burning tool. This step makes your flag truly stand out. It gives your sculpture that looks like an actual flag more character.
Apply a Protective Clear Coat
Your flag needs protection. Apply a clear coat for durability. This protects the wood and paint from damage. It also makes your flag last longer. You can choose from different types of clear coats. Polyurethane or spar urethane work well for outdoor display. Apply several thin coats. Lightly sand between coats with fine-grit sandpaper for a smooth finish. This final step ensures your waving wood American flag maintains its beautiful look. You can proudly show your finished flag on your wall. It will look like an actual flag billowing in the breeze.
Conclusion
You now have a unique, handcrafted waving wood American flag. Feel happy about this DIY woodworking project. You started by cutting wood. You ended with a beautiful finish. Now, display your flag with pride. It shows your skill and patriotism. Building this sculpture that looks like an actual flag is very rewarding.
FAQ
What kind of wood should I use for my waving wood American flag?
You can use pine, cedar, or even repurpose 2×4 lumber. Selecting straight boards helps your flag look best. Each wood type offers a unique grain and finish.
How do I create an ultra-realistic wavy design for my flag?
You trace a wave curve onto each wood stripe. Then, you carefully cut the shape with a jigsaw. Smooth the edges well. This step makes your flag look like an actual flag billowing.
What is the best way to finish my wavy wooden american flag for outdoor display?
Apply a clear coat for durability, like spar urethane. This protects your wood from weather. It helps your stunning handmade American flag last longer.
Can I make this flag without a planer?
Yes, you can. You can buy pre-milled wood or sand down the rounded edges of 2x4s. This takes more effort but still lets you build your waving wood American flag.