We’ll guide you through how to make wooden hair sticks using select hardwoods like oak or maple for ideal durability. Start by choosing dry wood pieces that are no thicker than the width of your index finger. Then, shape them through carving or lathe work.
We sand progressively to achieve an ultra-smooth finish and apply non-toxic finishes, such as pure linseed oil. Once you’ve mastered these basics, we’ll explore custom design options and professional production techniques.
Key Takeaways
- Select hardwoods like oak, maple, or cherry, and avoid sap-heavy evergreens for durability and aesthetic appeal.
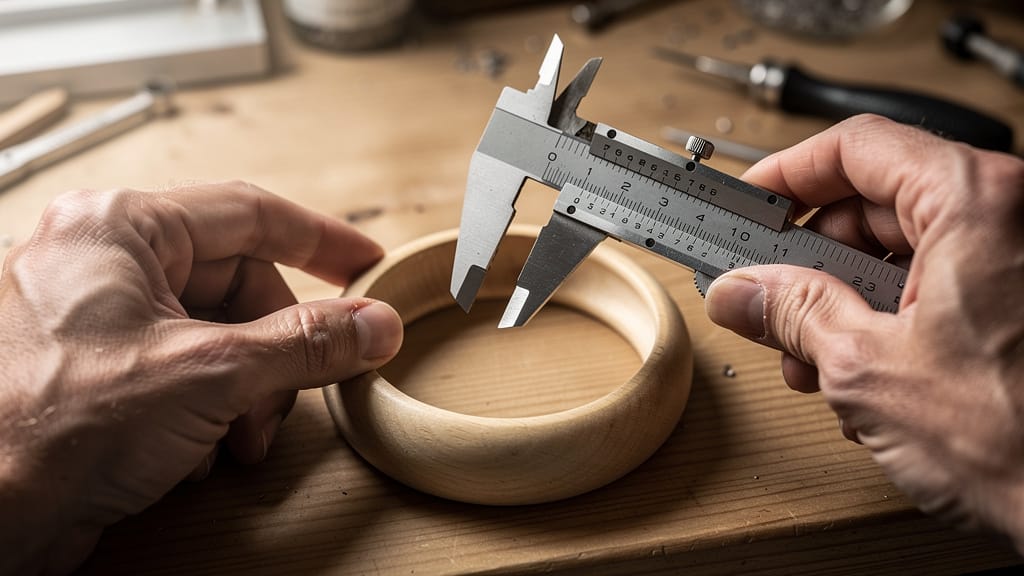
- Cut the wood into dowels that are no thicker than an index finger, ensuring each piece is firm and dry.
- Shape the wood through carving or lathe work, focusing on tapering the tips to prevent hair snagging.
- Sand progressively through different grits until achieving an ultra-smooth surface safe for scalp contact.
- Apply natural finishes like linseed oil or light varnish, ensuring complete curing before use.
Materials Selection: Choosing the Right Wood

When selecting wood for hair sticks, we want to focus on hardwoods like apple and cherry. They offer both durability and natural beauty, while avoiding sap-heavy evergreens that can compromise our finish.
Common Woods Used
Three main categories of wood are suitable for crafting hair sticks: traditional hardwoods, bamboo, and select softwoods. When choosing common woods, we should prioritize durability and workability.
Oak and maple lead our hardwood options. They offer exceptional strength and resistance to bending. Bamboo provides a perfect balance of flexibility and lightweight properties.
| Wood Type | Durability | Best Features |
|---|---|---|
| Oak | High | Strong / Rigid |
| Maple | High | Dense / Smooth |
| Bamboo | Medium | Light / Flexible |
| Pine | Low | Easy to Carve |
| Green Wood | Very Low | Avoid Use |
Remember to select pieces that match the width of the index finger for optimal handling.
Surface Treatments and Finishes
Selecting the proper surface treatment begins with understanding the wood’s characteristics. For wooden hair sticks, we’ll want to achieve a smooth finish that’s both durable and safe against the scalp.
When working with finer-grained woods like maple or birch, we start by sanding progressively to remove any rough spots.
We recommend using non-toxic finishes such as pure linseed oil. They penetrate the wood fibers while maintaining a natural look.
For added protection, apply a light coat of varnish. However, ensure it’s fully cured before use to prevent any transfer to hair or skin.
Design and Prototyping: From Concept to Sample

Creating beautiful wooden hair sticks begins with a solid design and prototyping phase.
We’ll start by sketching our design on paper using a pencil, carefully considering both functionality and aesthetic appeal. Next, we’ll select appropriate wood – harder varieties like oak offer durability, while softer ones like pine are easier to carve.
Using a crafting knife, we’ll create a prototype based on our design, focusing on precise shaping of the ends.
We’ll test the prototype in actual hairstyles, making adjustments for comfort and performance. Throughout this process, we’re documenting each step and modification to refine our technique for future projects.
How to Make Wooden Hair Sticks: A Workshop Flow

Let’s explore the essential steps in our hair stick production workflow, beginning with raw material preparation and initial shaping through carving or lathe work.
We’ll progress methodically through multiple sanding stages to achieve an ultra-smooth surface, paying special attention to creating a perfectly tapered tip that won’t snag hair.
Finally, we’ll cover proper finishing techniques using natural oils, waxes, or lacquers to seal and protect the wood while enhancing its natural beauty.
Rough Cutting and Blank Preparation
Begin our hair stick journey by gathering suitable twigs during a nature walk. Look for pieces that measure slightly thicker than the index finger and extend at least two inches beyond the intended final length.
Using loppers or hand pruners, cut the selected twigs, focusing on dry, dead wood for optimal carving results.
Next, we’ll carefully strip the bark using a knife, working away from our bodies.
We’ll then trim the twigs to their final length and carve one end into a blunt point while rounding the other.
Shaping (Lathe Work, CNC Routing, Hand Carving)
Once our blanks are prepared, we’ll explore three distinct shaping methods: hand carving, lathe work, and CNC routing.
For hand carving, we’ll use a whittling knife to carefully taper one end, maintaining steady control to create a blunt point that won’t snag hair.
Lathe work offers precision by spinning the wood while shaping it with chisels, allowing for intricate designs.
CNC routing provides computer-guided precision and pattern replication.
Sanding, Polishing, and Tip Finishing
Transforming our shaped hair sticks into polished accessories requires systematic progression through increasingly fine sandpaper grits.
We’ll start with coarse sandpaper to smooth initial contours, then switch to medium grit to refine edges and tackle hard-to-reach areas.
For that luxurious finish, we’ll use fine sandpaper followed by a nail buffer to achieve an ultra-smooth surface.
Surface Finishing
After completing the initial sanding process, we’ll explore three primary finishing options for your wooden hair sticks: oil, lacquer, and wax.
Let’s start with oil finishes like linseed or walnut. We’ll apply thin layers to enhance the wood’s natural color while creating a protective barrier against moisture.
For lacquer, we’ll work in a well-ventilated area, applying multiple thin coats for a durable, glossy finish.
Wax offers a softer, more traditional feel but needs regular maintenance.
Before applying any finish, we’ll make certain the surface is smooth with fine sandpaper.
For the best results, we’ll let each layer dry completely before adding the next.
Quality Control Checkpoints and Defect Rates to Expect
While creating wooden hair sticks requires skill and patience, maintaining consistent quality standards through systematic checkpoints will help minimize defects in your finished pieces.
We’ll start by inspecting each harvested twig for breaks and bends, then measure it against our standard stick template.
After bark removal, we perform a quality check to guarantee no surface blemishes remain.
During the sanding inspection phase, we carefully examine for rough spots or splinters that could catch hair.
Our final assessment focuses on uniformity and craftsmanship, evaluating the applied finish and overall consistency of design.
These checkpoints typically reveal a 10-15% defect rate, which we’ll correct before final approval.
Custom Options We Offer to Clients

From elegant minimalist designs to intricately carved masterpieces, we craft our wooden hair sticks to match your exact specifications.
Our custom options showcase your individual taste through personalized designs that highlight the unique appearance and natural beauty of each wood species.
- Select your preferred wood type, length, and thickness for ideal functionality.
- Select custom-carved patterns, designs, or decorative embellishments.
- Pick your finish from our selection of protective oils and waxes.
- Add extra accessories like wooden beads, pom poms, tassels, or fabric flowers.
Each one-of-a-kind accessory undergoes meticulous crafting to make certain it perfectly aligns with your vision and styling needs.
Packaging and Shipping: Protecting the Product in Bulk
To guarantee our handcrafted wooden hair sticks reach wholesale clients in pristine condition, we implement a rigorous packaging protocol.
We secure each piece in protective sleeves or bubble wrap, then divide them using custom cardboard inserts to prevent friction damage during shipping.
For bulk orders, we pack the protected hair sticks in sturdy, stackable boxes that can withstand transport demands.
We’re committed to eco-friendly packaging solutions wherever possible.
Each box receives clear “Fragile” labels and handling instructions.
This systematic approach guarantees our wooden hair sticks arrive safely while maintaining our commitment to sustainability and product quality.
Conclusion
We’ve covered everything needed to craft beautiful wooden hair sticks, from selecting ideal hardwoods to refining production workflows. By following our detailed material guidelines, prototyping methods, and step-by-step processes, you’ll consistently receive high-quality pieces.
FAQs
What Is the Best Material for Hair Sticks?
We’ll get the best results using lightweight, flexible woods like willow, cherry, or apple. They won’t snap easily, and we’ll want to choose dry deadwood that’s finger-thick and free from flaws.
How to Make Wooden Sticks Bendable?
Let’s soak flexible wood like willow in warm water for several hours, then steam it to loosen fibers. We’ll carve thinner sections where needed and dry the sticks in their desired shape.
How to Make Hair Sticks Stay in Place?
Twist the hair sticks slightly as you insert them and cross them in an “X” pattern. Angle the sticks against the scalp to maximize grip and stability.