Think of wooden letter decoration ideas as small billboards for your customers’ style. A single initial can become nursery art, a bold shop sign, or a wedding piece guests photograph all night. That level of personalization keeps shoppers coming back, both online and in-store.
For retailers and e-commerce sellers, this demand is both a big opportunity and a real challenge. Shoppers expect smooth, safe, high-quality wooden letters that are ready for paint, stain, or glue. You, on the other hand, need consistent sizing, reliable wholesale pricing, low risk minimums, and flexible options for testing new product lines.
That is where Qlychee Crafts fits in, offering precision laser-cut, unfinished wooden letters with clean, pre-sanded edges, eco-friendly materials, very low minimum order quantities starting from only two pieces, competitive wholesale pricing, and full drop shipping support.
In this guide, you will walk through five fun, easy ways to decorate wood letters for home decor, events, seasonal displays, and gifts. You can sell them as finished products or bundle them as DIY kits. By the end, you will have practical ideas to plug into your current range, plus a dependable partner in Qlychee Crafts to supply every blank letter you need.
1. Paint and Stain Techniques: Classic Finishes for Timeless Appeal
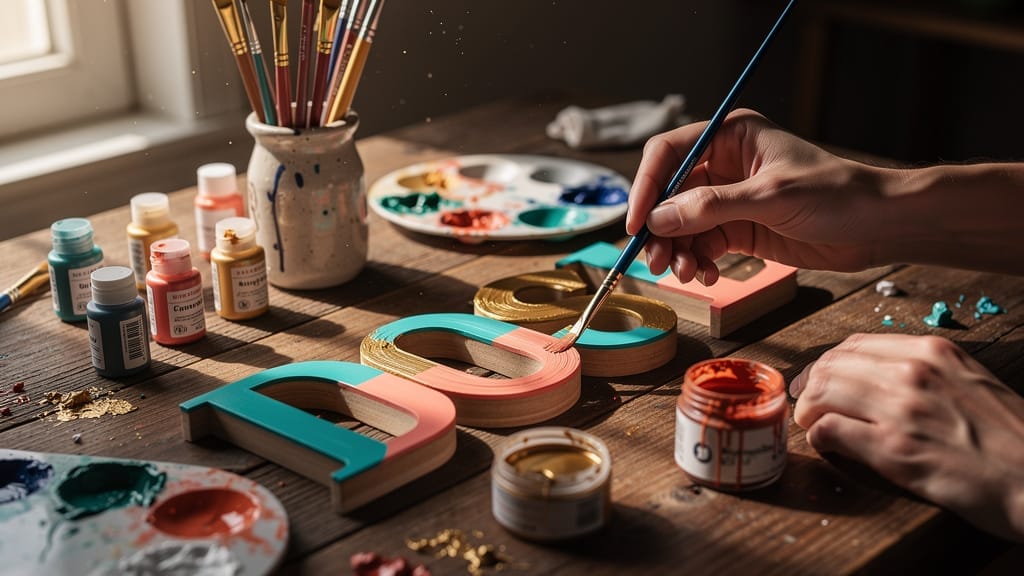
When people picture decorated wooden letters, painted and stained finishes are usually the first styles they imagine. These methods are simple, low cost, and familiar to most crafters, which makes them ideal for beginner-friendly DIY kits and high volume sales. With Qlychee Crafts letters, the smooth, pre-sanded surfaces and crisp laser-cut edges mean you can start painting right away.
Solid color paint is the easiest starting point and still sells very well. Match:
- On-trend neutrals for modern living rooms
- Soft pastels for nurseries
- Bold primaries for playrooms and classrooms
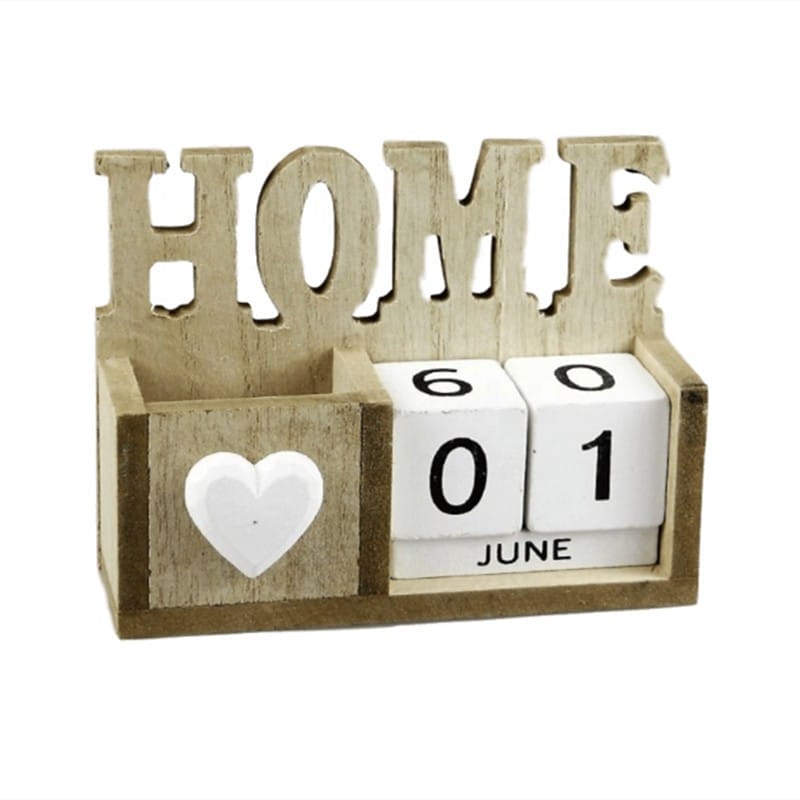
Color blocking—giving each part of a letter a different shade—works especially well for short words like HOME, LOVE, or JOY that customers place on mantels and shelves.
Wood stain gives letters that warm farmhouse feel shoppers still love. A rich brown stain brings out the grain of Baltic Birch and turns simple initials into handsome family name signs. Stained script letters look great in entryways, while stained block letters on a plank suit rustic laundry rooms, kitchens, and cabins. Because Qlychee Crafts offers both MDF and real wood, you can pick the best base for full stain or mixed paint-and-stain designs.
Ombre and gradient paint effects create a modern, social-media-ready look. Blend light to dark shades of the same color from top to bottom or side to side. This style is popular for nursery names, party signage, and decor meant for photos, and it works well as a simple two- or three-color blending project in workshops or kits.
For customers who want something that looks like metal art without the weight or price, faux finishes are a reliable upsell. By layering different paints and using a light spray of water, you can mimic aged copper with a blue patina or a weathered zinc finish. On a well-cut wooden base, the effect looks surprisingly high end and suits offices, restaurants, and gift items.
Stenciling helps you stretch simple paint even further. Place a stencil on the letter and dab paint through it to add repeating patterns, florals, or even logos. This turns a basic painted letter into wall art that pairs nicely with gallery walls and framed prints.
From a business point of view, offer two tracks at once:
- Pre-finished painted and stained letters for shoppers who want quick decor
- DIY paint kits that bundle an unfinished letter with small paint pots and a brush
This way, you serve both customers who enjoy creating and those who prefer to buy finished pieces.
2. Decoupage Magic: Paper and Fabric Makeovers
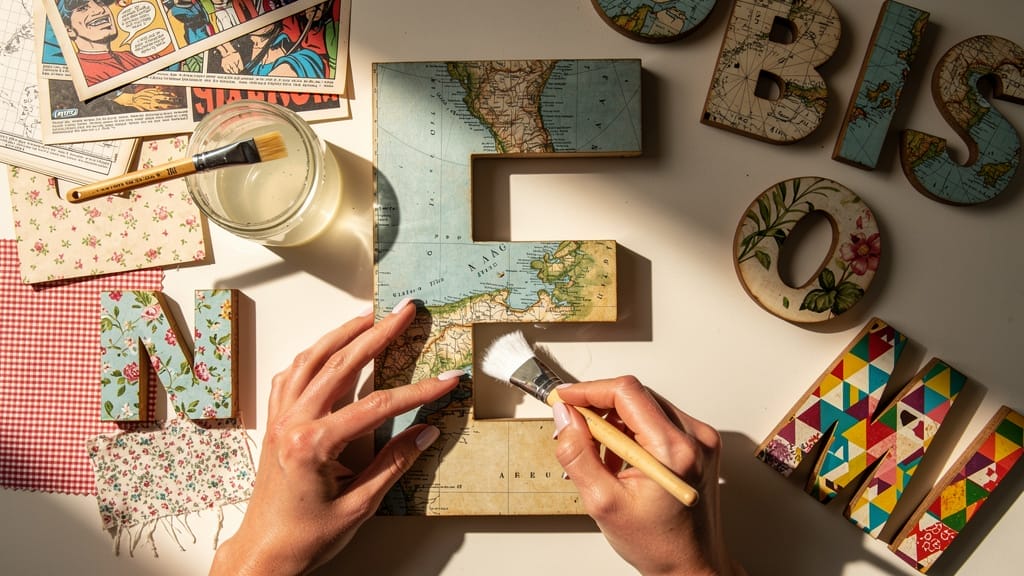
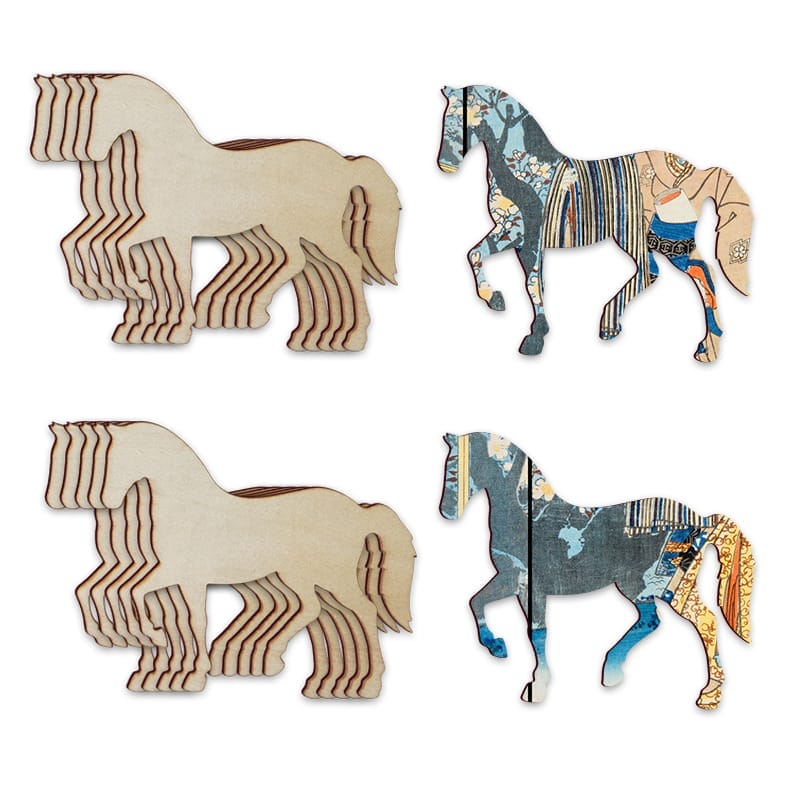
Decoupage is a simple technique that impresses customers, with examples demonstrating how beautiful it can be when applied to wooden letter gift sets and decorative blocks. You glue paper or fabric onto the surface of a wooden letter, smooth it, and seal it with a clear top coat. Thanks to the smooth, consistent faces, paper and fabric lie flat with fewer bubbles, which means less waste and happier buyers.
Paper choices open up almost endless wooden letter decoration ideas. Popular options include:
- Comic book pages for superhero bedrooms or game rooms
- Scrapbook and wrapping paper to match farmhouse, minimalist, or bold color themes
- Vintage maps and atlas pages for travel-themed nurseries, offices, or bookshops
- Pages from adult coloring books, pre-colored and cut to create detailed name plaques
Fabric decoupage adds texture to the same technique. Use leftover pieces that match curtains, bedding, or upholstery so everything in a room feels coordinated. For interior designers and home stagers, this is an easy way to echo custom textiles without the cost of full upholstery projects. With Qlychee Crafts, you can order specific sizes and fonts so letters match the scale and style of the space.
Photo collage letters are some of the most meaningful products you can sell. By printing small photos, trimming them to fit, and layering them across a large initial, you create gift-ready pieces for graduations, anniversaries, memorials, and corporate milestones. Sell them as finished products or as kits where customers add their own printed images.
The basic decoupage process stays almost the same for every look:
- Brush on a thin layer of decoupage medium.
- Press paper or fabric into place and smooth out air bubbles.
- Let it dry, then add one or two thin coats over the top to seal and protect.
The even, non-porous faces of MDF letters from Qlychee Crafts are especially good here, since the medium sits on top rather than soaking in.
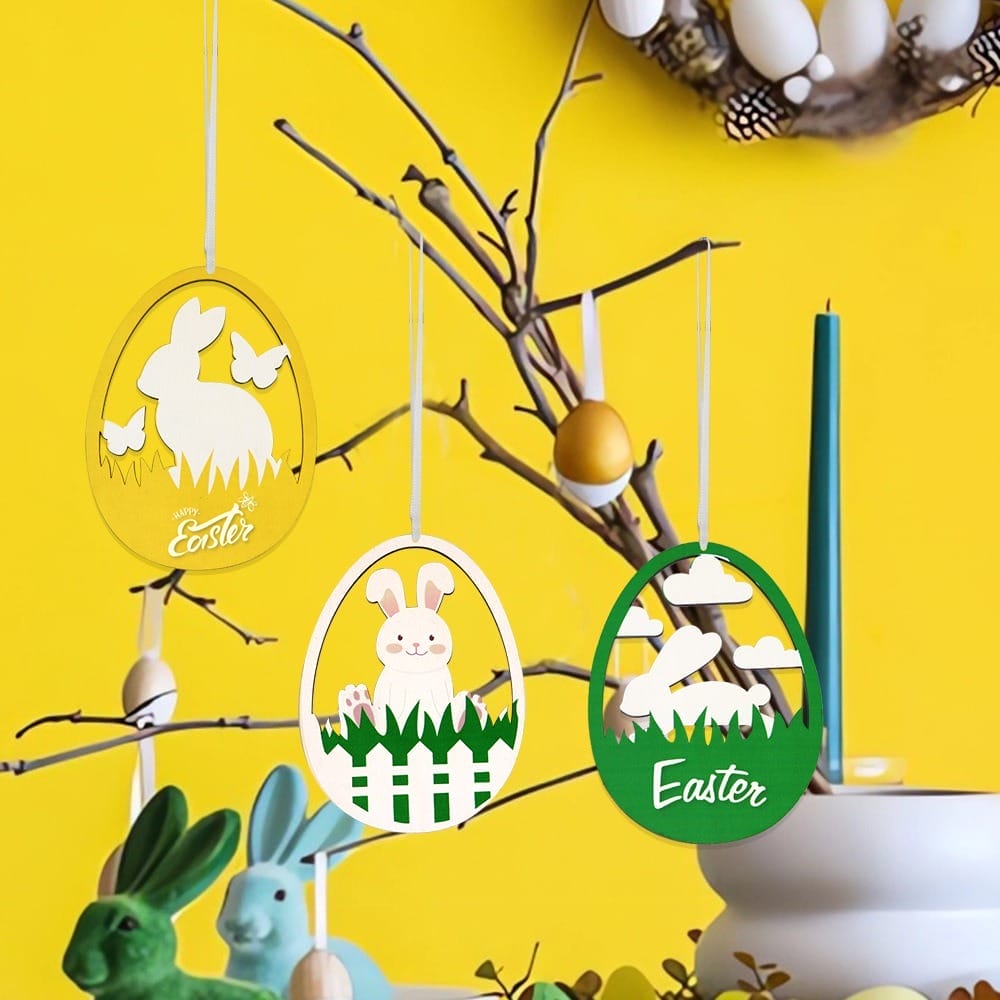
From a retail perspective, decoupage is perfect for themed collections and seasonal lines. For example, you might offer:
- A coastal set using maps and navy stripes for summer
- A winter line using plaid fabrics and sheet music paper
Because you can change papers and fabrics so quickly, it is easy to refresh your wooden letter decoration ideas each season.
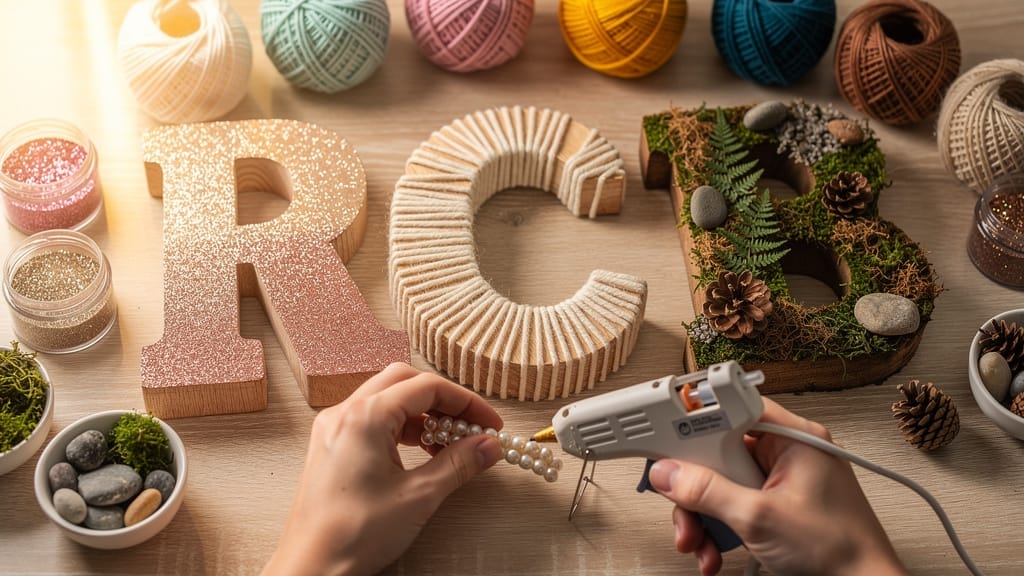
3. Textural Embellishments: Adding Dimension With Yarn, Glitter, and Natural Elements
Flat paint looks great, but letters with texture grab attention from across a room. When shoppers can see and feel raised details, they sense more work and care in each piece, which supports higher price points. Textural styles are perfect for gift shops, event decor, and any setting where you want your letters to stand out on shelves and in photos.
“The details are not the details. They make the design.” – Charles Eames
Yarn wrapping is a favorite for nurseries and kids’ rooms because it feels soft and friendly. Attach the yarn with small dots of glue and wrap it tightly around the letter until no wood shows. Solid colors give calm, simple decor, while gradient yarns move from dark to light in one color family.
Glitter appeals to customers planning parties or holiday displays. You can:
- Cover the entire letter with one glitter color for maximum sparkle
- Create an ombre glitter effect, with most of the shine at the bottom
- Highlight only edges or one section for a more subtle look
To keep glitter in place, brush on glue, apply glitter, tap off the extra, then seal with a clear spray so it does not shed.
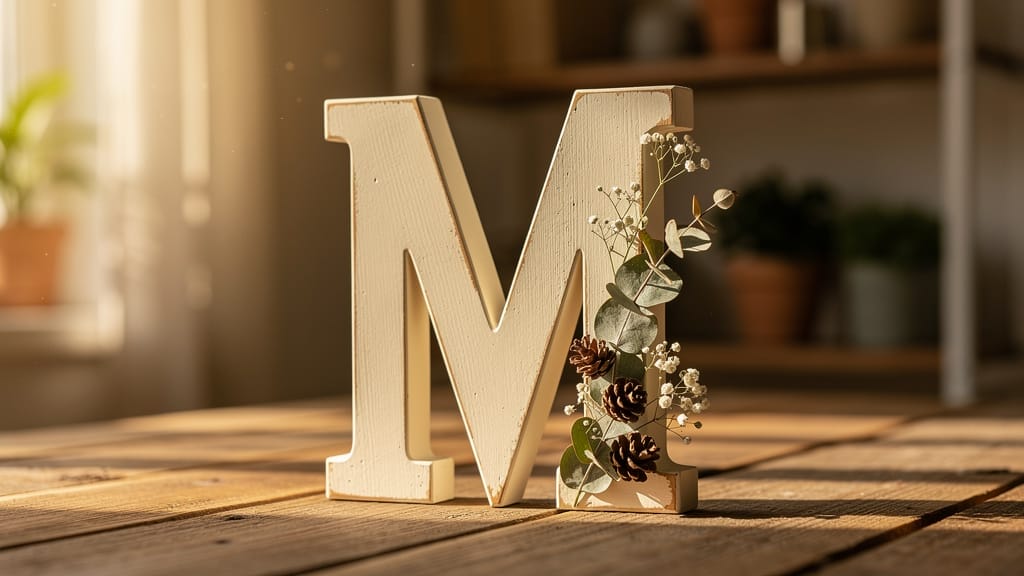
Natural materials tap into rustic and boho styles. Try:
- Small trimmed twigs for a woodland look
- Faux or dried flowers on one corner for bridal and baby showers
- Moss, shells, or smooth stones for coastal or forest themes
Qlychee Crafts uses sturdy wood with good thickness, so letters stay straight even when you add slightly heavier materials.
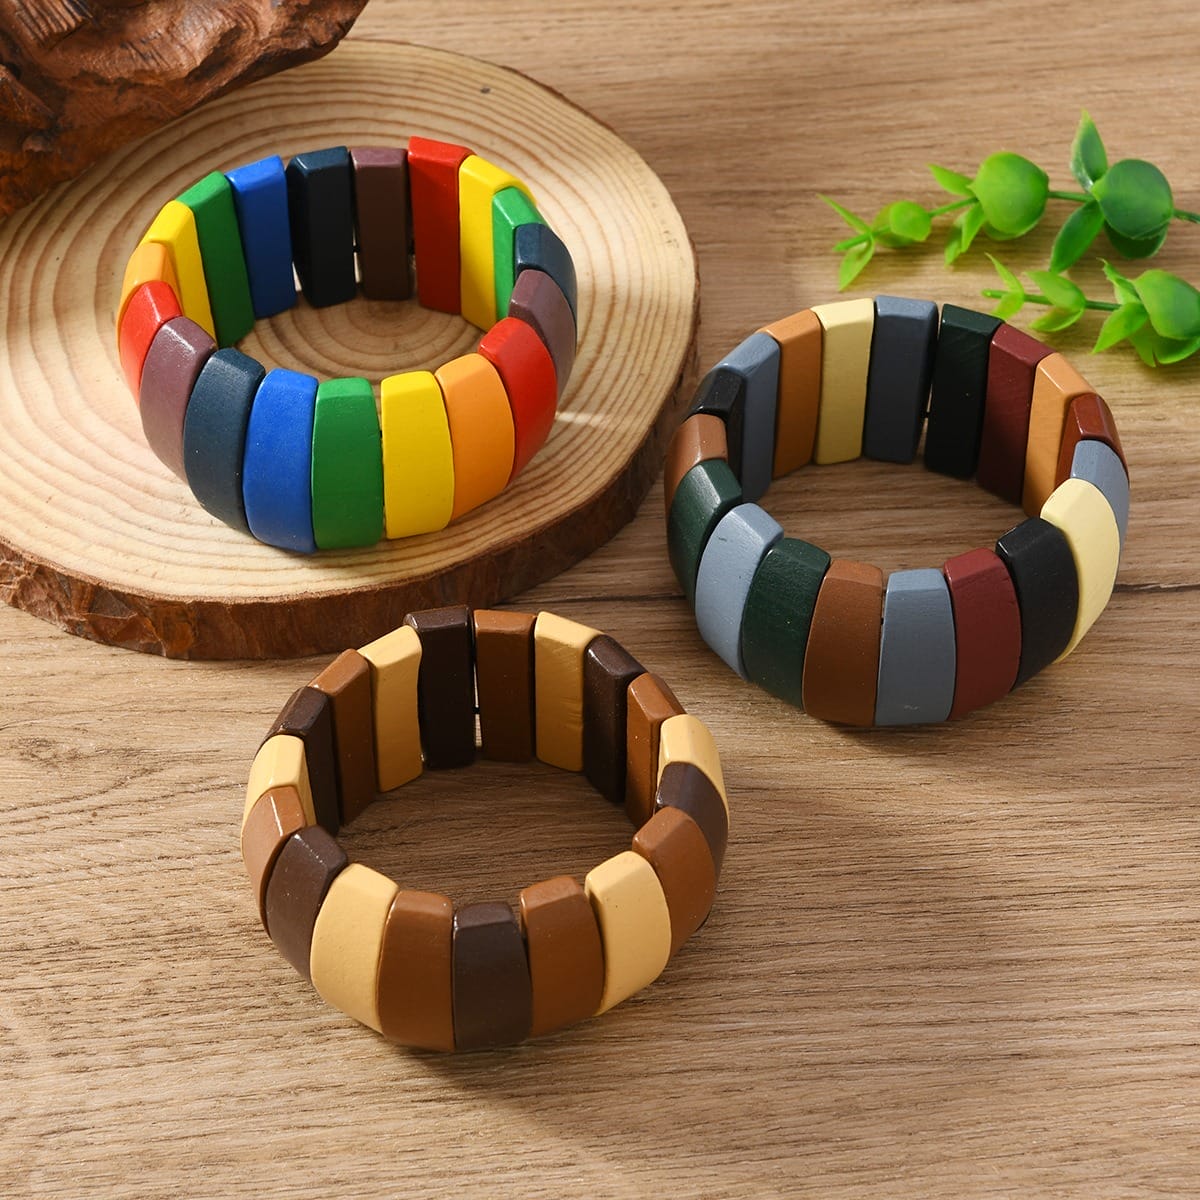
Beads, sequins, and other small objects let you design very detailed work. Outline a letter with small pearls, cover the surface with seed beads, or create patterns using buttons from a cherished collection. These pieces take more time, but they can be priced as premium ornaments, keepsakes, or custom gifts.
You can also mix methods for rich, layered effects. A yarn-wrapped letter with a glitter-dipped bottom edge, or a stained letter with one corner filled with moss and mini pumpkins, feels special and collectible. Explain the extra time and materials that go into these styles, and customers are often glad to pay more, especially for gifts.
For your business, textured letters are an easy way to build a higher-priced tier above simple paint or decoupage designs. Keep plain painted letters as entry-level items and offer yarn, glitter, and natural-element versions as deluxe options.
4. Washi Tape and Confetti: Quick and Colorful No-Mess Designs
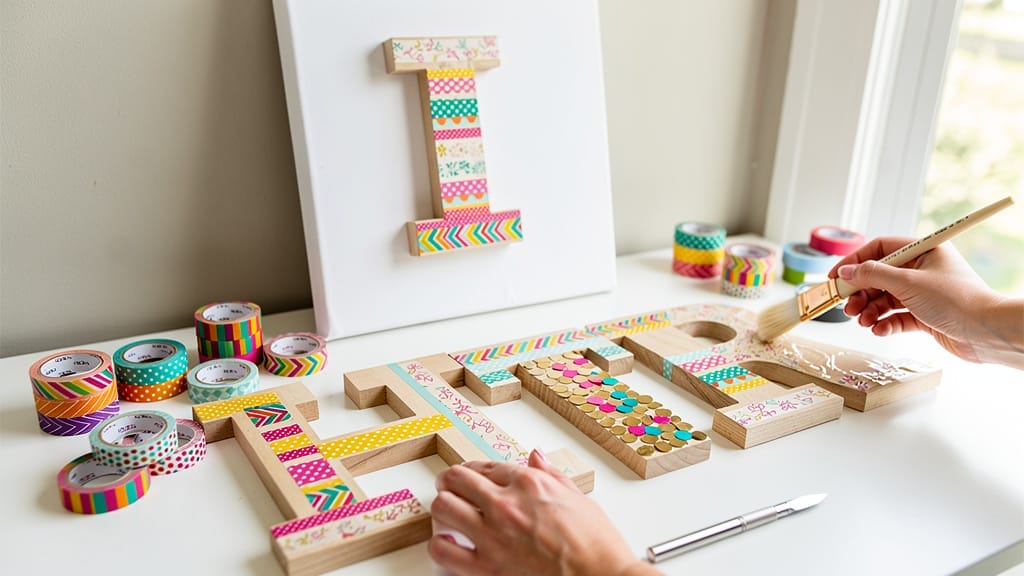
Sometimes customers want fast, low-mess projects they can finish in one sitting. Washi tape and confetti designs fit that need and give you simple ideas for workshops, kids’ parties, and impulse-buy kits. Because these methods need very little drying time, they work well in busy store events and short craft classes.
Washi tape is a thin decorative tape that comes in endless colors and patterns: stripes, dots, florals, geometrics, and holiday graphics all look great on wooden letters. To decorate, stick strips of tape across the letter and trim the extra along the edge with a craft knife. If a pattern does not line up or someone changes their mind, the tape lifts cleanly from the smooth surface and can be adjusted without damage.
There are many easy design directions with tape:
- Full coverage with one pattern for a bold, graphic look
- Alternating stripes using two or three patterns
- Diagonal or chevron layouts for a more design-forward style
Mounting washi-tape-covered letters on stretched canvas lets you sell ready-to-hang wall art that is still very light and easy to ship. Paint the canvas a solid color, let it dry, then glue the letter on top. This format survives shipping well and looks polished in product photos.
Confetti letters use bright paper circles or shapes applied with a decoupage medium. Brush on the medium, sprinkle or place confetti pieces, and add a final sealing coat. The finished letters look playful and work well for playrooms, craft rooms, and party decor. The style is very forgiving, so it is a great project for children and beginners.
For your shop, these fast methods are ideal for live events and starter kits. Bundle a Qlychee Crafts letter with a small roll set of washi tapes or a packet of confetti and a mini bottle of glue. Because the base letters are smooth and splinter-free, customers have a better crafting experience and are more likely to share their projects online and come back for more.
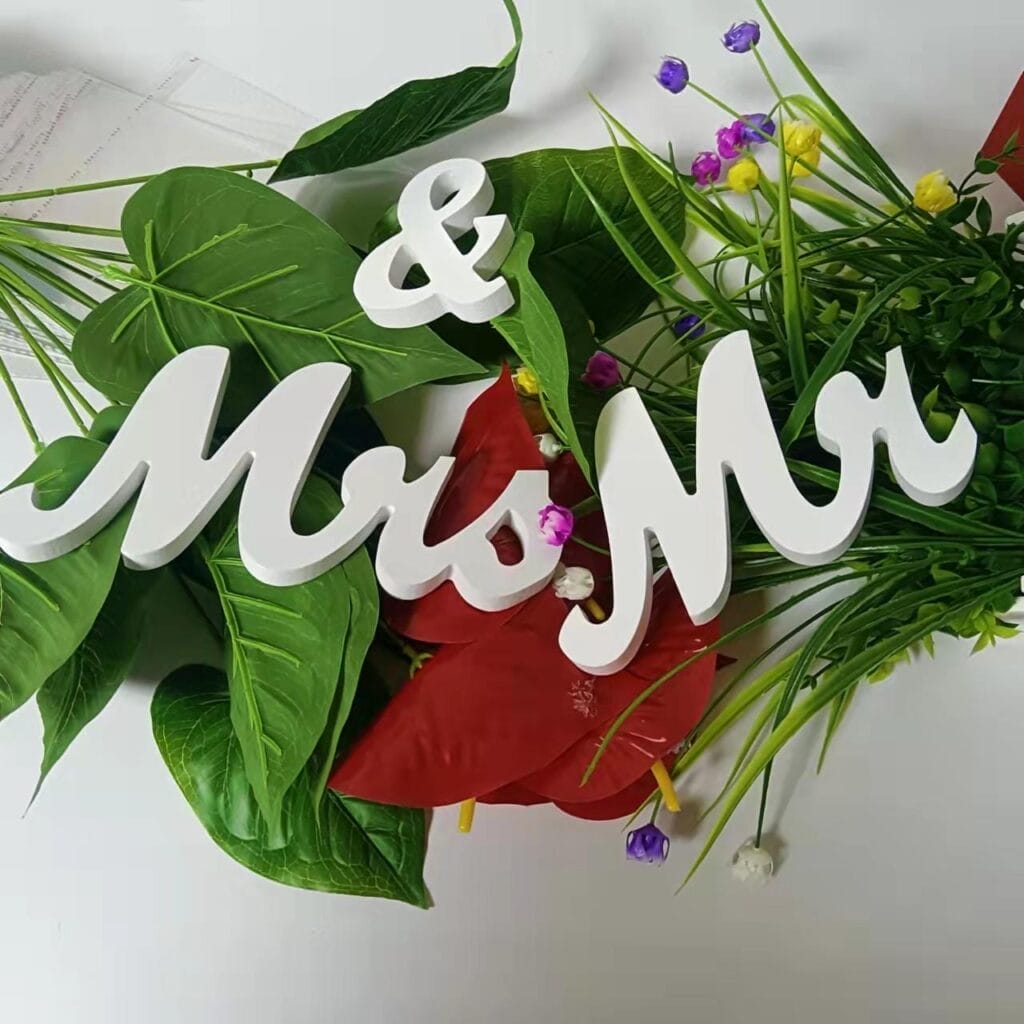
5. Standing Floral Letters: Premium Event Decor That Commands Top Dollar
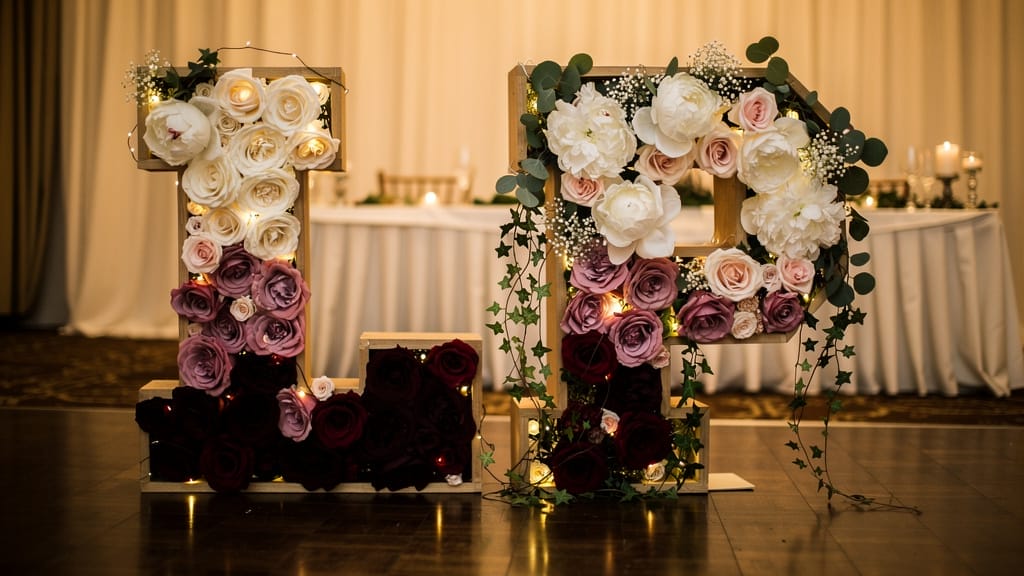
Standing floral letters sit at the high end of wooden letter decoration ideas, both in look and in price. They are the kind of pieces people choose for important days like weddings, milestone birthdays, and branded events. Because they photograph beautifully, event planners and florists love them for social media and portfolios.
The basic method is straightforward. Start with sturdy, freestanding wooden letters that can stand on their own. Attach faux or silk flowers with hot glue or floral wire until you reach the coverage you want. Some designs cover the entire front with blooms, while others cluster flowers in certain areas and leave part of the wood visible.
Weddings are the most obvious setting, and they offer many ways to use floral letters, such as:
- Large initials behind the sweetheart table or near the cake
- The couple’s shared last initial on the gift or welcome table
- Small floral words like LOVE or MR & MRS on dessert tables or bars
After the event, couples often keep at least one letter as decor at home.
These letters also work very well for showers, birthdays, and corporate events. For a baby shower, you might spell BABY or use the first letter of the baby’s name in soft pastels. For milestone birthdays, flower-covered numbers make strong photo props. Businesses can display initials or short brand names in company colors at launches, trade-show booths, or store openings.
Design options are wide open, and exploring Visual and Studio Arts programs can provide additional creative inspiration for developing unique floral arrangements and artistic techniques. Try:
- Ombre blooms, moving from dark at the bottom to light at the top
- Single-color designs in white, blush, or deep green for a calm, high-end feel
- Seasonal color stories: soft pinks and yellows for spring, bright tropicals for summer, warm oranges and burgundies for fall, or white flowers with greenery for winter
From a profit angle, floral letters make a lot of sense. Wholesale standing letters from Qlychee Crafts are affordable at volume, and quality faux flowers can be sourced in bulk. When you combine materials with the time needed to build each piece, you can still price them at a healthy margin. Event rental businesses can reuse the same letters again and again, spreading costs across many bookings.
Because these letters carry more weight from flowers and glue, base quality matters. Qlychee Crafts uses strong, warp-resistant wood and offers custom sizing, so your floral letters stay straight and steady on tables and stands. With low MOQs and drop shipping, you can test new sizes and words without heavy stock commitments and scale up as planners and clients fall in love with this premium decor line.
As many craft instructors like to say, “People don’t just buy the project; they buy the story and the experience around it.” Floral letters deliver both.
Conclusion
Wooden letters may start as simple blanks, but they can grow into a full product family for your business. Classic paint and stain finishes cover everything from farmhouse family signs to sleek modern monograms. Decoupage with paper, fabric, and photos adds rich stories and themes. Textural embellishments such as yarn, glitter, and natural pieces bring depth that supports higher price points. Washi tape and confetti offer fast, low-mess projects for kits and events. Standing floral letters round things out with showpiece decor for weddings and high-impact celebrations.
Together, these five wooden letter decoration ideas support sales across home decor, seasonal refreshes, events, and gifting, giving you revenue all year long. You can sell ready-made pieces for shoppers who want finished decor and also offer DIY kits for customers who enjoy making their own.
If you are ready to turn these ideas into real products, now is a good time to act. Explore the Qlychee Crafts catalog, request custom samples, or reach out for wholesale pricing so you can build a strong, profitable category around DIY and finished wooden letter decor.
FAQs
Question 1 – What Type Of Wood Is Best for DIY Wooden Letter Decoration Projects?
For most DIY and retail projects, Baltic Birch and MDF work especially well. Baltic Birch has a natural grain that looks beautiful under stain and still takes paint smoothly, while staying light enough for wall mounting. MDF offers an ultra-smooth, flat surface that is perfect for painting, decoupage, and washi tape without visible grain lines.
Here is a quick comparison:
| Material | Best For | Key Benefits |
|---|---|---|
| Baltic Birch | Stain, mixed stain/paint, rustic decor | Visible grain, lightweight, warm natural look |
| MDF | Solid paint, decoupage, washi tape, glitter | Very smooth surface, crisp edges, no grain |
Qlychee Crafts supplies both options, cut with lasers for clean edges, and uses eco-friendly, low-emission materials that support safer home use.
Question 2 – Can I Sell Decorated Wooden Letters Commercially If I Buy Them Wholesale?
Yes. Wholesale wooden letters are meant to be turned into finished decor that you resell. You can build product lines for brick-and-mortar stores, online shops, craft fairs, and event rental businesses. There are no extra licensing limits on decorating and reselling letters you buy from Qlychee Crafts.
By adding your own paint, paper, flowers, or other details, you turn a basic craft blank into a higher-margin branded item. Qlychee Crafts supports this with low MOQs, drop shipping options, and custom laser engraving so your logo or brand name can appear directly on the product or packaging.
Question 3 – What Is the Minimum Order Quantity (MOQ) for Wholesale Wooden Letters?
Qlychee Crafts is friendly to growing businesses and keeps MOQs low. Many wooden letter styles are available starting from as few as two pieces, which lets you test new fonts, sizes, or product ideas without heavy stock risk.
- Larger orders receive volume discounts, improving profit per piece as you scale.
- In many cases, you can mix different letters, sizes, and even numbers within one order to reach the overall MOQ.
Drop shipping setups can have slightly different rules, so it is best to contact Qlychee Crafts to discuss samples and long-term plans.
Question 4 – How Do I Prevent Paint or Glitter from Chipping Off Wooden Letters Over Time?
Long-lasting finishes start with a smooth, well-cut base. When you use pre-sanded letters from Qlychee Crafts, paint and glue grip the surface better and are less likely to flake.
For durability:
- Wipe dust from the letter before painting.
- Apply thin coats of paint and let each coat dry fully.
- After decorating, seal the letter with two or three thin coats of clear acrylic sealer or polyurethane, drying between coats.
- Use spray sealers for glitter so you lock down loose particles without heavy brush marks.
With this kind of simple prep and sealing, decorated letters can look fresh for years, even in busy family homes.
Question 5 – What Are the Most Popular Wooden Letter Sizes for Home Wall Decor and Events?
Popular wooden letter sizes tend to fall into a few ranges:
- 2–6 inches: ornaments, shelf accents, classroom signs
- 8–12 inches: best sellers for wall-mounted family names, nursery names, and tabletop words
- 15–24 inches: front door wreaths, porch signs, and event decor seen from a distance
- Over 24 inches: wedding backdrops, photo booths, retail displays